Set up SPF, DMARC and DKIM at GoDaddy.com
Applies to
If the DNS Manager for your domain is hosted with GoDaddy, follow the steps below to add a CNAME and verify the domain.
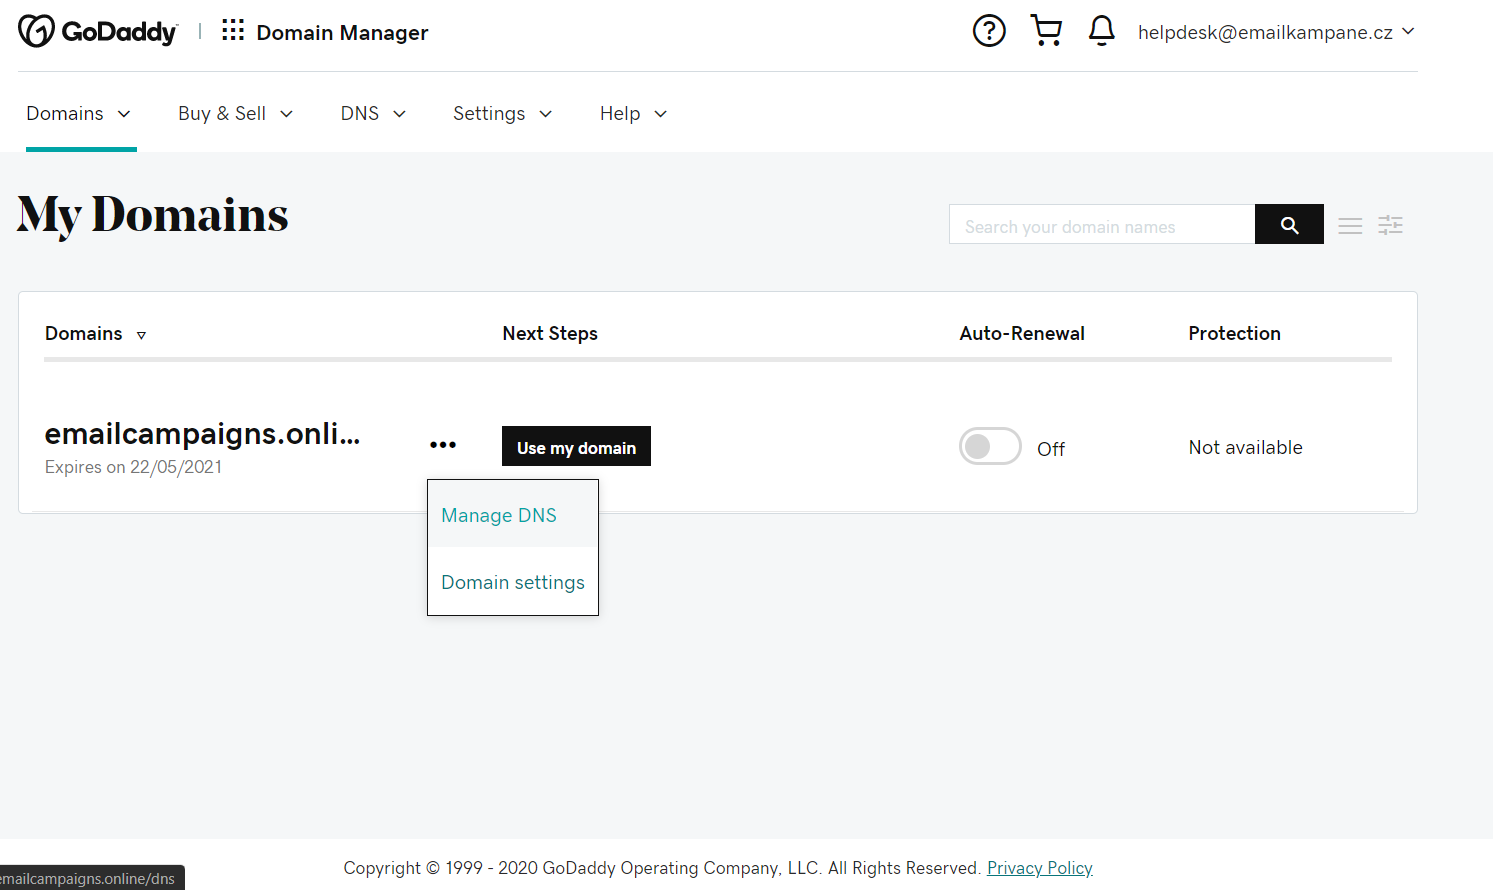
- Log in to your GoDaddy DNS Manager. Go to the My Account menu and click Domains.
- Under Domains, click the Manage DNS button for the domain you want to verify.
- The DNS Manager page will open with information about the existing DNS records.
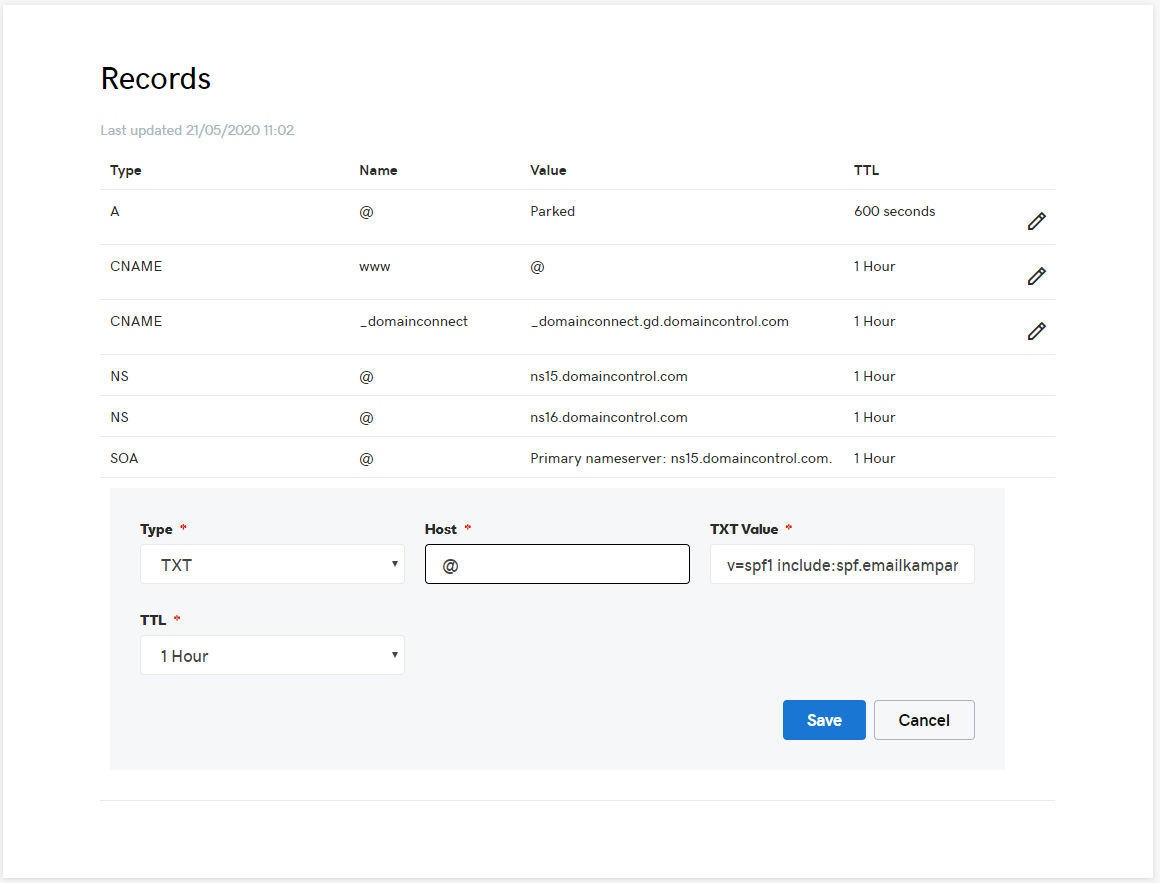
- Go down to the Records section and click the Add button to add a DNS record.
- Choose TXT from the drop-down menu, Type.
- In the Host field, enter the following four host names: @
- In the Points to field, enter v=spf1 include:spf.emailkampane.cz ~all
- Finally click Save.
- Repeat step-4 to step-8 to add all other records mentioned below.

| Type | Record* | Value | |
|---|---|---|---|
| DMARC | TXT | _dmarc | v=DMARC1; p=none |
| DKIM | CNAME | ek01._domainkey | dkim.emailkampane.cz |
| Custom domain | CNAME | click | click.emailkampane.cz |
Warning
!!!IMPORTANT!!!: You might be testing / using different email tools and they could also want you to create their SPF records. Maybe, you already created them. In such cases, it’s necessary to merge all of them under one record.
Such a merged SPF record can look like this: “v=spf1 include:spf.emailkampane.cz include:spf.protection.outlook.com include:_spf.freshsales.io ~all” (without quotes), where the individual colors represent the individual tools.
Was it useful?

Thank you for your feedback.
6 
