Create Categories
Applies to
eWay-CRM Desktop, eWay-CRM Online and eWay-CRM Mobile (iOS and Android).
Note
The procedure is described on projects, but it can be applied to contacts, companies, etc. You can use categories to divide items (contacts, deals, projects, etc.) into groups (e.g. industries, territories).
Tutorial for
eWay-CRM Online
Assign Existing Categories
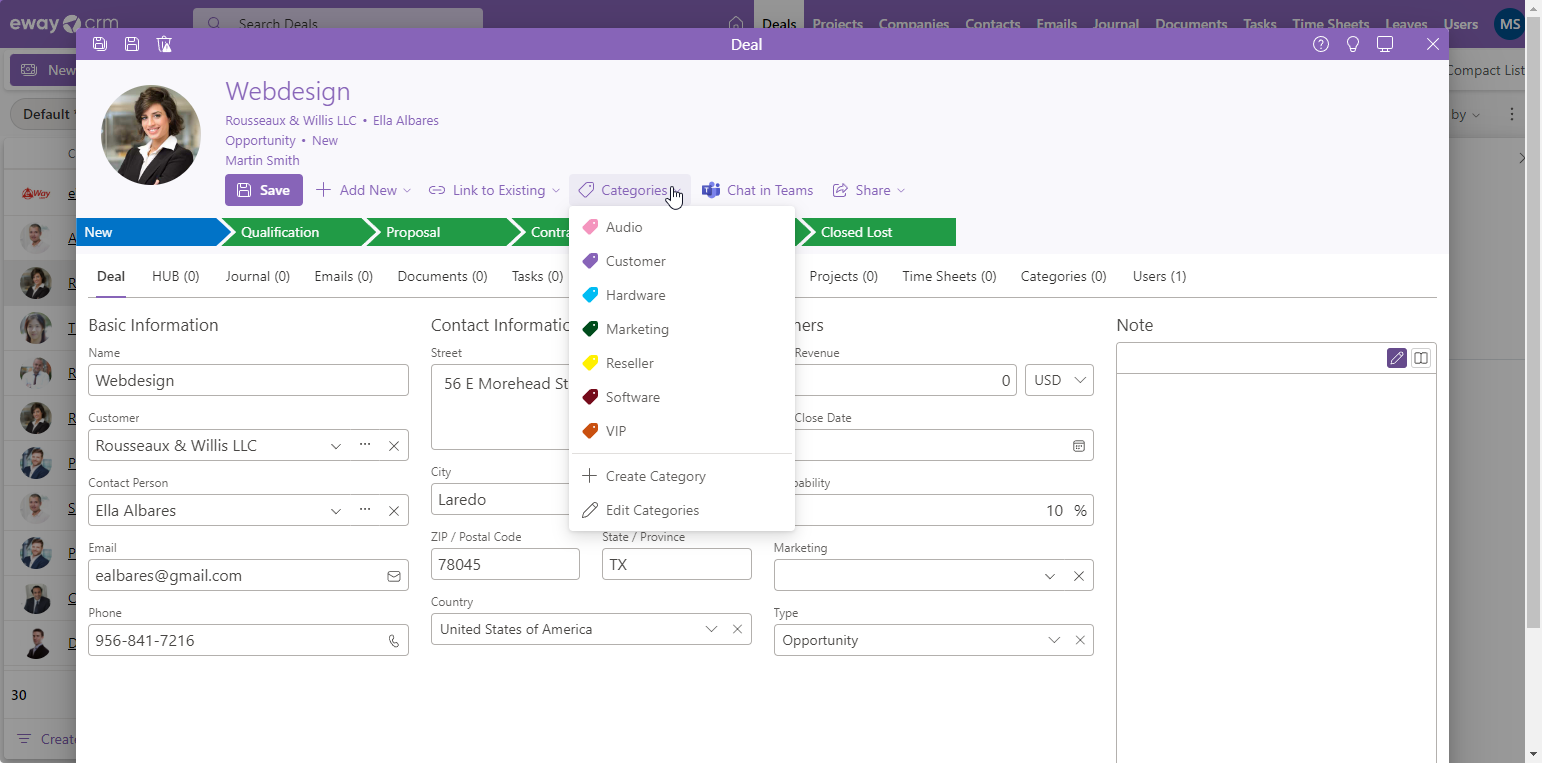
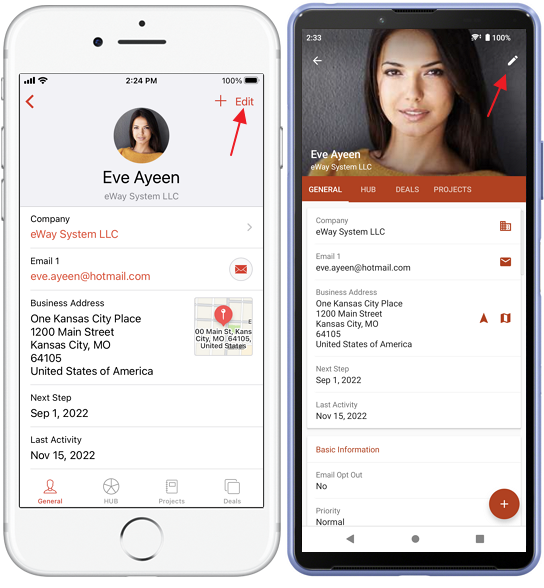
- Open an item, click Categories and select the category you want. If the list of categories is long, you can easily search for your category within it.
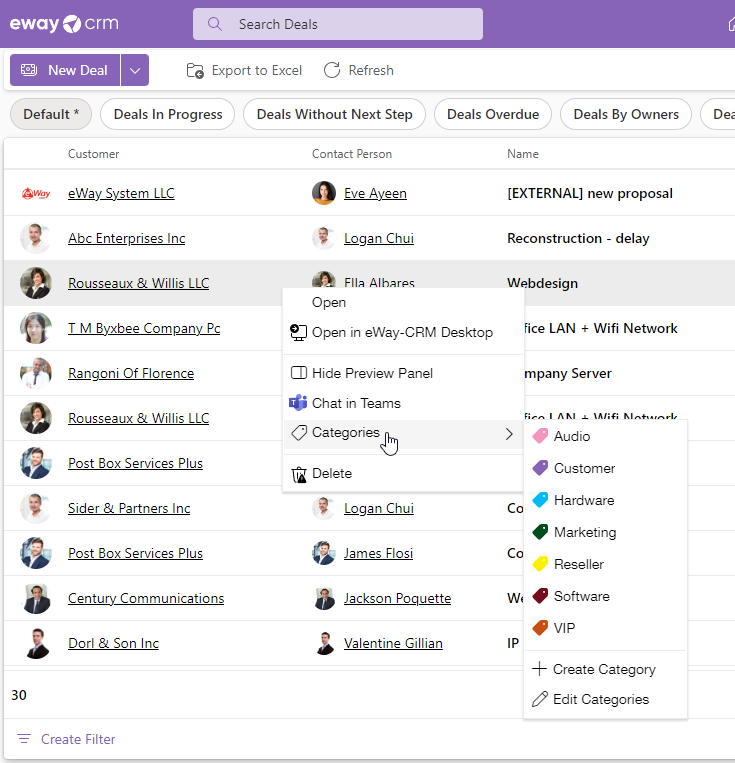
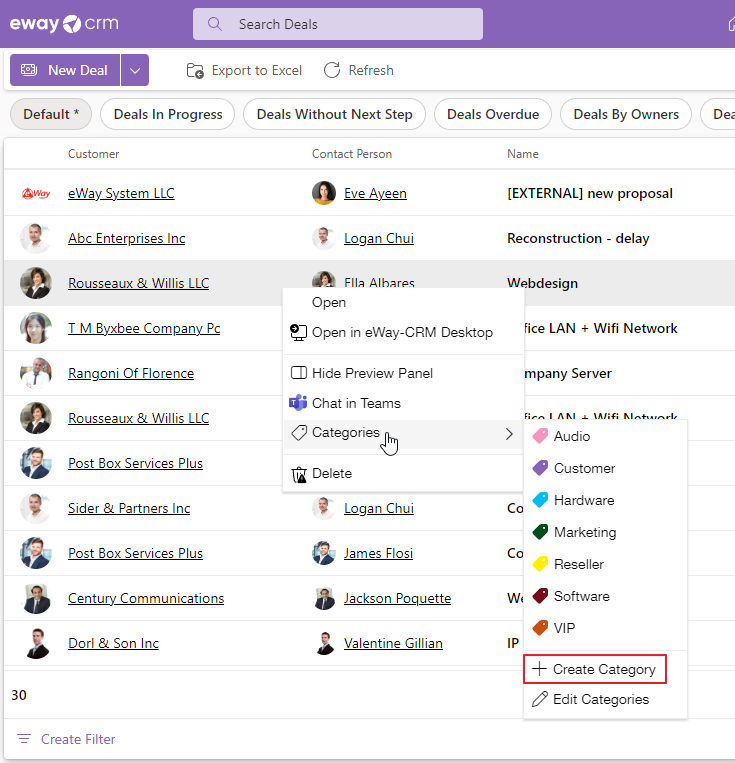
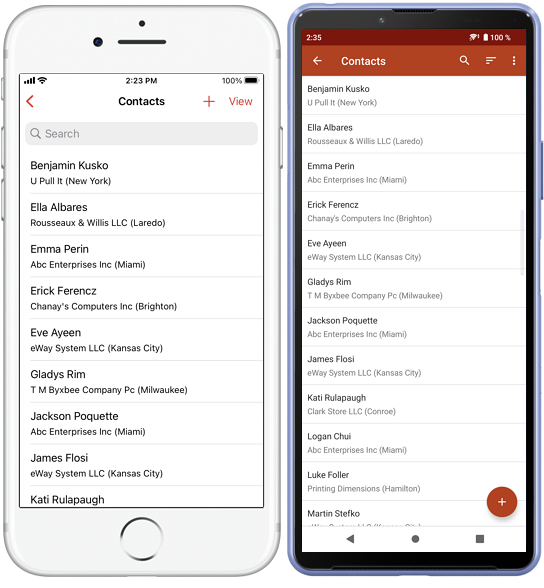
- Or click on any module to open the list of items. Right-click on item and select Categories. If the list of categories is long, you can easily search for your category within it.
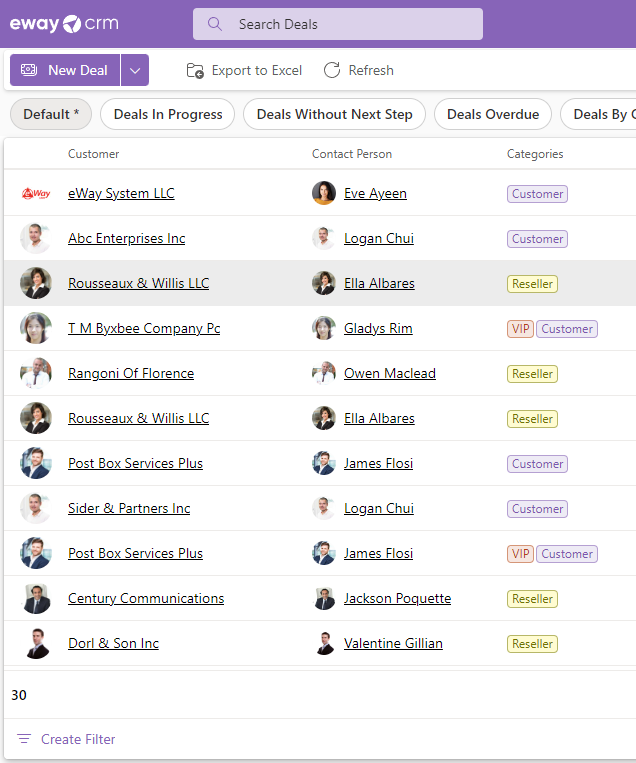
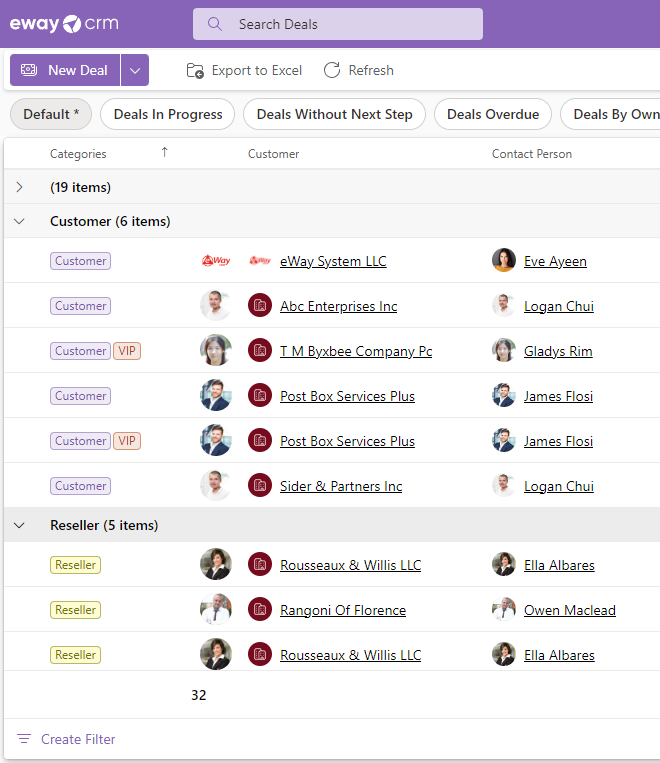
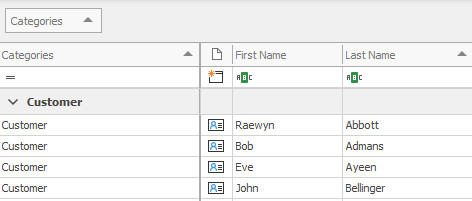
- Now, you can add a column Categories to a list view of deals, contacts, projects, etc., and filter or group items by categories. Learn more about creating custom list views here. See examples below:
Create Categories
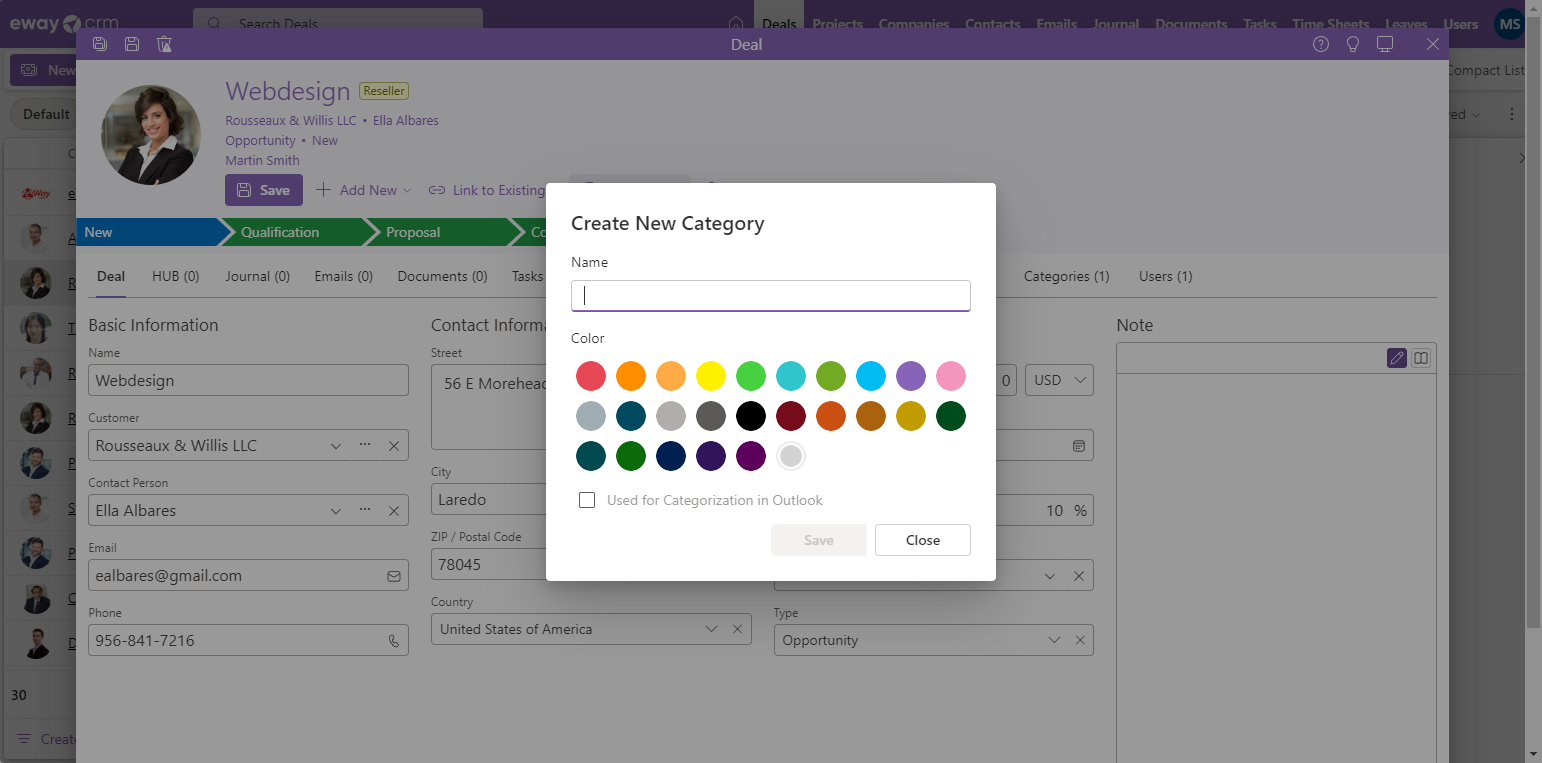
- The easiest way to create a category is to open an item. In the ribbon, click Categories and select Create Category.
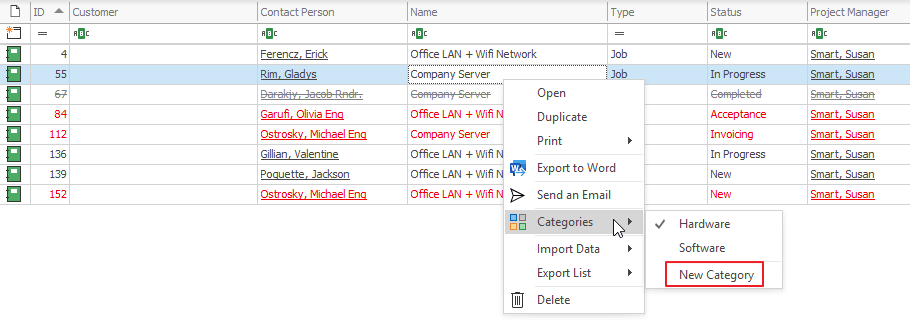
- Or right in the list, you can also right-click item you want to categorize and select Categories > Create Category.
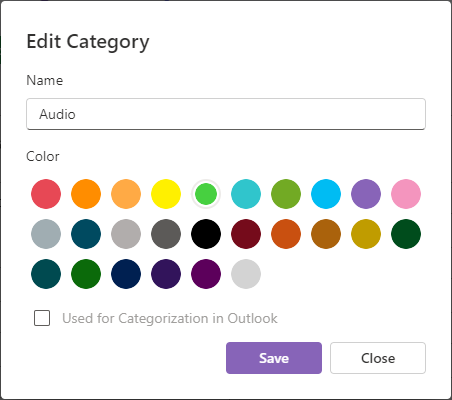
- You insert the name of the category, its color and you can set whether the category will be also used for the categorization in Outlook. Save your changes. Then just click Save.

Tip on categories management
eWay-CRM has its own categories module which is separate from Microsoft Outlook categories. Categories in eWay-CRM are shared across your team. This is why we pay close attention to who is able to create new ones and edit the existing ones using the Module Permissions. In Administration Center you set No for the Create column in Categories module for a specific group of users).
Edit and Delete Categories
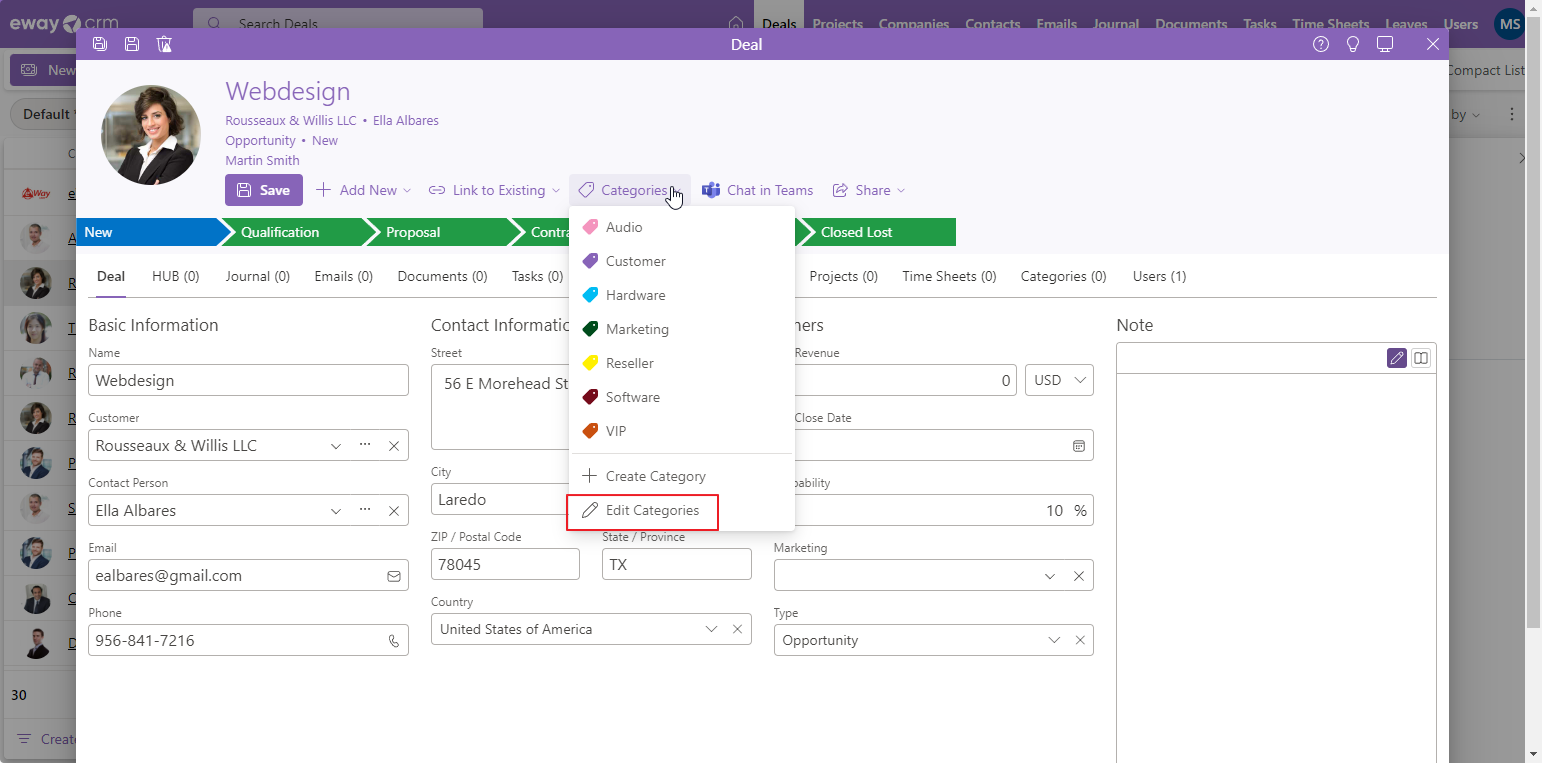
- In any item window, click Categories and select Edit Categories.
- Or right in the list, you can also right-click item and select Categories > Edit Category.
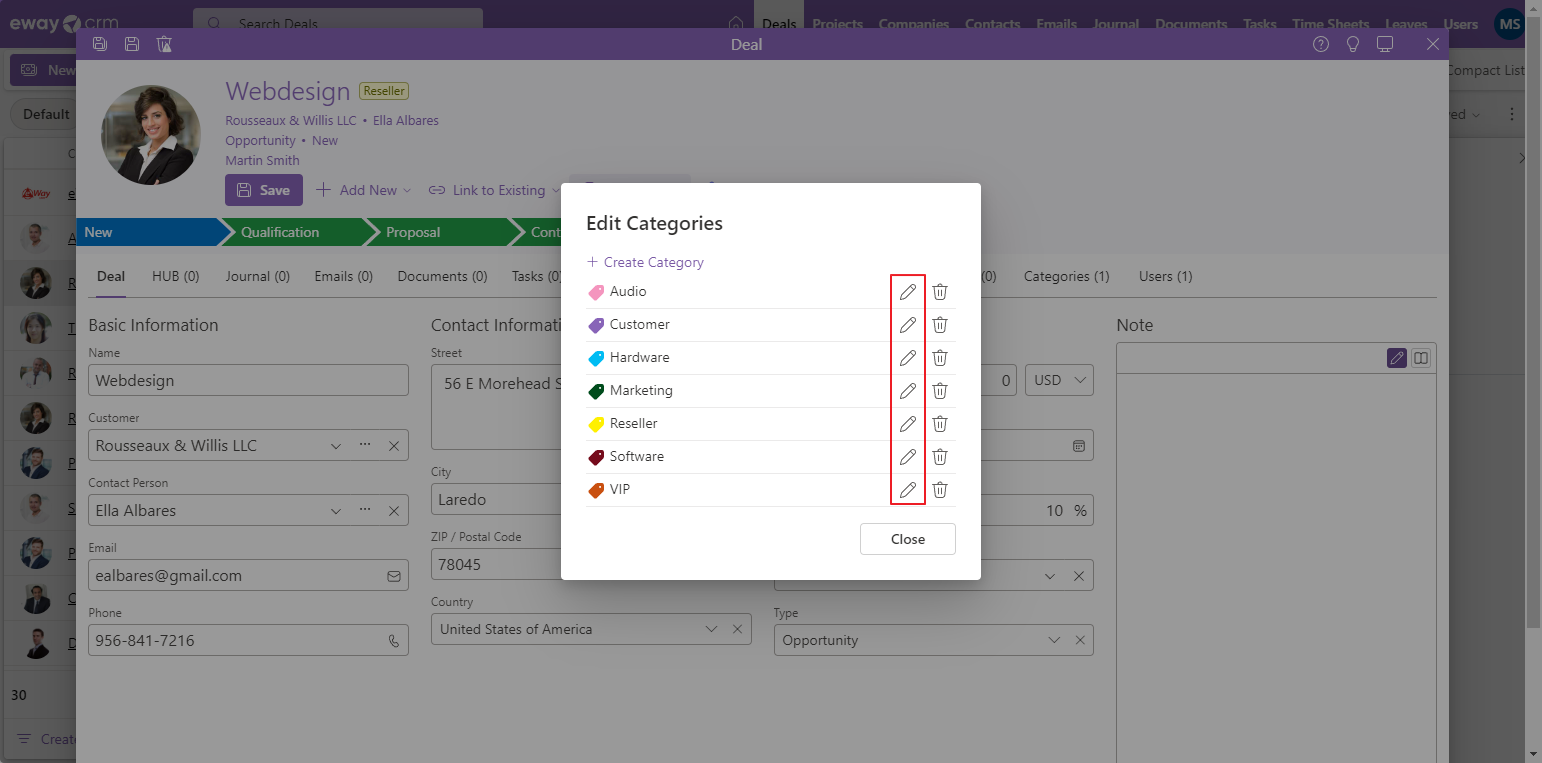
- If you want to edit a category, just click the pencil icon.
- Here, you can rename the category, change its color or the setting about the categorization in Outlook. Save your changes.
- If you want to delete a category, click the bin icon next to it and confirm your choice.


eWay-CRM Desktop
Assign Existing Categories
Note
If you want to have same categories in eWay-CRM and Outlook, please look at the article Categorization of Items Between eWay-CRM and Microsoft Outlook.
- Open an item, click Categorize and select the category you want.
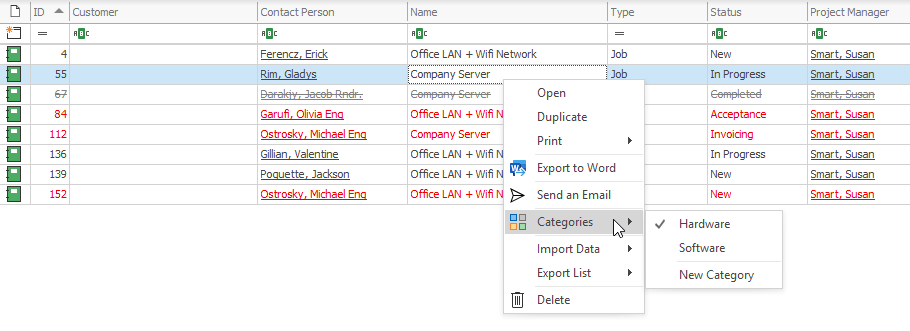
- Or click on any module to open the list of items. Right-click on item(s) and select Categories.
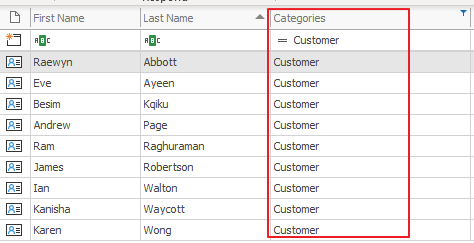
- Now, you can add a column Categories to a list view of deals, contacts, projects, etc., and filter or group items by categories. Learn more about creating custom list views here. See examples below:
Tip
In list, select one or more items. When you press SHIFT on your keyboard, you can select the group of items, when you press and hold CTRL, you can select a different items by clicking.
Create Categories
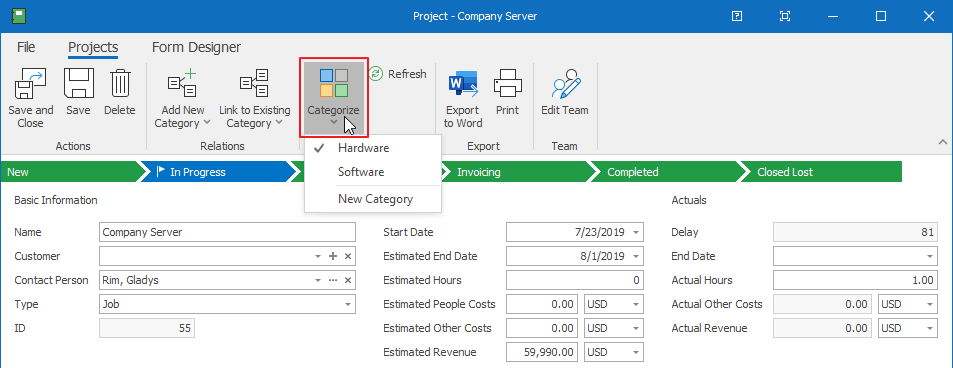
- The easiest way to create a category is to open an item. In the ribbon, click Categorize and select New Category.
- Or right in the list, you can also right-click item you want to categorize and select Categories > New Category.

Tip on categories management
eWay-CRM has its own categories module which is separate from Microsoft Outlook categories. Categories in eWay-CRM are shared across your team. This is why we pay close attention to who is able to create new ones and edit the existing ones using the Module Permissions. In Administration Center you set No for the Create column in Categories module for a specific group of users).
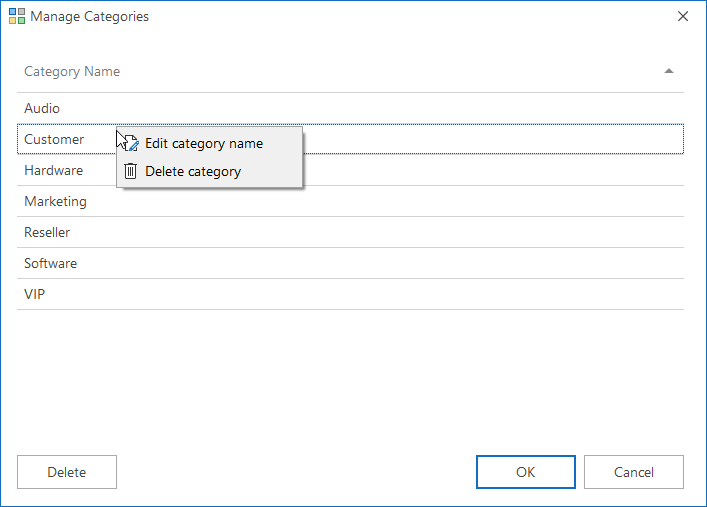
Edit and Delete Categories
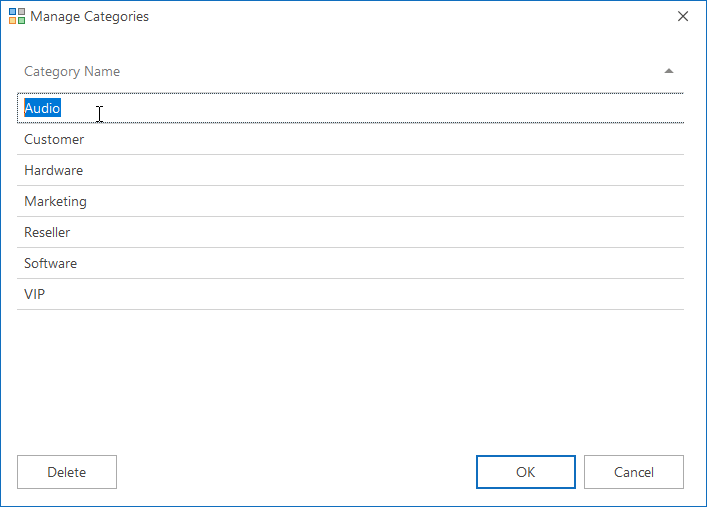
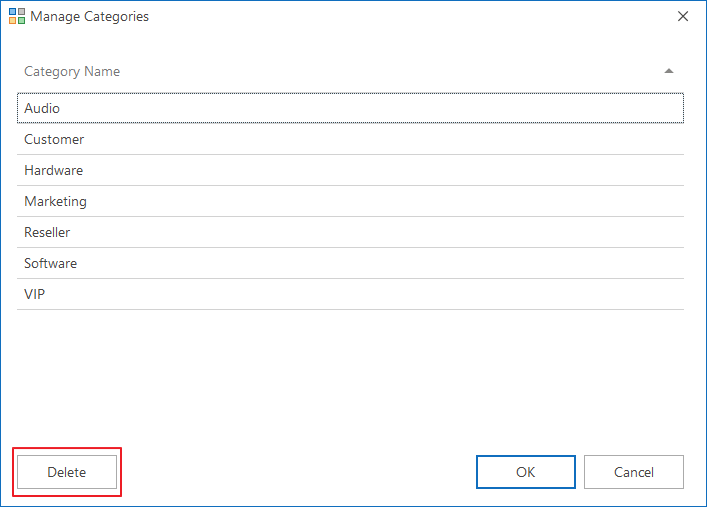
- In any item window, click Categorize and select Manage Categories.
- Here, you can double-click the name of any category and rename it.
- If you select a category or categories, you can erase them by clicking Delete.
- Both options will pop up when you right-click any category in the list.

eWay-CRM MobileAssign Existing Categories
- Go to any list and tap on item you want to categorize, e.g. contact.
- Tap Edit.
- Select Category field.
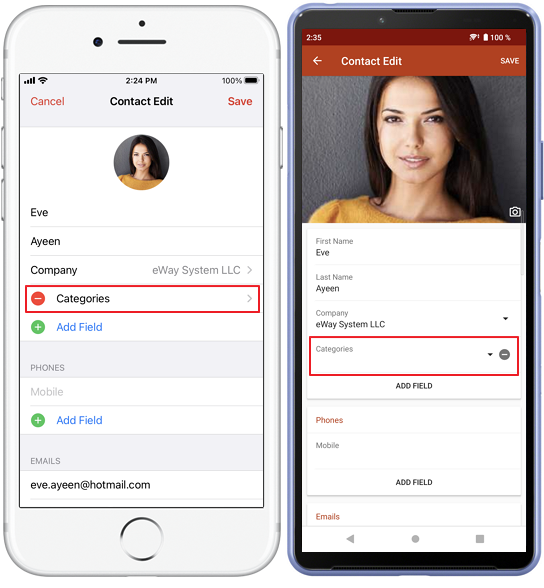
- Here, you can select a category or categories to categorize the item.
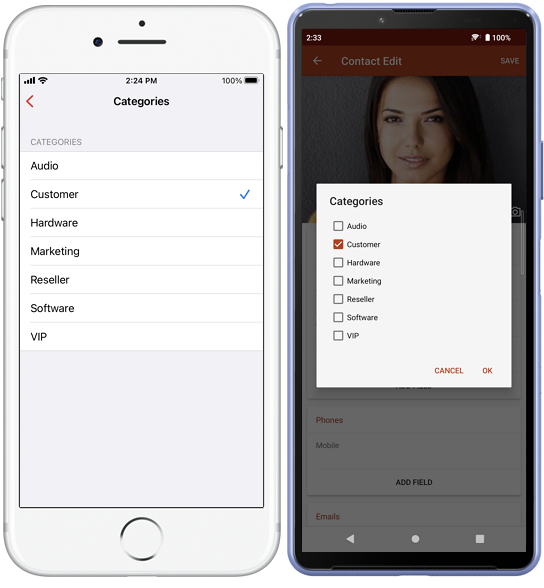
- If you finish the categorization, click Save.

Was it useful?

Thank you for your feedback.
1 
