





First Steps in eWay-CRM
Get Familiar with eWay-CRM Fast.
Applies to
eWay-CRM Desktop, eWay-CRM Online and eWay-CRM Mobile (iOS and Android).
Tip – A CRM built on Microsoft 365
eWay-CRM takes the data you already have across Microsoft 365, shares it with your whole team, and organizes it around your customers, deals, and projects. It connects with Outlook, Teams, SharePoint, Power BI, Power Automate, and Copilot.
This guide walks you and your team through your first steps in eWay-CRM: building your contact database, setting up sync, inviting your colleagues, and working with eWay-CRM in Outlook, Teams, and your sales pipeline.
Contents
- Getting Started
- Build Your Contact Database
- Set Up Sync
- Invite Your Team
- Work With Your Data
- eWay-CRM in Outlook and Teams
- Deals and Reports
- What’s Next
Getting Started
- If you don’t have an account yet, go to www.eway-crm.com, click Start free, and follow the wizard. eWay-CRM comes with a 14-day free trial.
- Bookmark eWay-CRM, or pin it to your Windows taskbar or Mac dock, so you can open it with a single click.
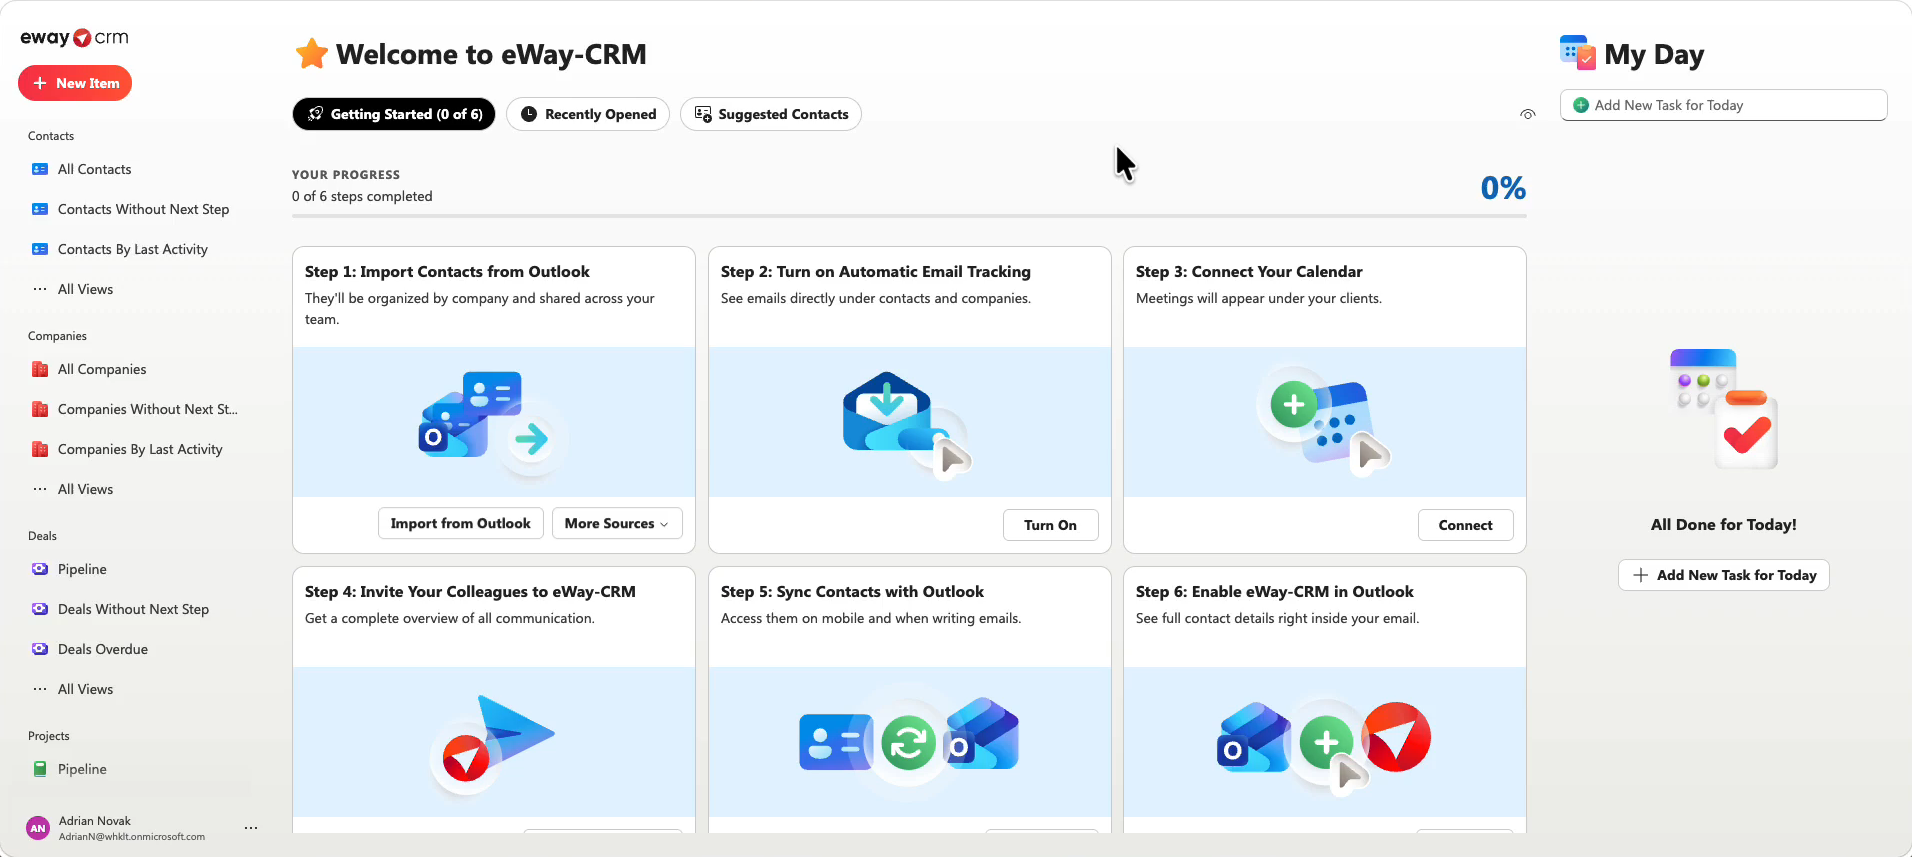
- On the homepage, the Getting Started tab shows which steps you still have to take, and you can start each of them right from there.
Build Your Contact Database
- In the first step, click Import from Outlook. To move contacts from your previous CRM, use More Sources > Import from Excel (see Import Data from Microsoft Excel).
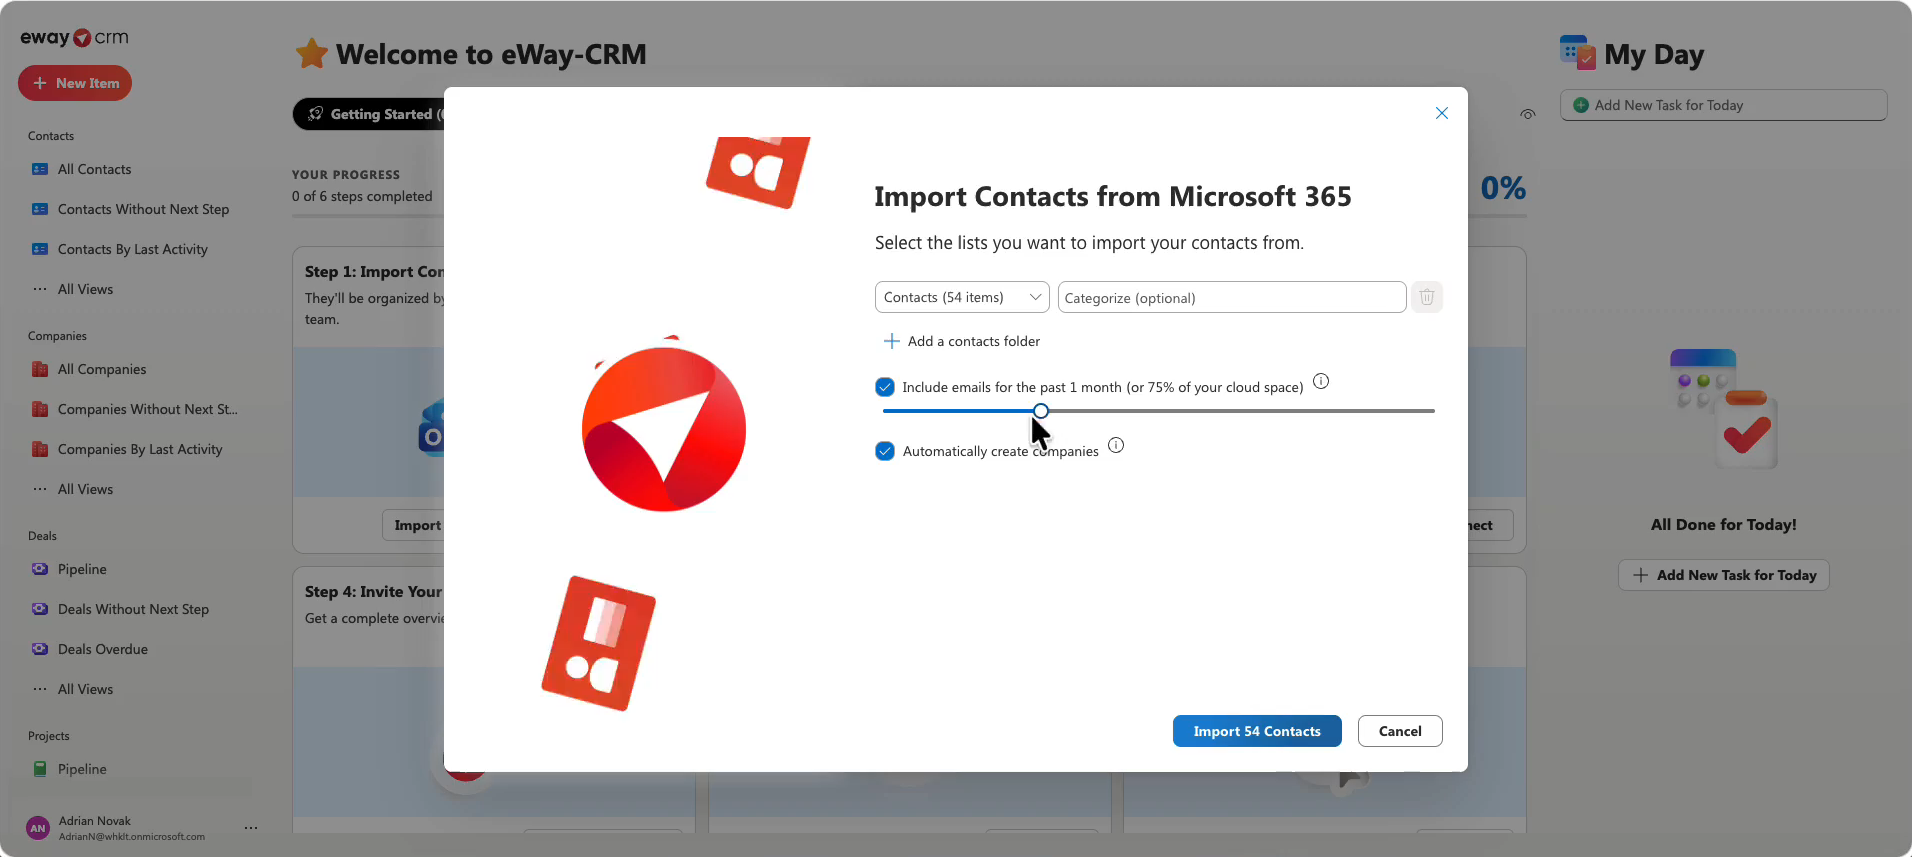
- Select your contacts folder, check Include emails and Automatically create companies, and confirm the import. eWay-CRM imports your contacts, creates the related companies, and brings in your communication history. Learn more in Import Contacts from Your Microsoft 365 Account.
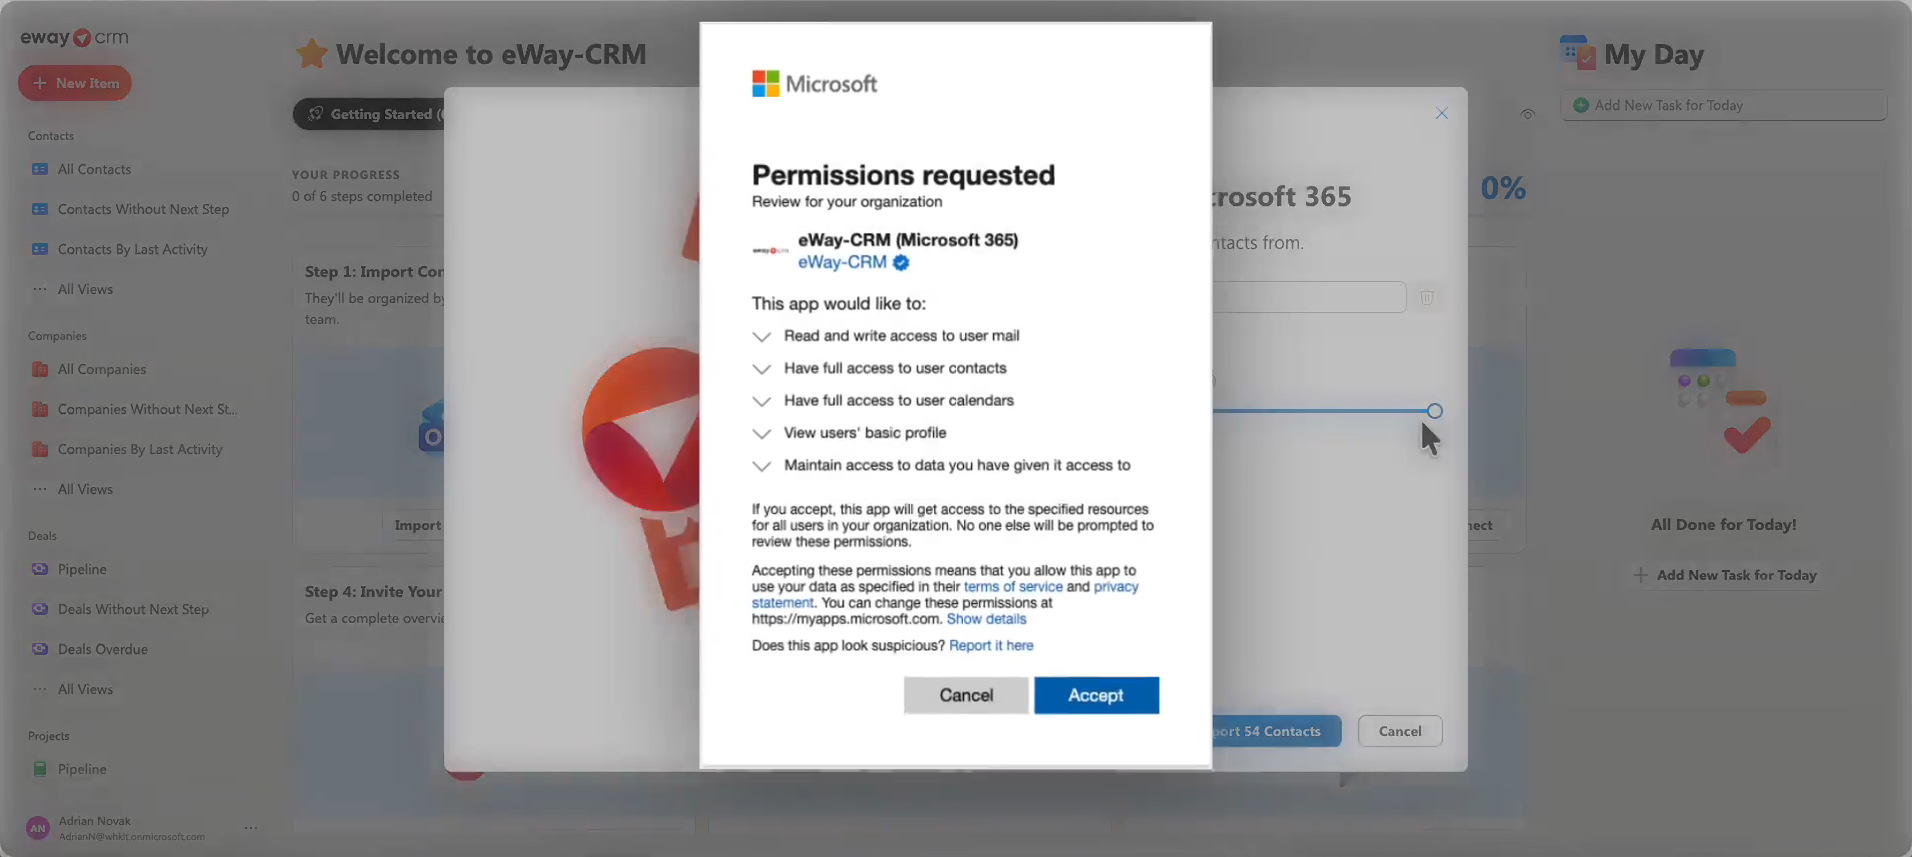
- You might be asked for Microsoft 365 admin consent at this point. Click Accept – without it, eWay-CRM can’t access your Outlook data. For more information, go to eWay-CRM (Microsoft 365) requires admin consent.
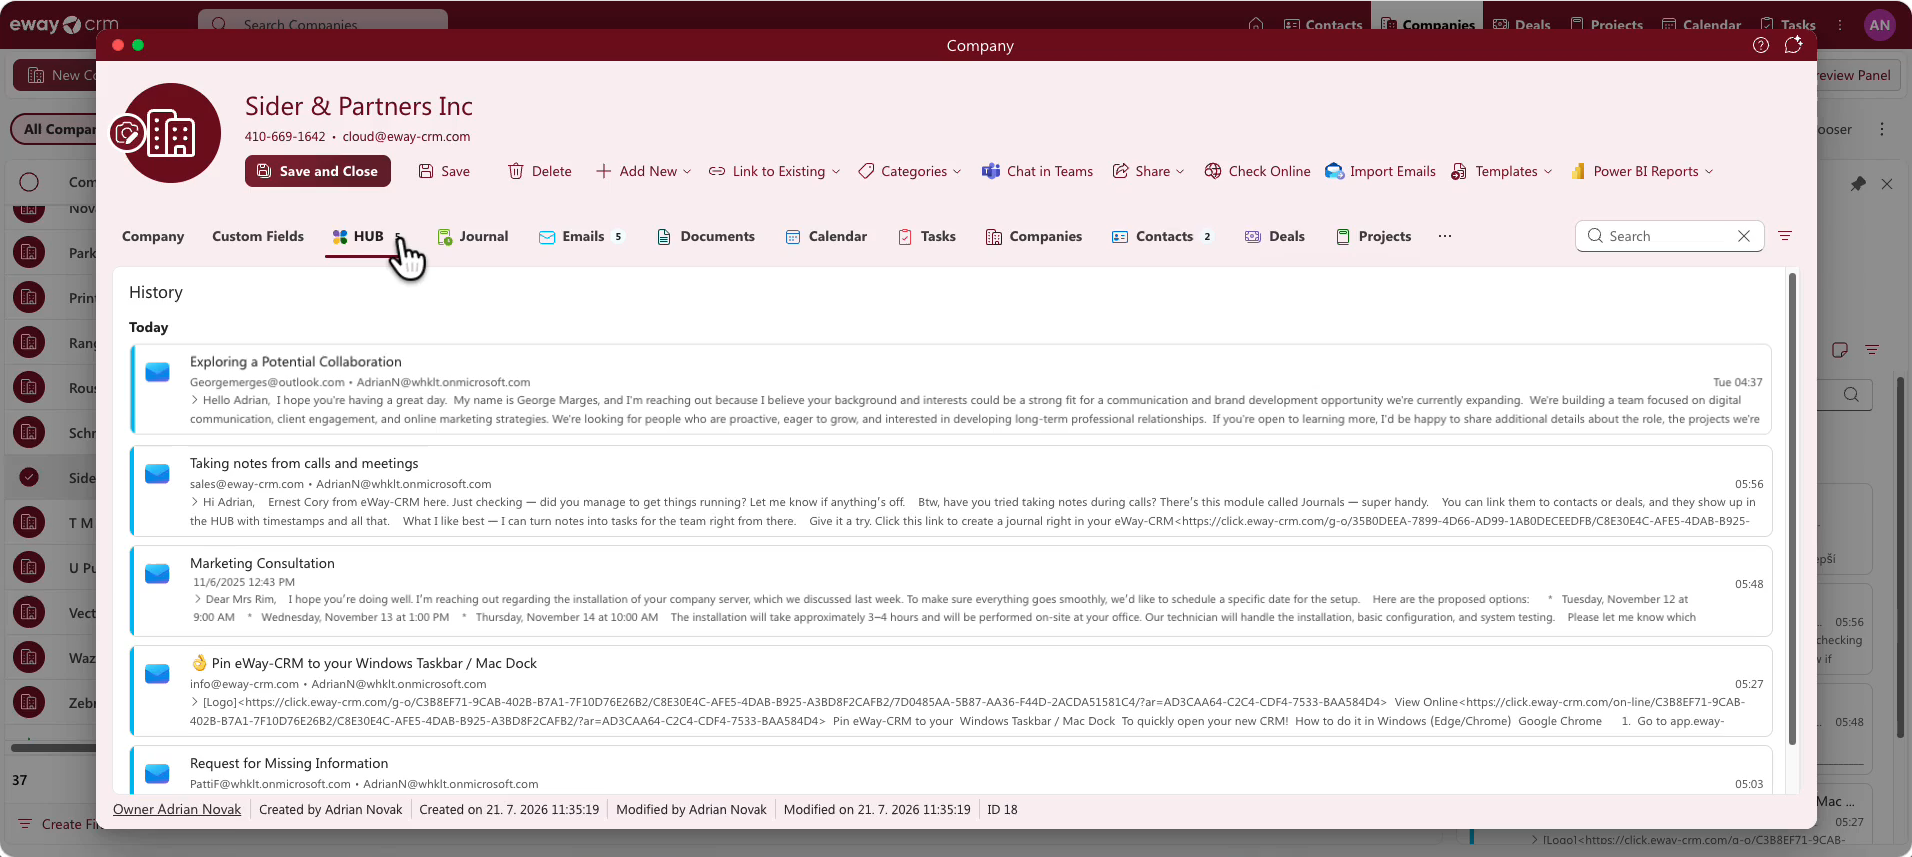
- Open any company and click HUB. You’ll see emails from all of its contacts in one place – a complete communication history, so you don’t need to check it contact by contact before a meeting.
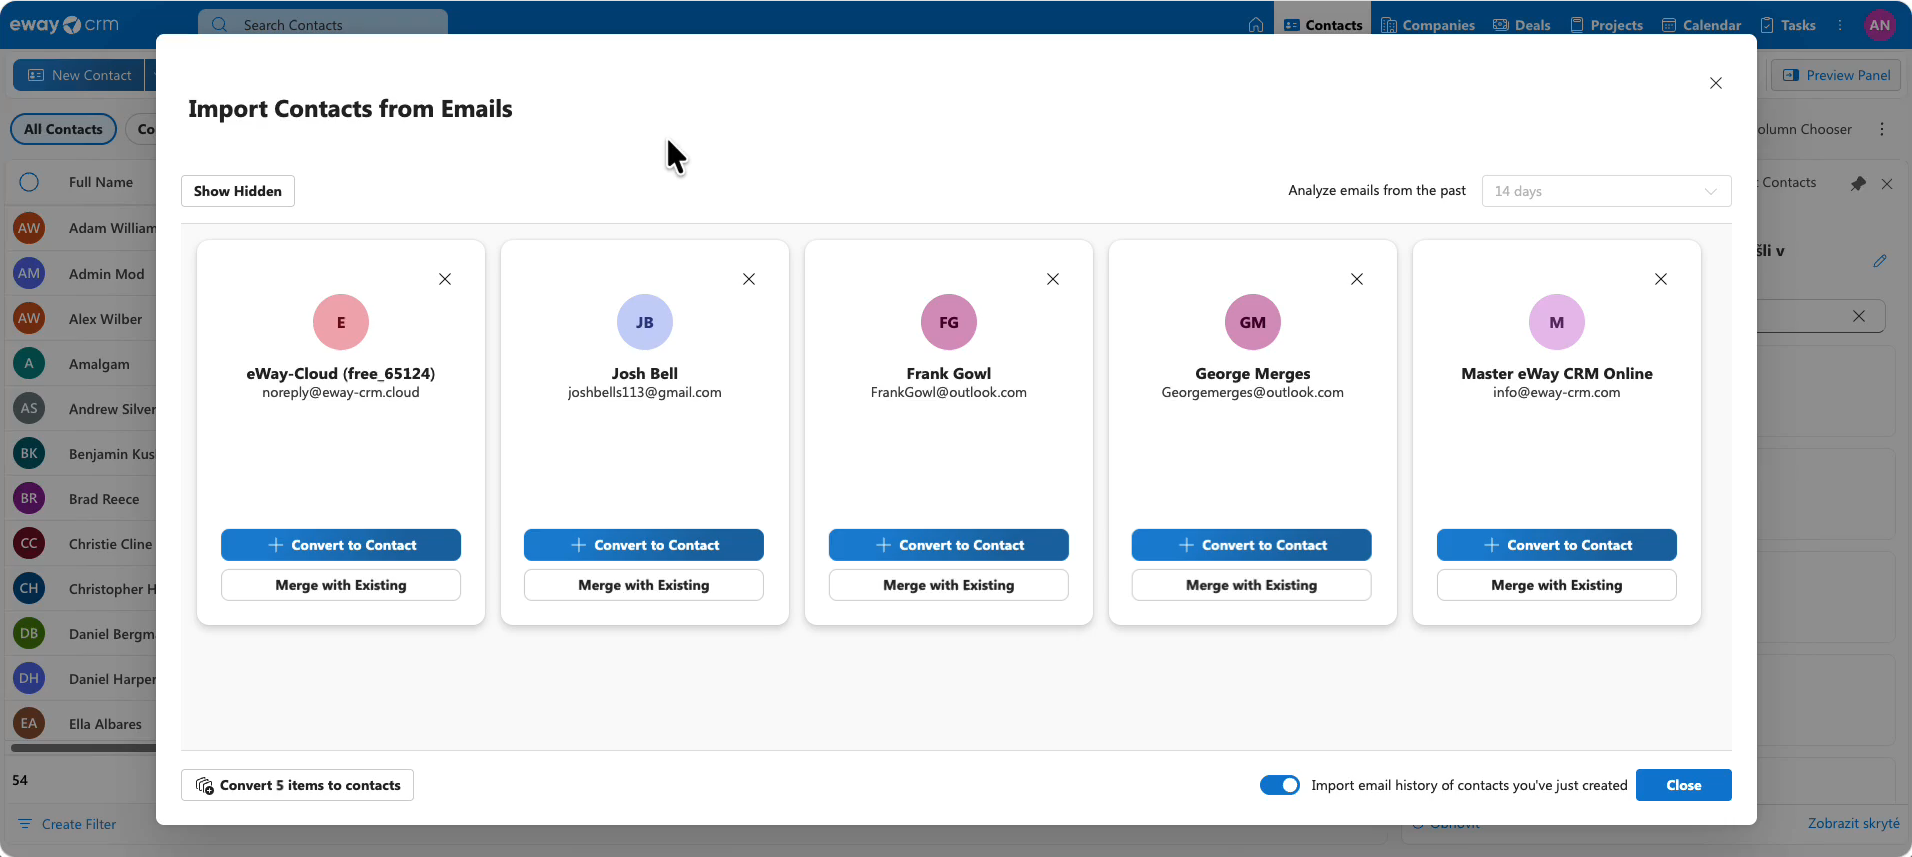
- Don’t keep your customers in Outlook contacts, or want to make sure you haven’t left anybody behind? In the Contacts module, click Import > Import Contacts from Emails. In a couple of seconds, eWay-CRM analyzes your mailbox and lists the people you communicate with most often who aren’t in eWay-CRM yet. Add them one by one with Convert to Contact, or import up to 20 at a time. See Import Contacts From Emails.
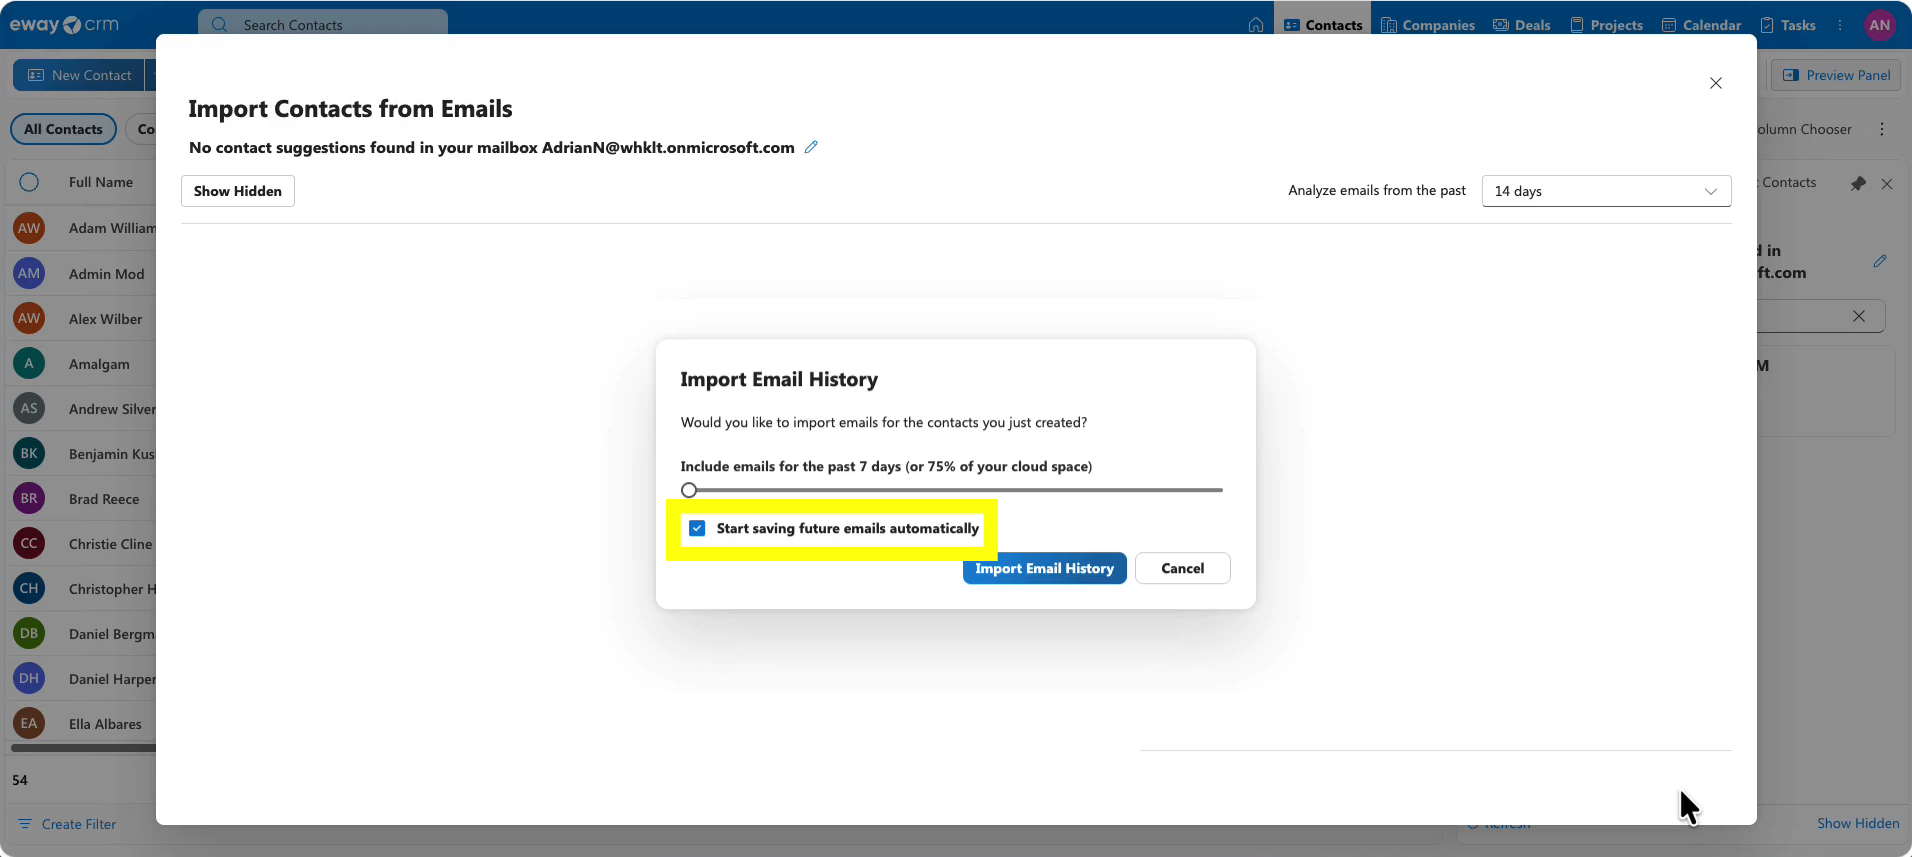
- When you confirm, eWay-CRM also imports your previous emails with these contacts. Keep Start saving future emails automatically checked – eWay-CRM will then save all emails you send to and receive from your contacts. Built-in AI also reads email signatures, so your new contacts often come with a job title, phone number, and address.
- You can repeat this step anytime to make sure no contacts are missed. New suggestions will also appear in the Suggested Contacts tab of the preview panel on the right.
Set Up Sync
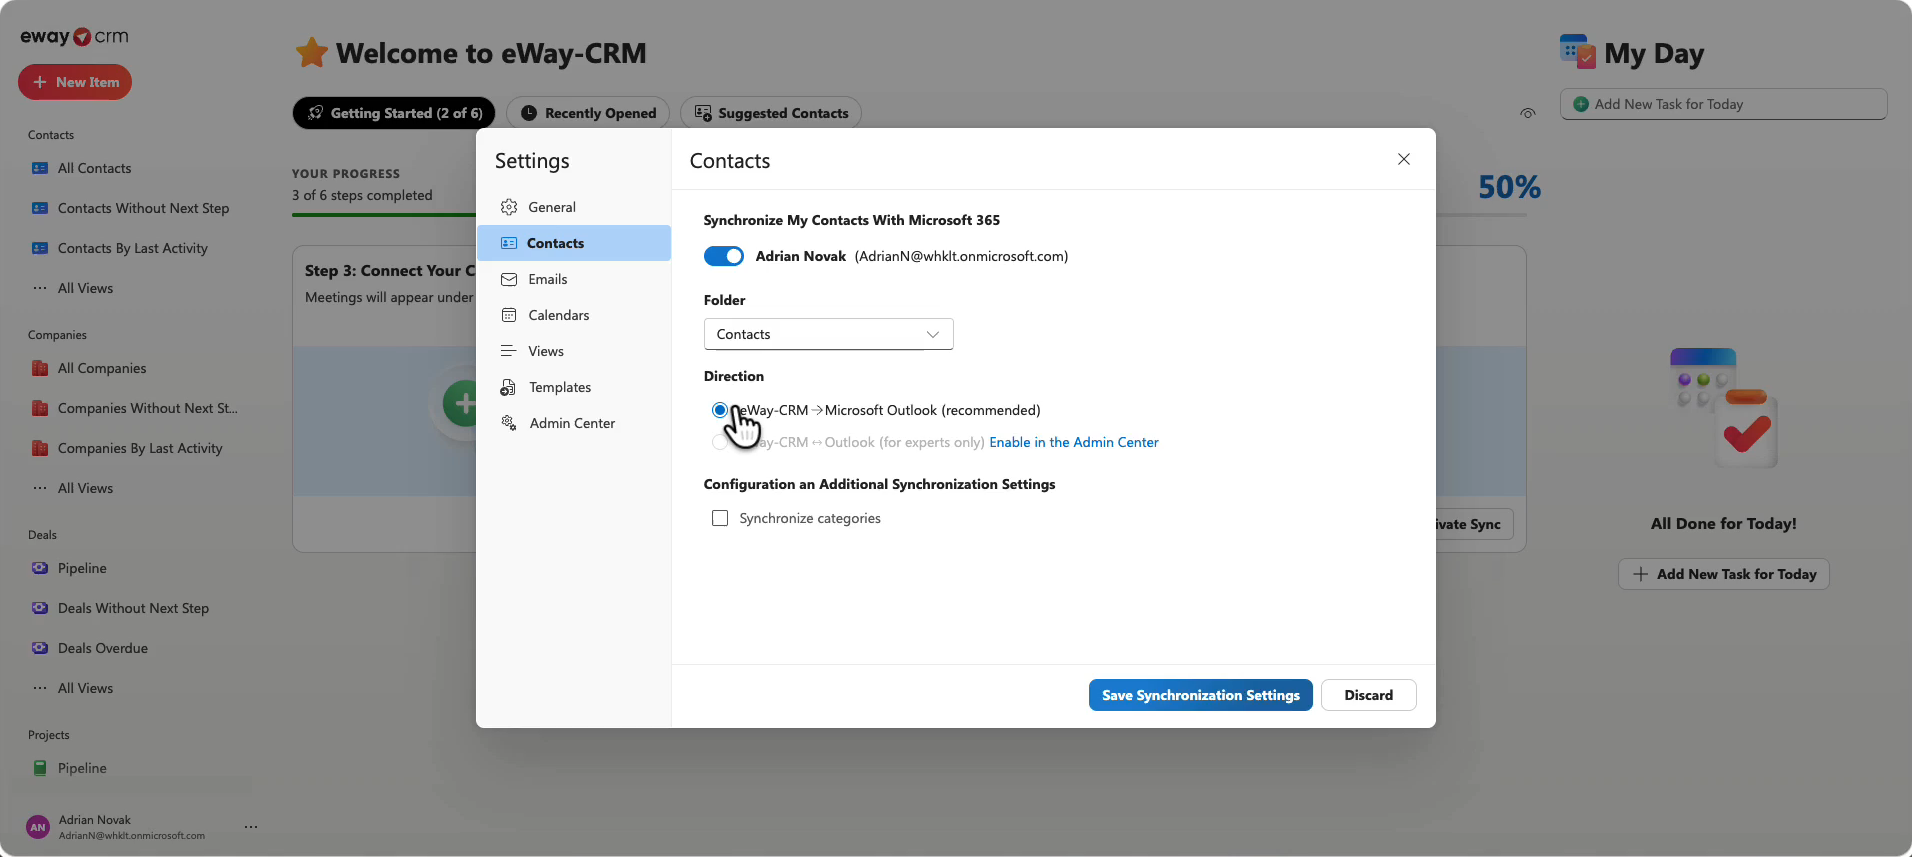
- In Settings > Contacts, turn on Synchronize My Contacts With Microsoft 365 and choose the direction eWay-CRM → Microsoft Outlook (recommended). When you or anyone on your team creates a new client in eWay-CRM, it appears in your Outlook and on your phone as well. Keep your private contacts in Outlook – they don’t belong in the CRM. You can skip the initial import, since you’ve already done it. Learn more in Synchronize Contacts with Microsoft 365.
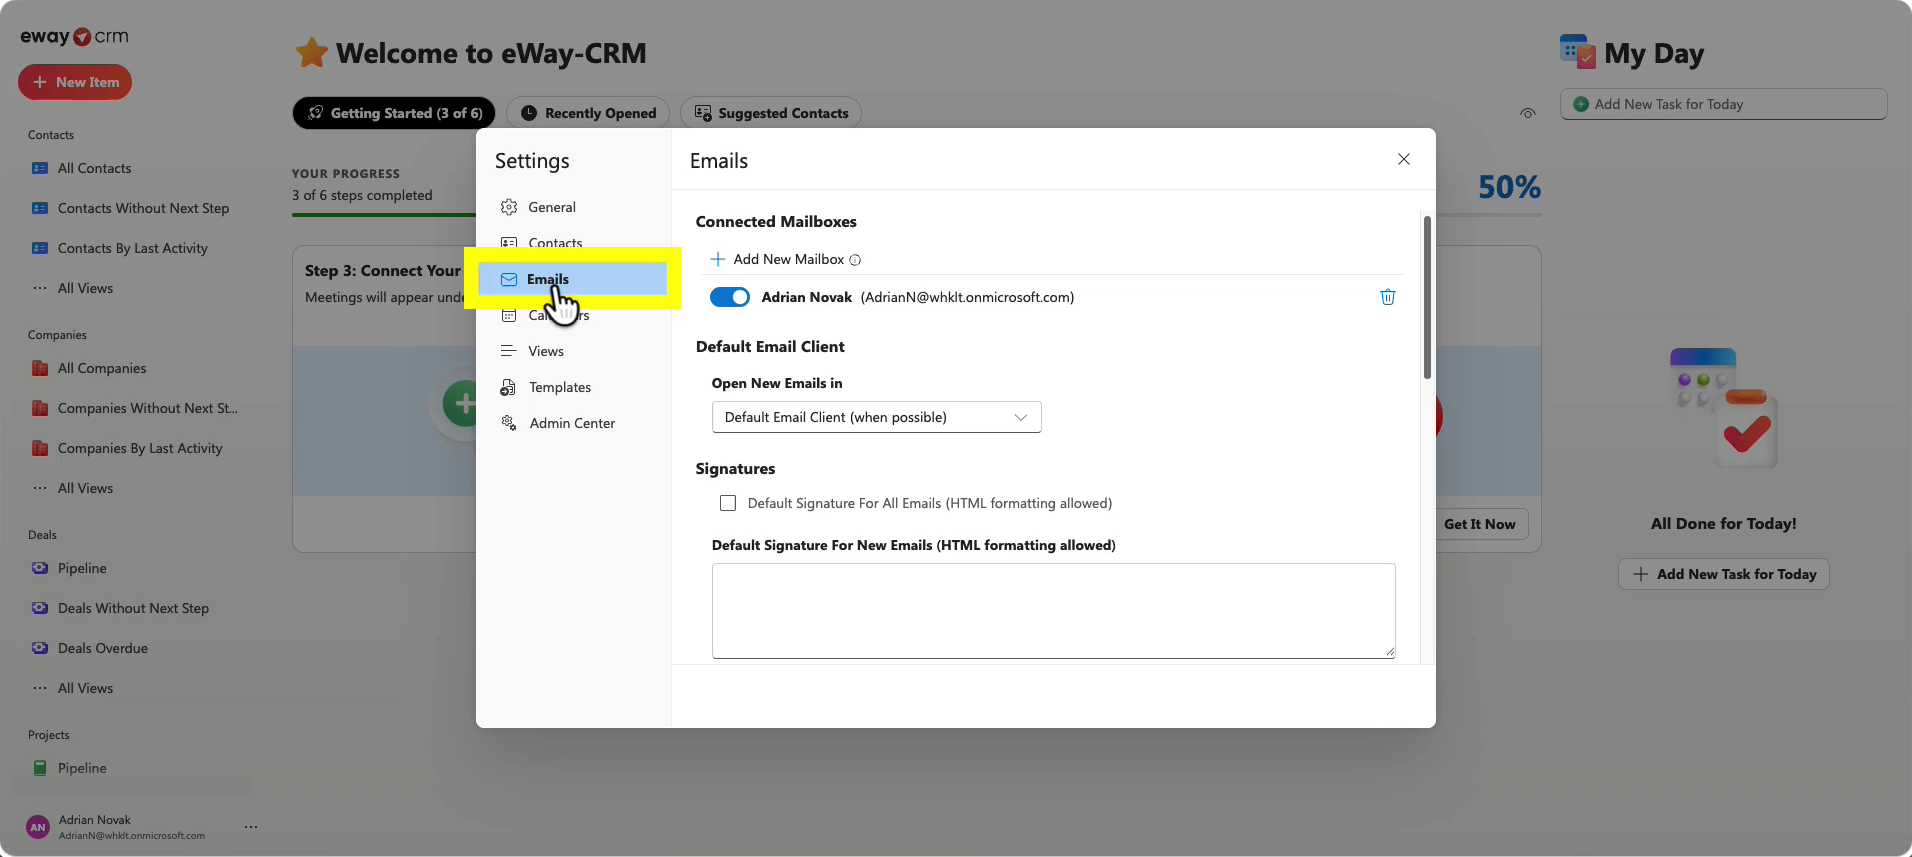
- In Settings > Emails, check that your mailbox is connected (it already is if you kept the option to save future emails on). Track email communication with contacts and companies, but not with users: contacts are external people, users are your internal staff, and internal communication shouldn’t end up in a shared CRM. Add your internal domain to Ignored Domains, along with the domains of your accountant or external legal team. If you use Configure for Entire Company in the Admin Center, the rules apply to your whole team. See Save Your Emails to Contacts Automatically.
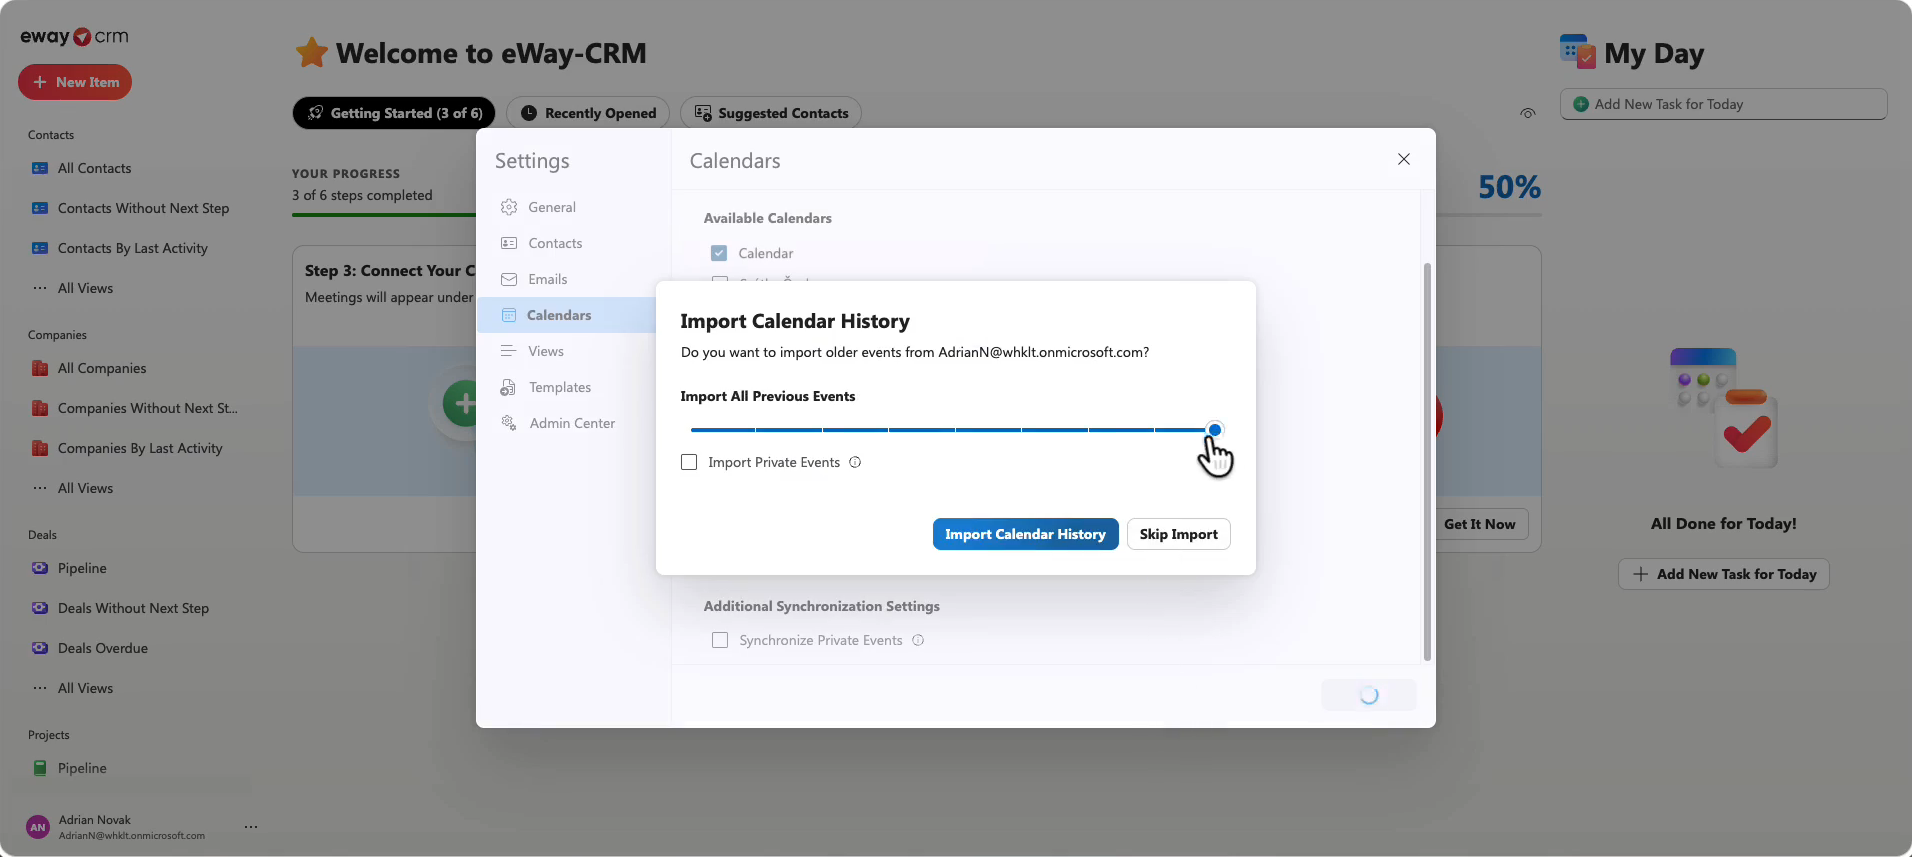
- In Settings > Calendars, turn on Synchronize My Calendars With Microsoft 365. Make sure to import your older meetings as well: in the Import Calendar History window, choose how far back to go and click Import Calendar History. Meetings sent by you or your customers are linked to the contacts and their companies.
Invite Your Team
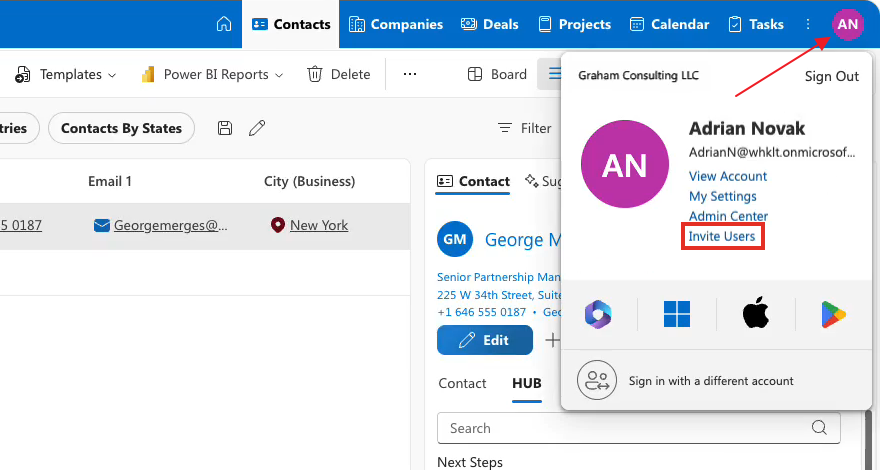
- In any module, click your avatar in the top right corner and select Invite Users.
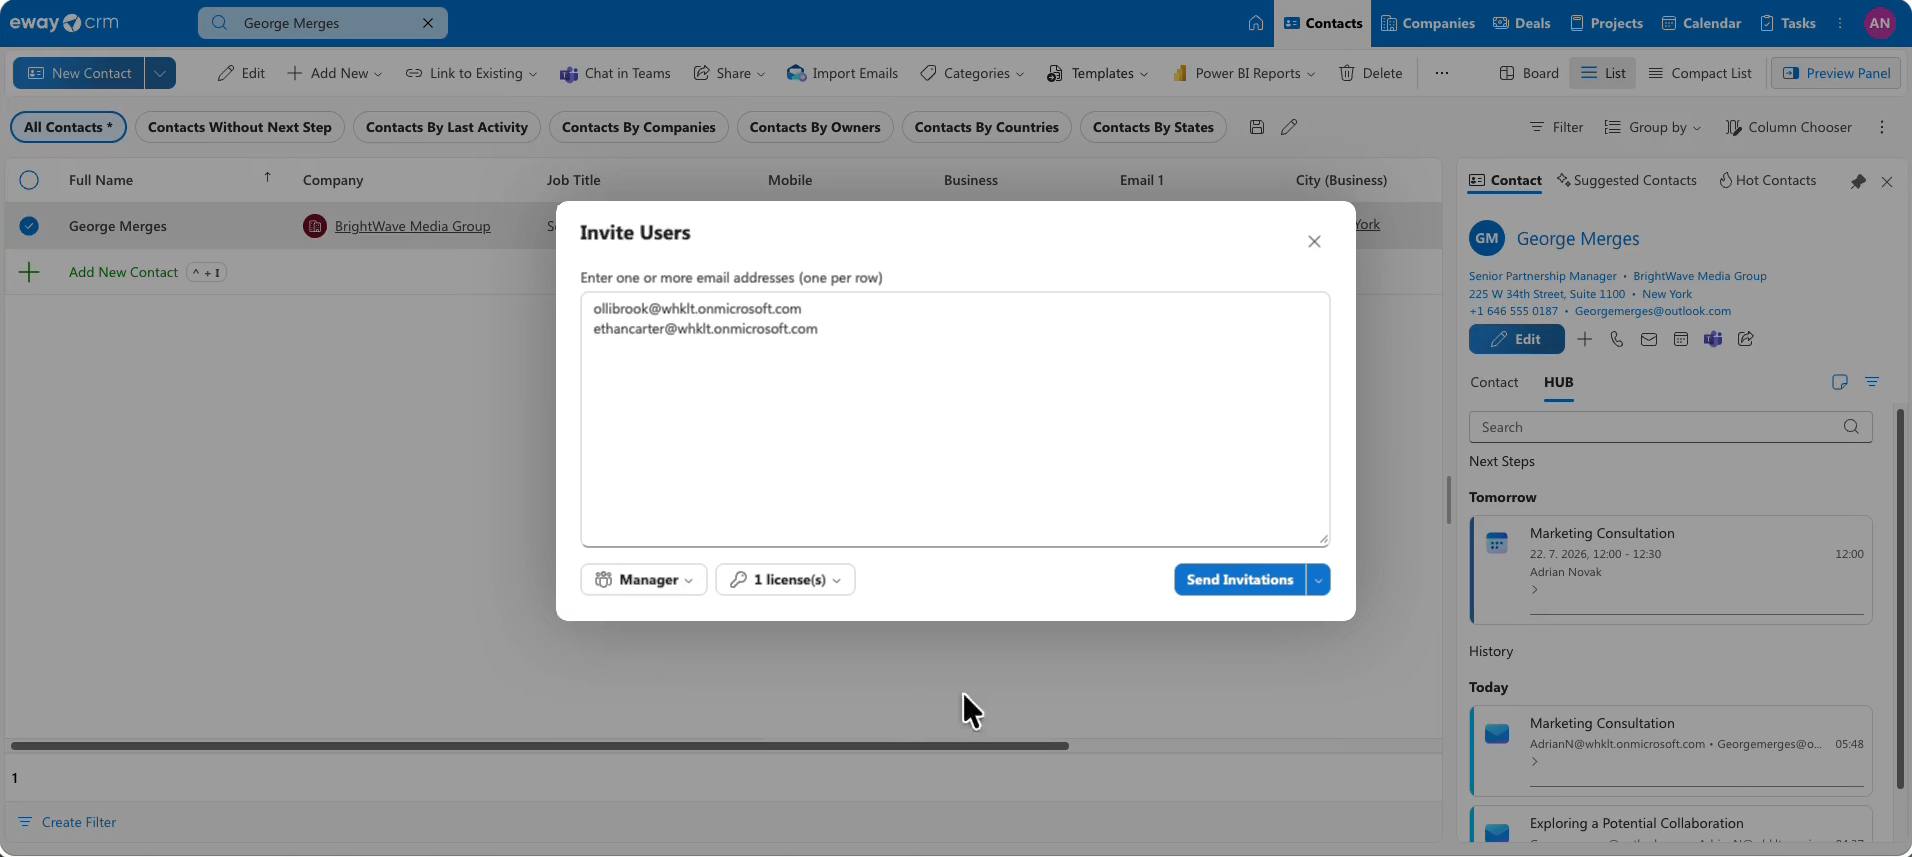
- Enter your colleagues’ email addresses, one per row, and click Send Invitations. eWay-CRM sends them login instructions (see also Create Accounts for Other Users).
- Ask your colleagues to import their contacts, emails, and meetings, and to set up contact, email, and calendar sync. Don’t worry about duplicates: if someone imports a contact that already exists, eWay-CRM skips it and only imports their emails. When you open a contact, you see not only your emails, but your colleagues’ emails too.
- Finally, search your contacts and delete all internal staff. Employees belong in the Users module, not in Contacts.
Congratulations – you’ve built a shared company database of all your customers. That was the most difficult step.
Work With Your Data
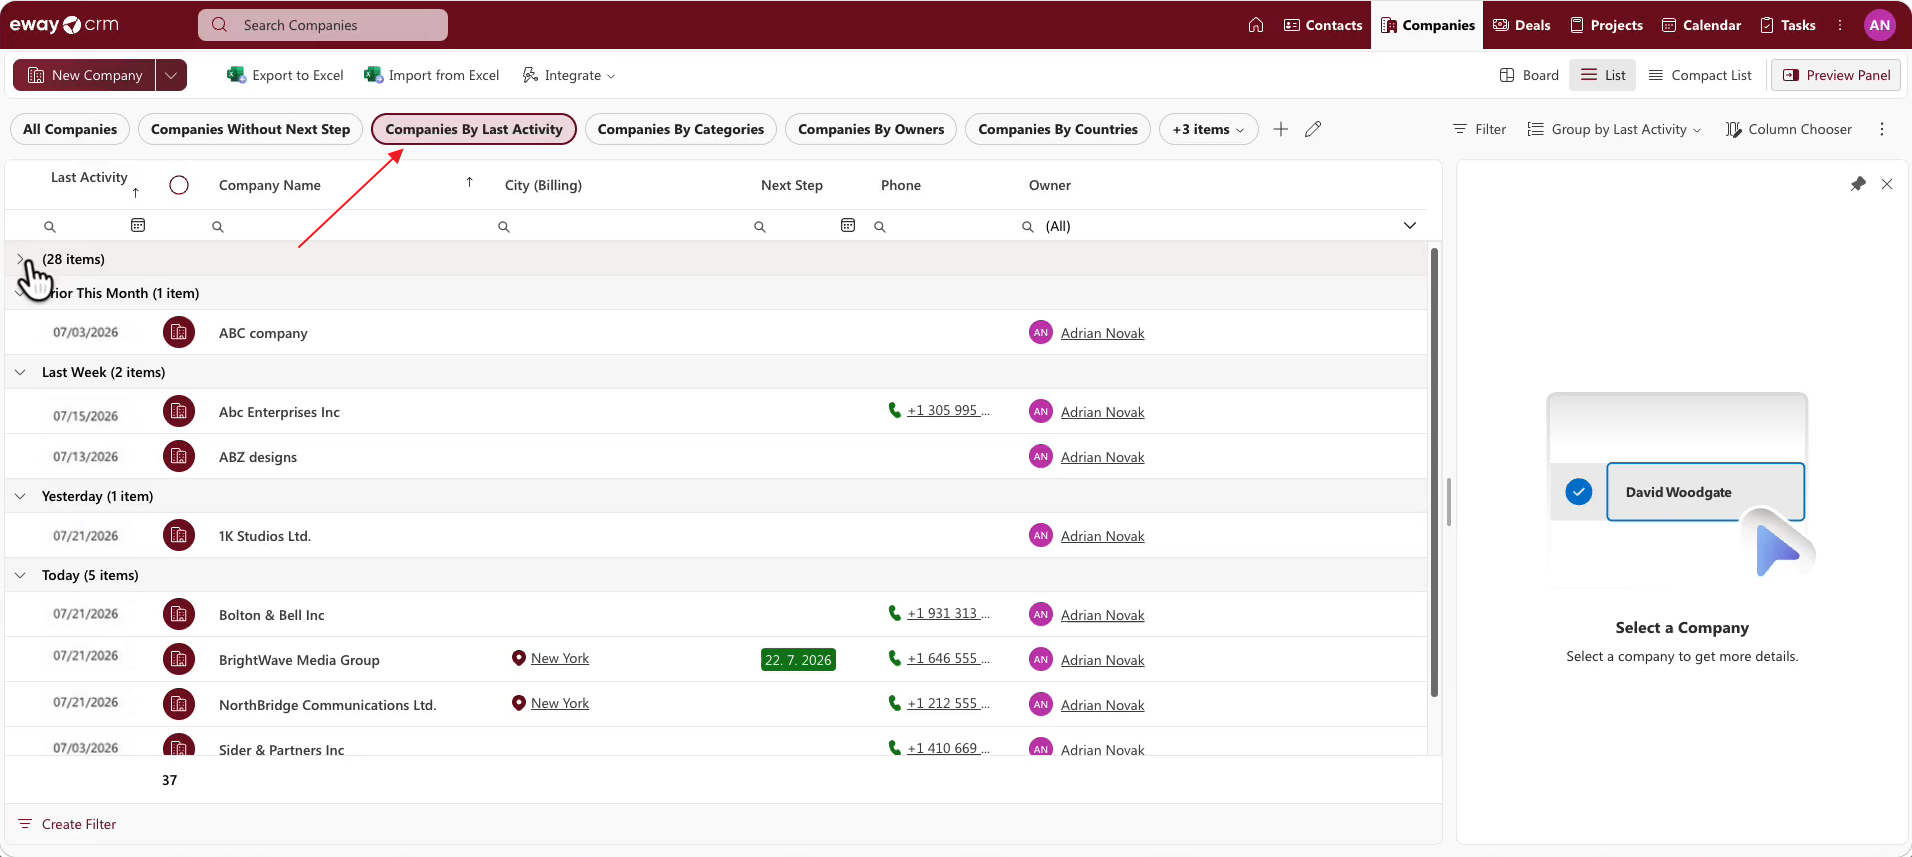
- In the list of companies, the Last Activity column shows the date of your last interaction with each customer. Switch to the Companies By Last Activity view to see which customers you haven’t contacted in a while.
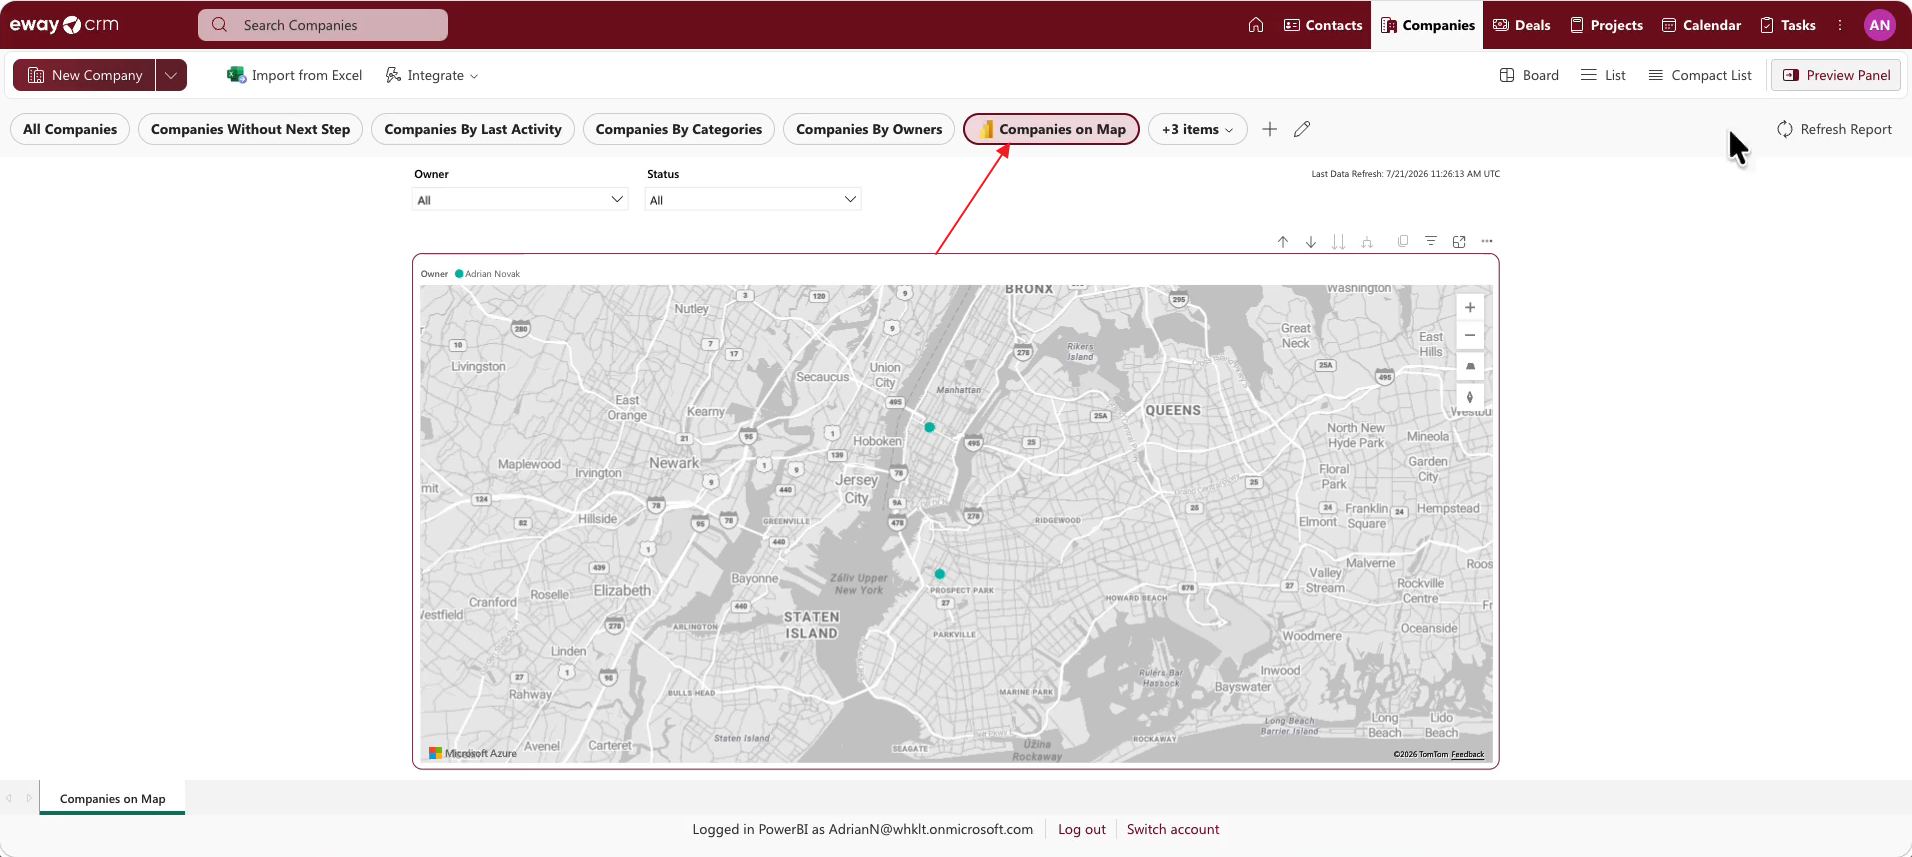
- The Companies on Map view is a built-in Power BI report that shows your customers on a map, by state or city. See View Company on the Map.
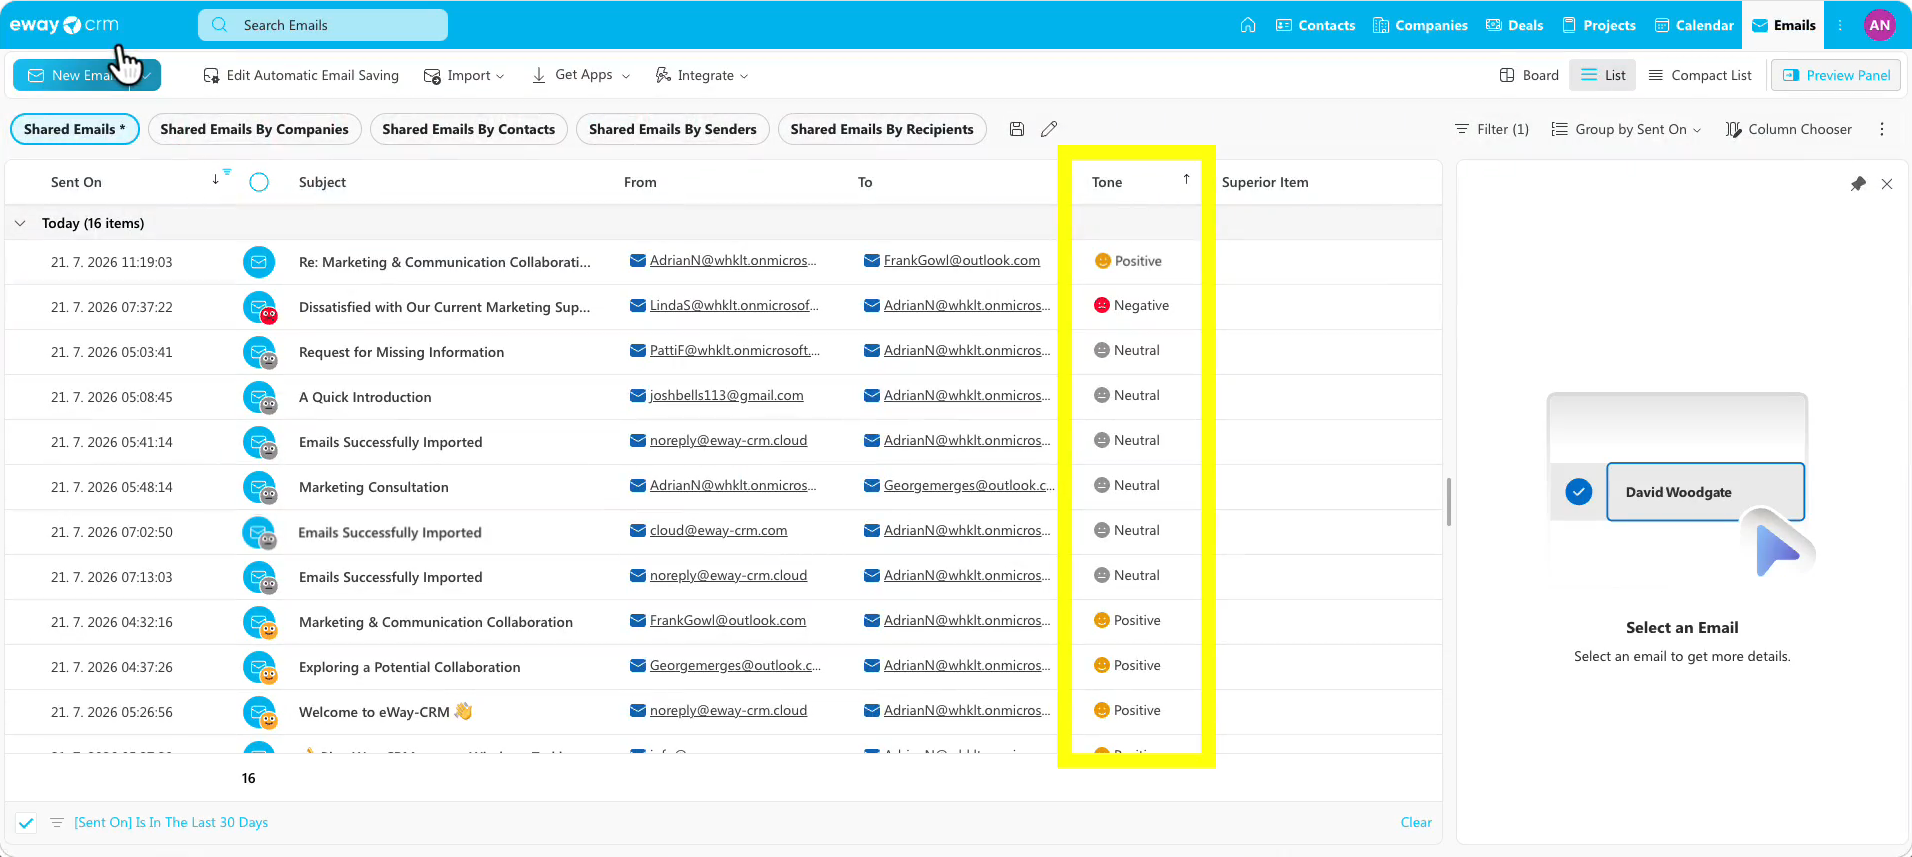
- The Emails module works like a shared Outlook for your whole team. Messages are grouped by day, so you can see who was in touch with whom, open a message, and even reply when a colleague is unavailable. The Tone column uses AI to mark incoming messages as positive, neutral, or negative, so you can spot a frustrated customer and respond quickly.
eWay-CRM in Outlook and Teams
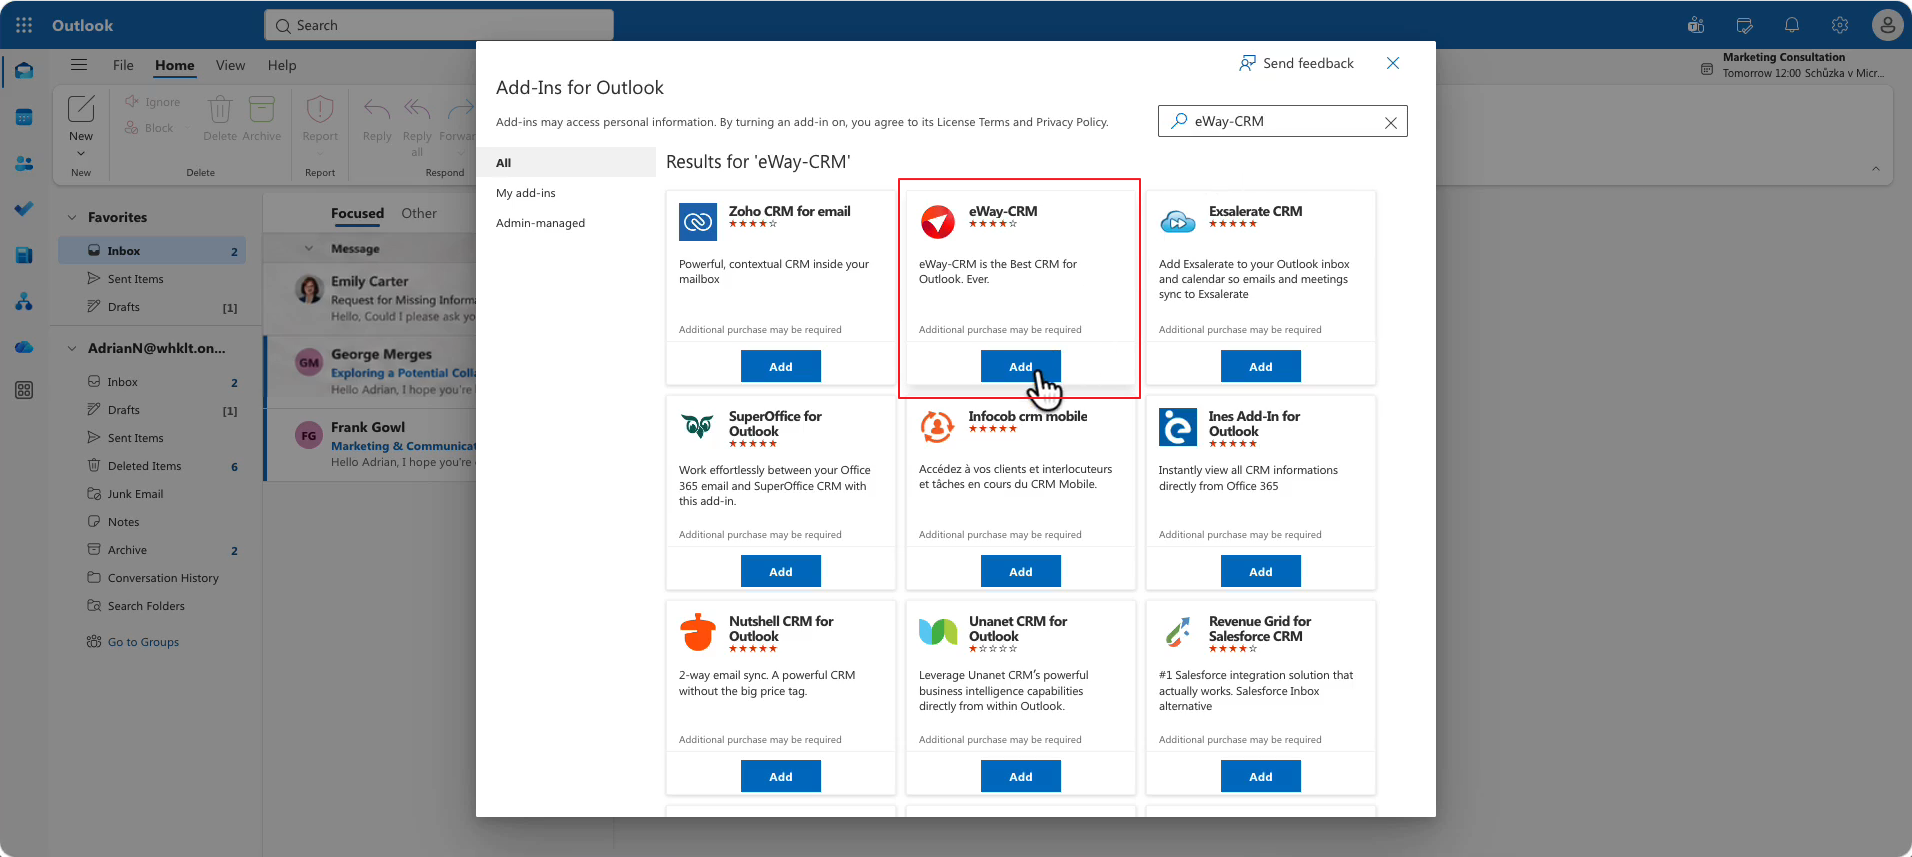
- In Outlook, open Add-Ins for Outlook, search for eWay-CRM, and click Add. eWay-CRM then becomes available in both Outlook and Microsoft Teams. For details, see Install eWay-CRM Online.
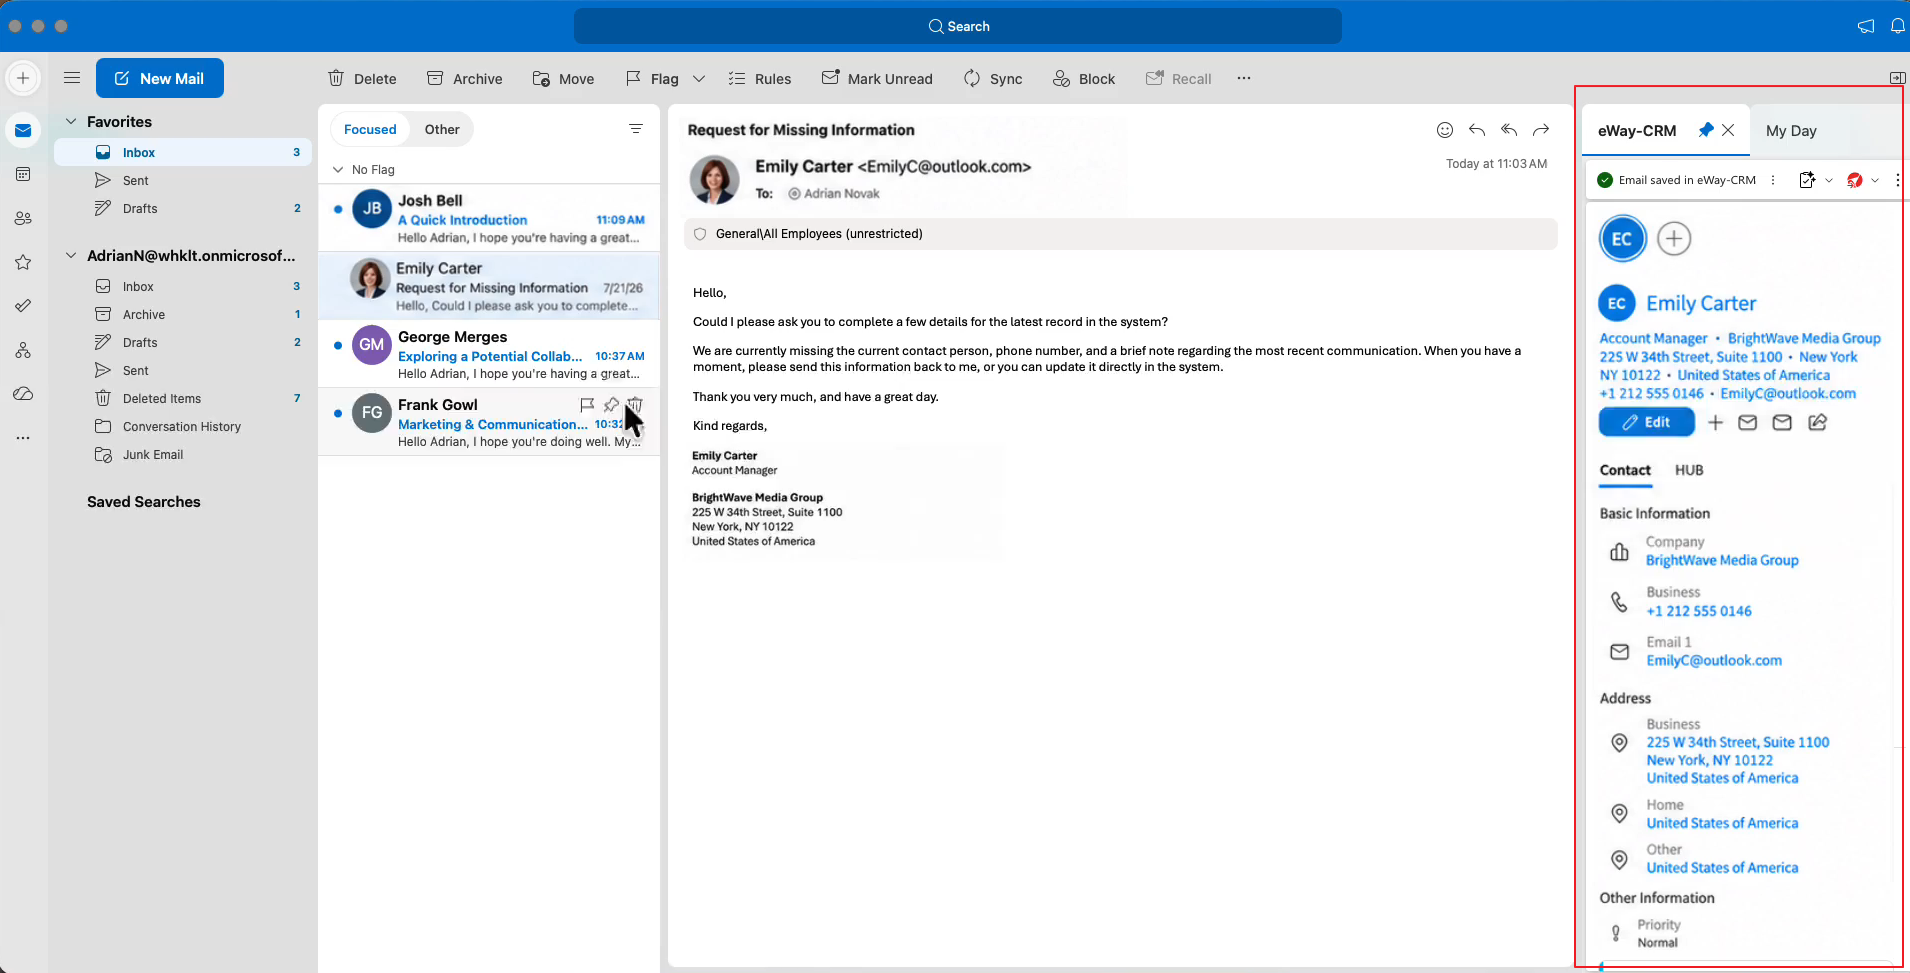
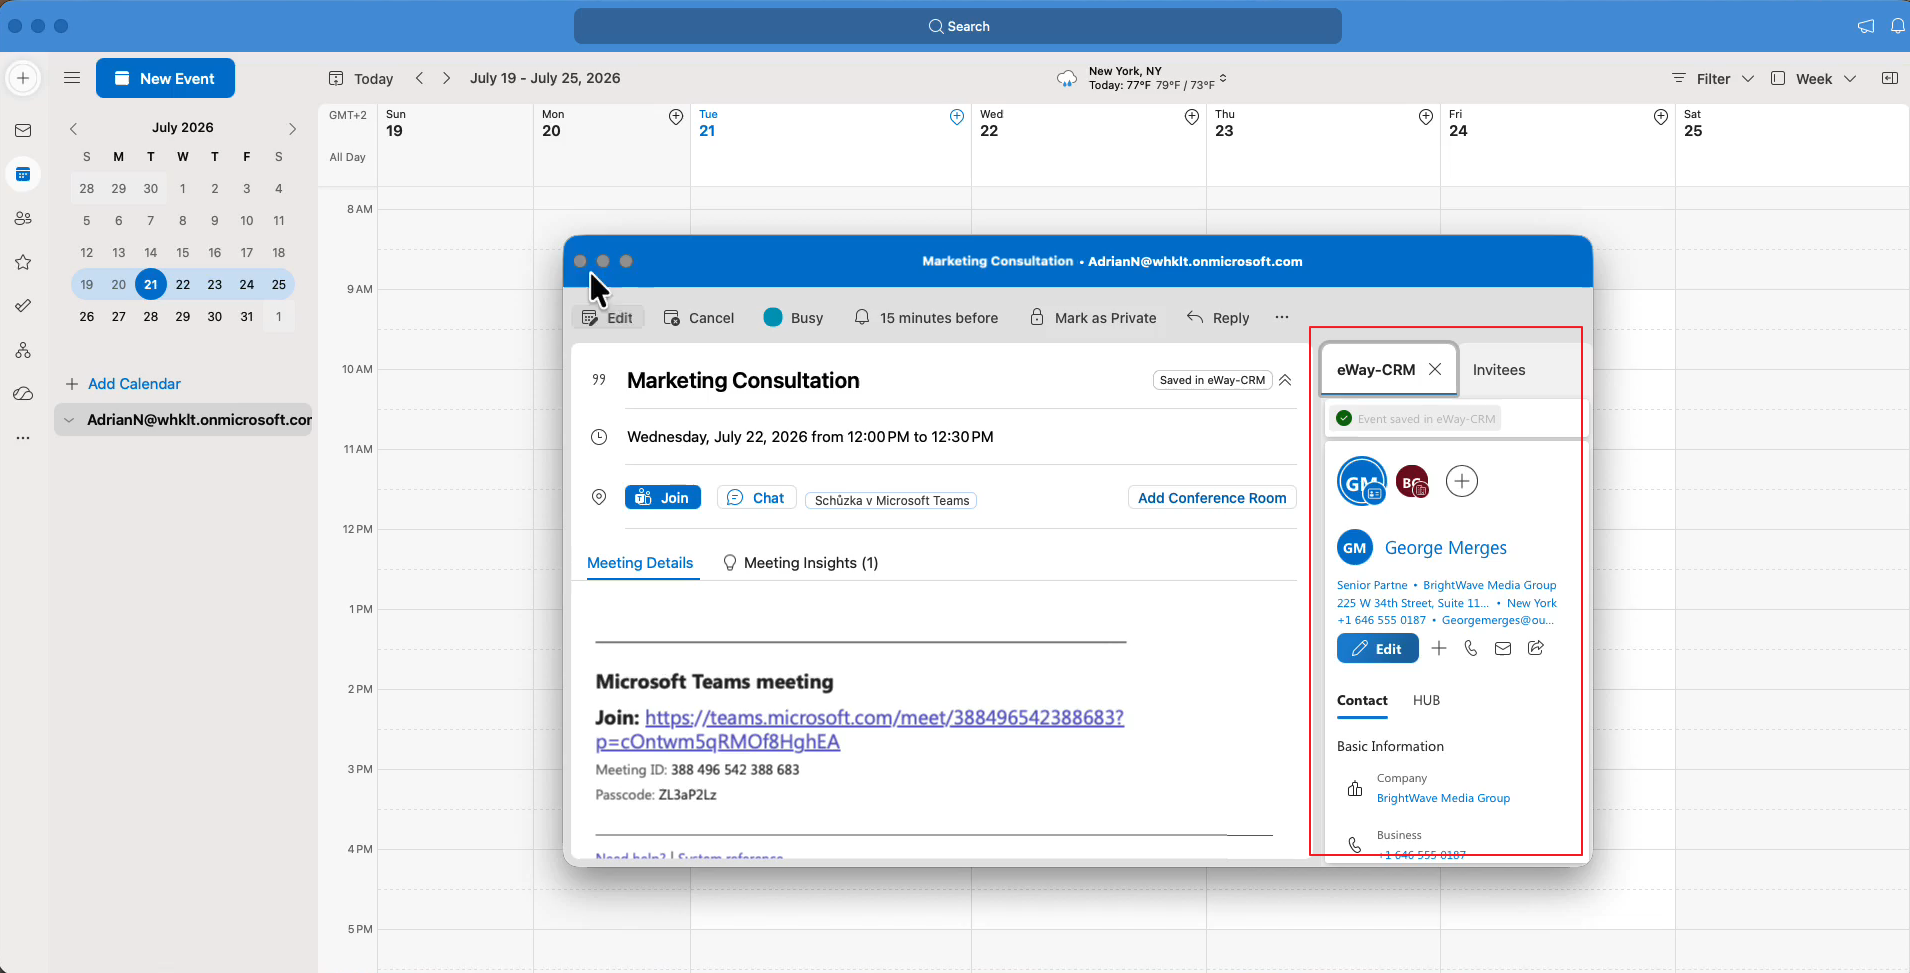
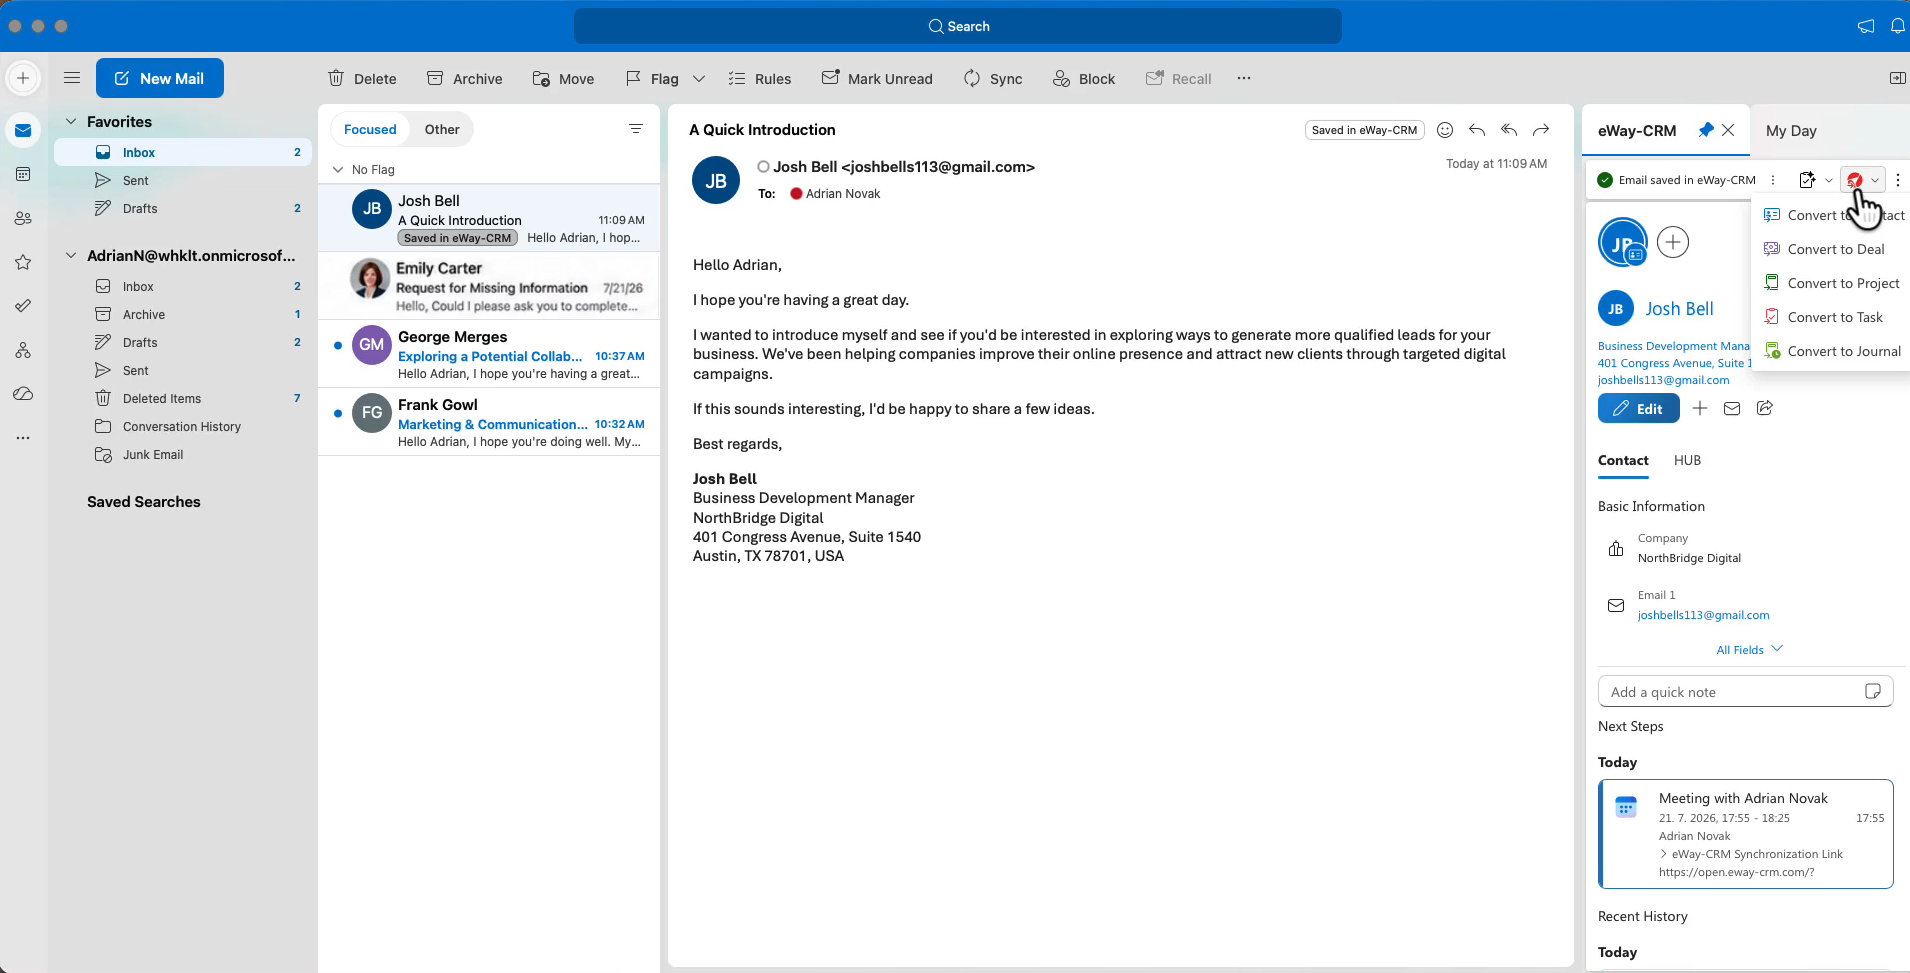
- Select an email and open the eWay-CRM panel. You immediately get all details about the sender, including the full communication history.
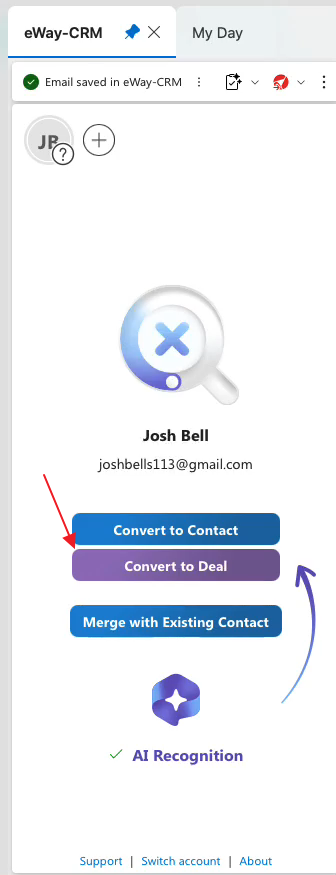
- If the sender isn’t in eWay-CRM yet, click Convert to Contact (see Create Contacts from Emails).
- The same applies to meetings: when you open an event, you see participant details. You can save your own meeting to eWay-CRM and link it with a customer, so your team knows you’re handling it – see Add Calendar Events to Contacts.
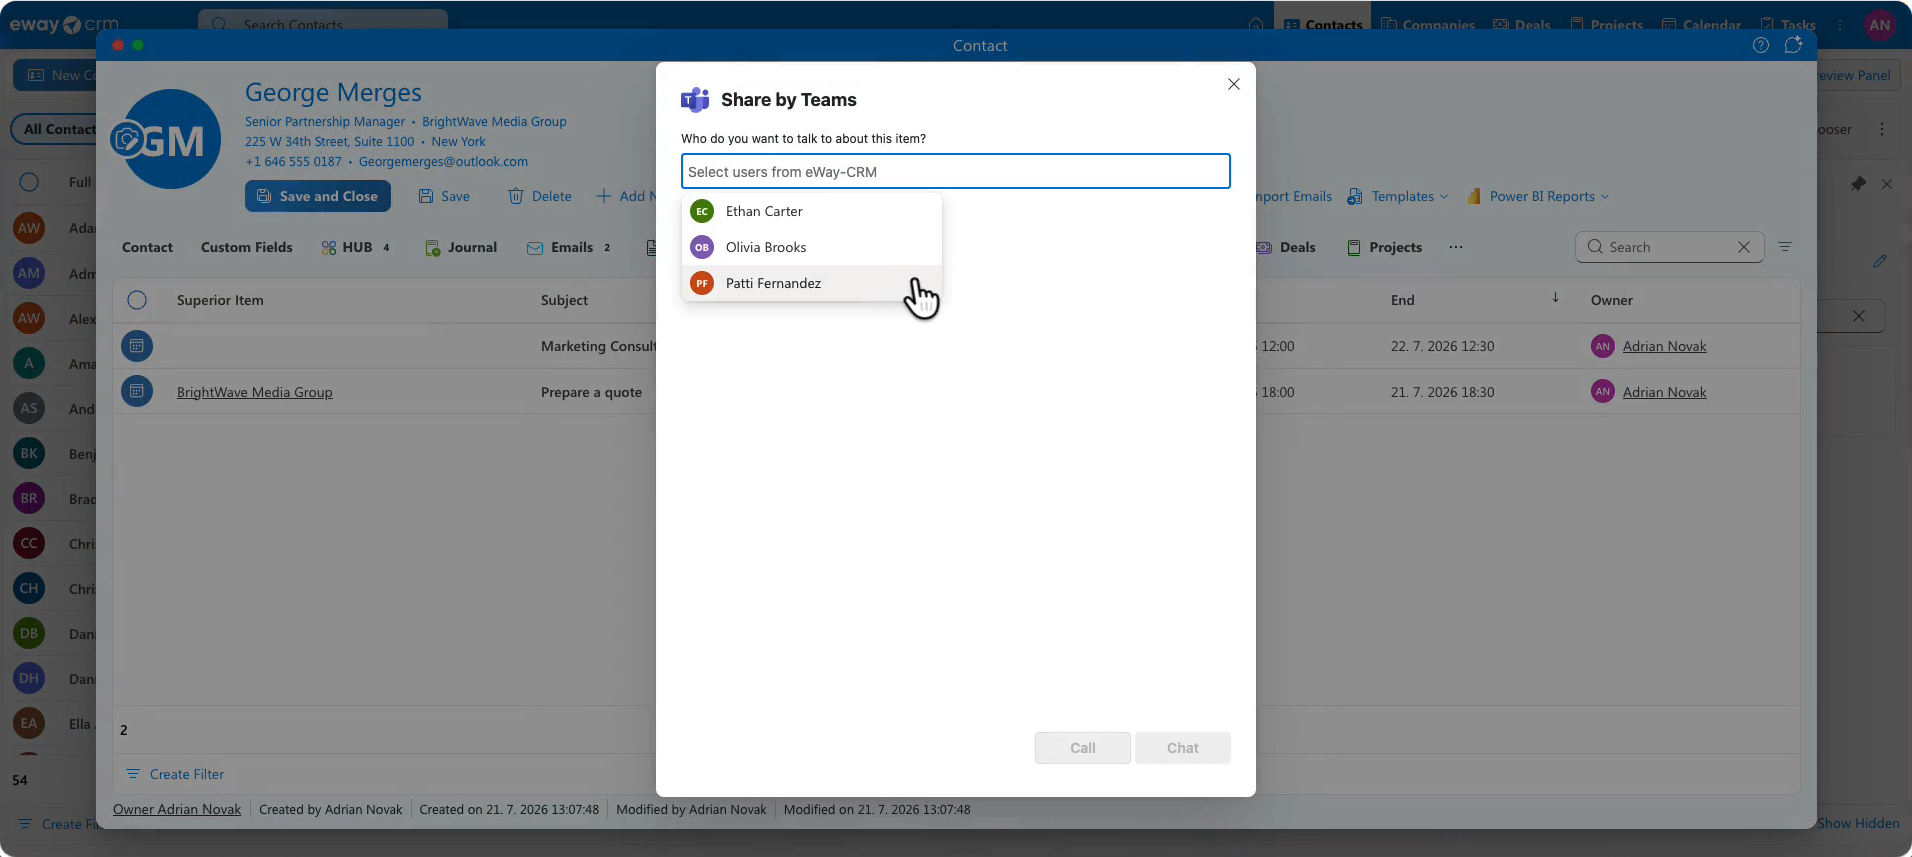
- Need to discuss a customer with a colleague? On the contact, click Chat in Teams, select your colleague, and click Chat. The message includes a link to the contact, so your colleague knows exactly who you’re referring to. See Send a Link to Open an Item Via Teams.
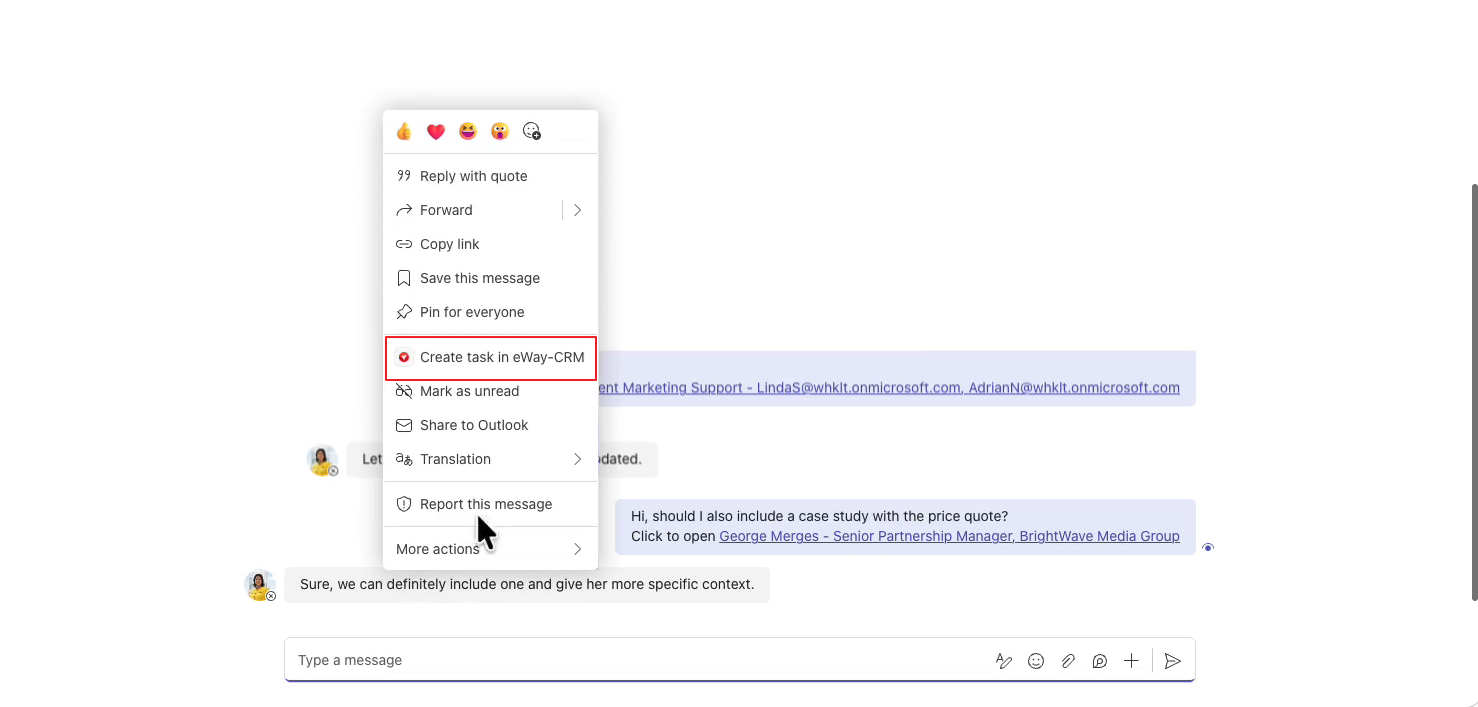
- When a colleague sends you instructions in Teams, open the message menu and select Create task in eWay-CRM.
Deals and Reports
- Received an email that represents a business opportunity or a task? Convert it in the eWay-CRM panel into whatever you need – for example, Convert to Deal. The original email is linked to the new deal automatically, and you can start working on it right away, such as planning a meeting with the customer. See Create Deals from Emails.
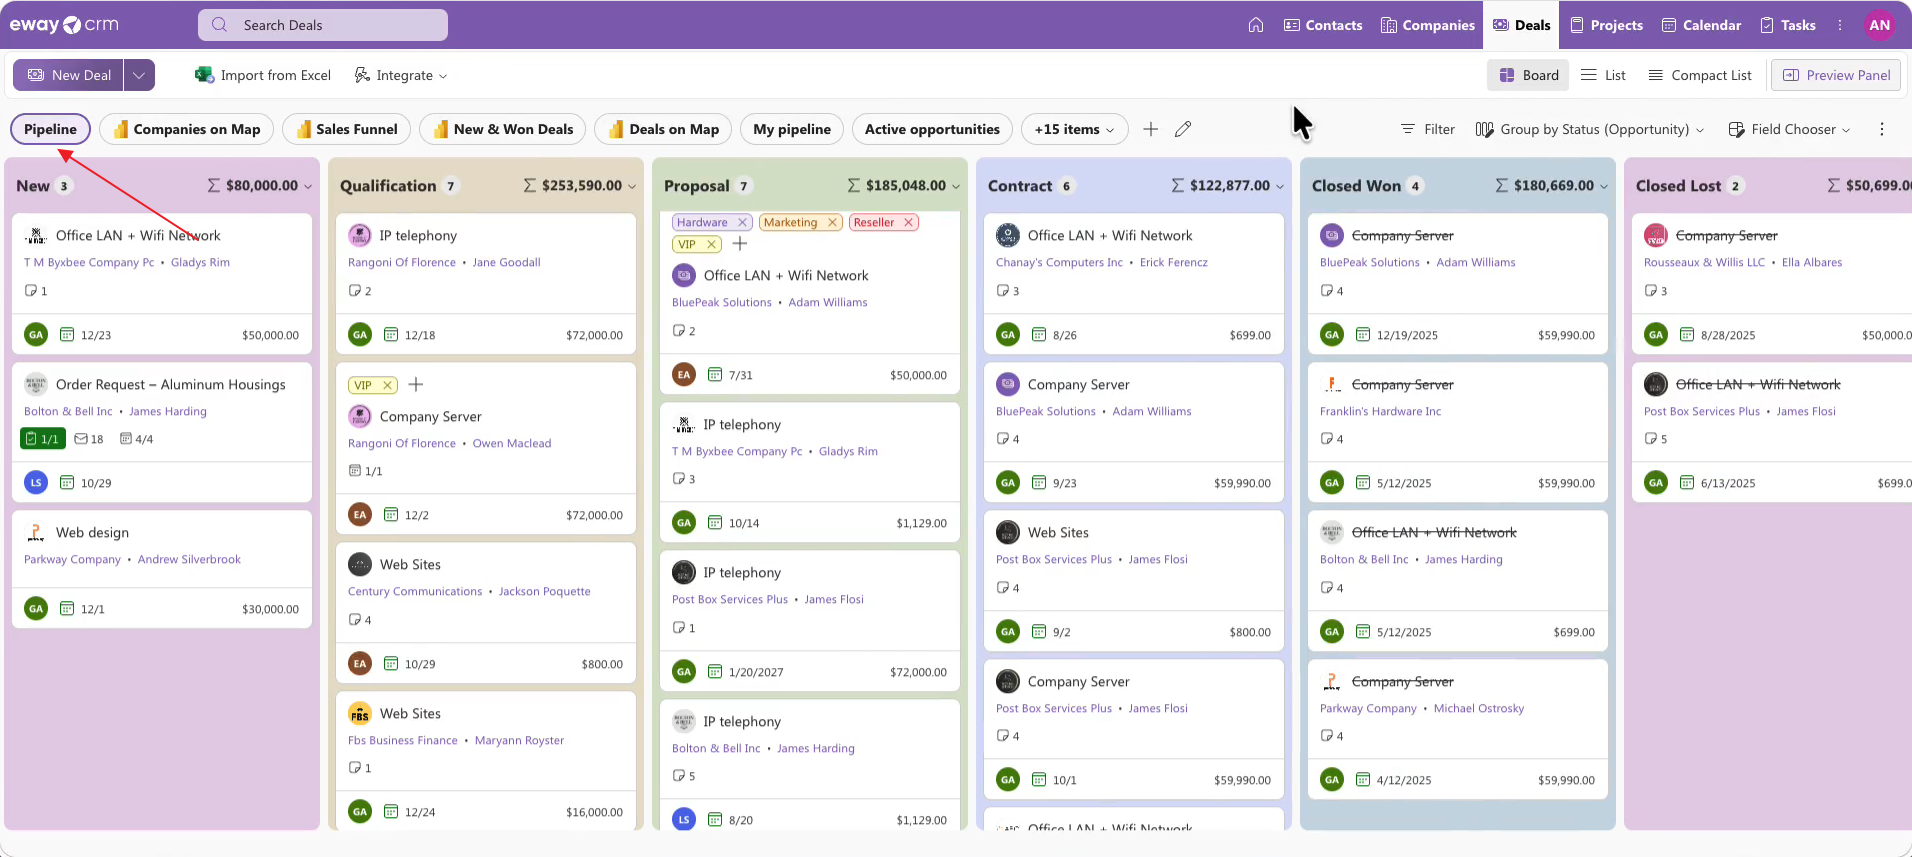
- In the Deals module, the Pipeline view shows your entire sales pipeline. Move deals through stages, assign tasks, and attach documents (see Board View).
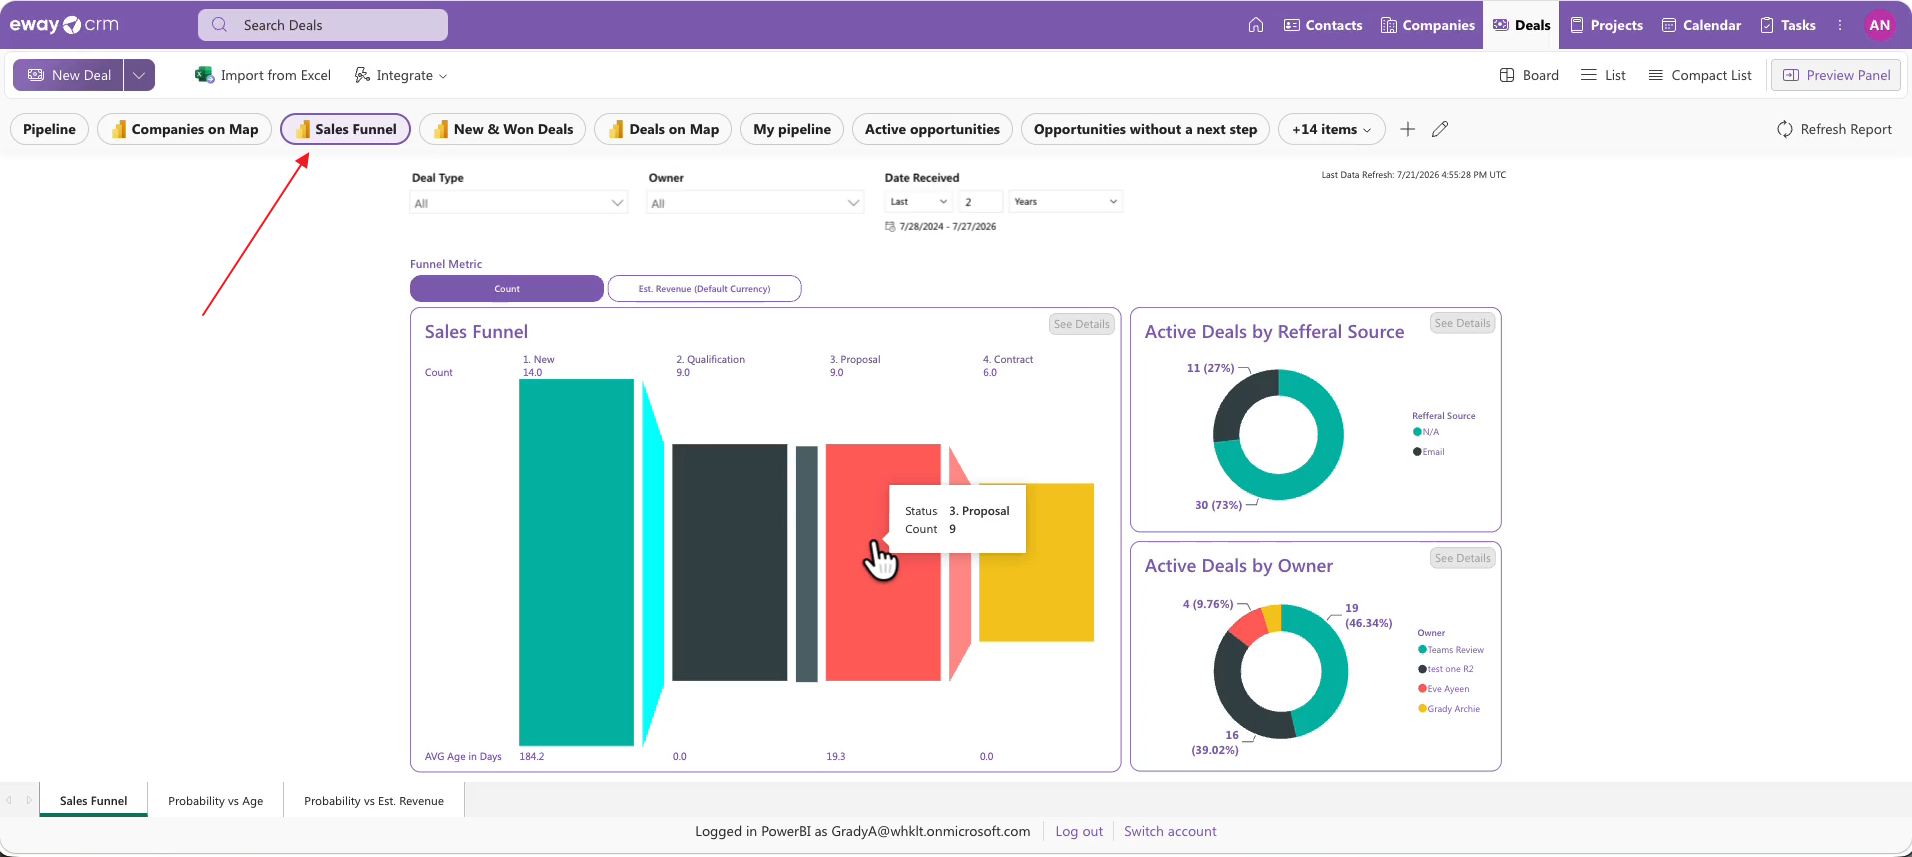
- The Sales Funnel view shows how successfully you convert deals between stages and where there’s room for improvement – a good topic for your next sales meeting. For more insights, open Deals on Map to plan your next business trip, or New & Won Deals. All of these are Power BI reports, and thanks to the Microsoft-certified connector, you can create your own.
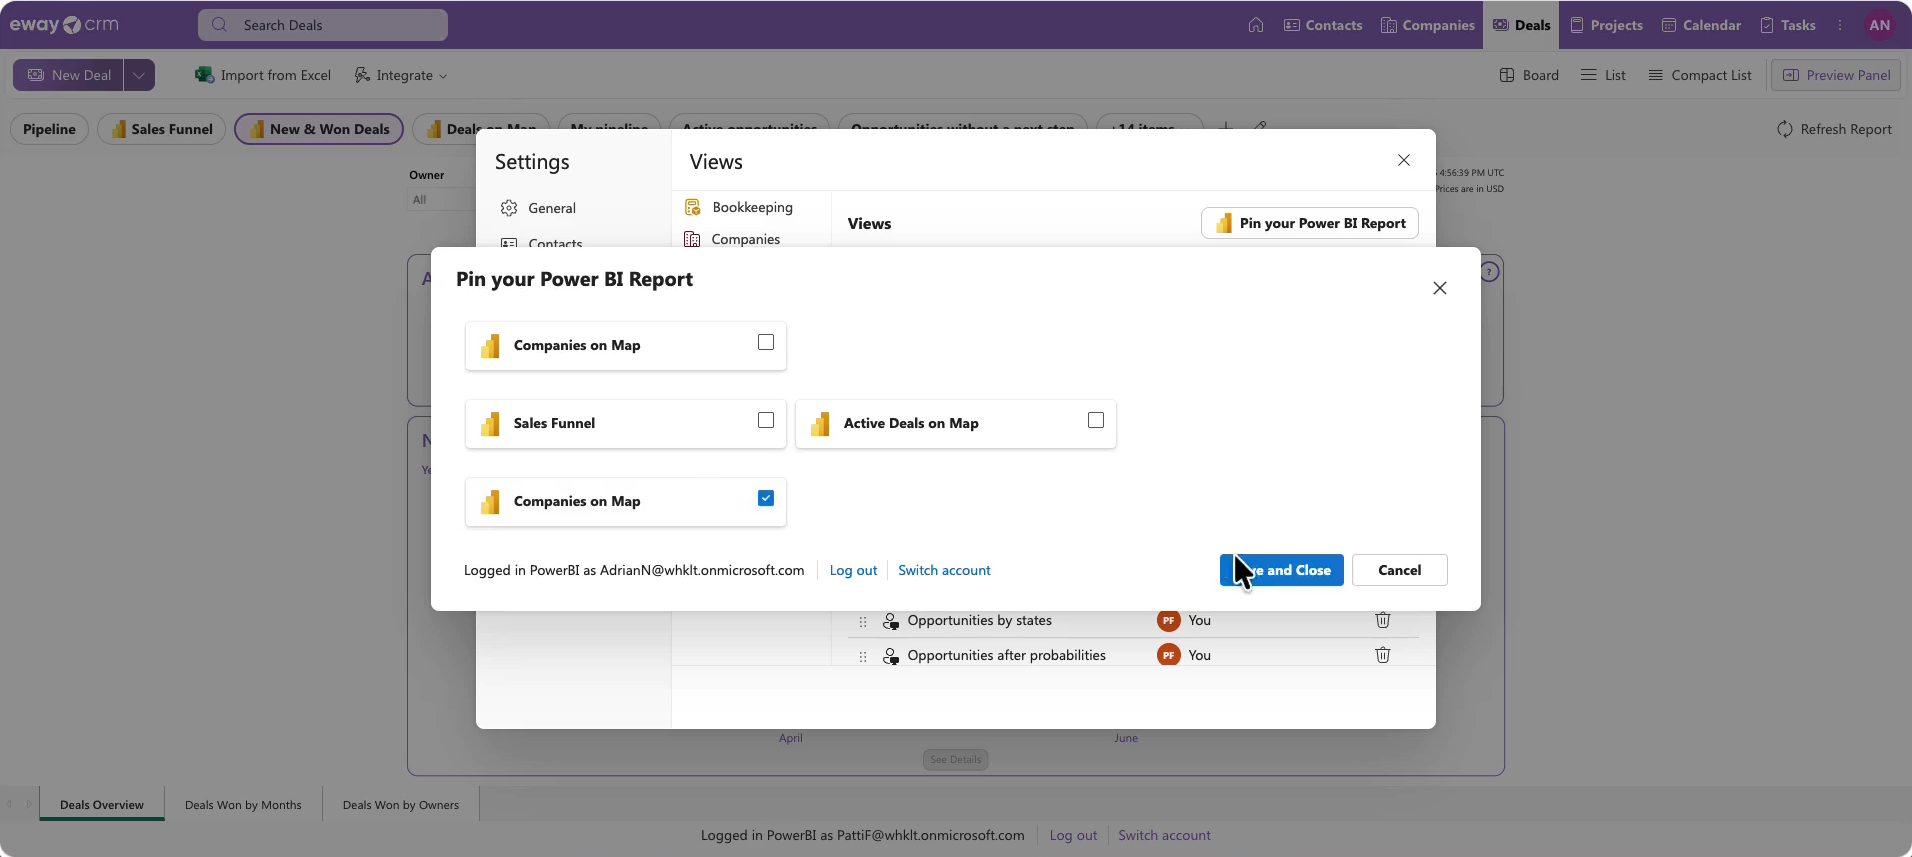
- To pin your own report to the navigation bar, click the pencil next to the views, click Pin your Power BI Report, select the report, and click Save and Close. You can reorder the views by dragging them. See Pin Power BI Reports in Your eWay-CRM.
What’s Next
eWay-CRM is a fully-fledged and highly customizable CRM. You can create custom fields, workflows, and Word templates, set permissions, and integrate with Mailchimp or various lead capturing tools – directly or via Zapier or Power Automate. Check out our other guides and videos, or reach out to us. We’re here to help.
Was it useful?

Thank you for your feedback.
2 


