Customize an Existing Workflow
Applies to
Tutorial for
Workflow Introduction
Workflow represents a set of steps everybody needs to follow to close a sales opportunity or finish a project. It corresponds to a company’s standard internal processes and allows users to automate them to ensure that everyone follows the same steps. Workflow can automatically generate tasks, send email notifications, check for mandatory fields, or make sure all proper documents are attached. In eWay-CRM, you can set up your own workflows in Deals, Projects, Documents, Marketing Campaigns, Bookkeeping Records, Time Sheets, Leaves, and Bonuses.
The workflow panel is displayed at the top of a dialog box.

The different colors give a different meaning to individual statuses:
 | Blue background: the current status of the item. |
 | Green background: available statuses you can click on. |
 | Grey background: not active. |
 | White background: the new status you clicked on before saving. |
Basic Workflow
How to Edit Workflow
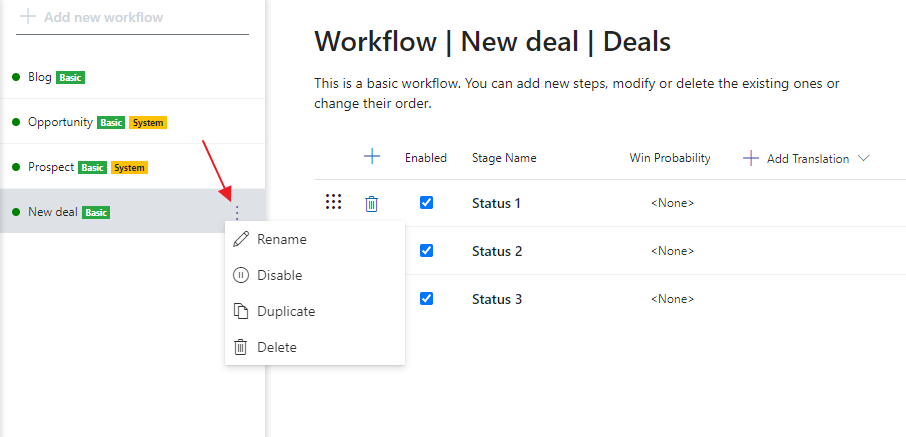
- Click the link to go to the setting of the deal workflows. You need to have eWay-CRM account with administrator permissions to do so.
- Click three dots next to the name of the deal type. You have these options:
- Rename – rename the type (not possible for system types)
- Disable – the type will not be used (cannot be seen in the Type field)
- Duplicate – it creates new type wit statuses of this existing one so there is no need to create everything from the scratch when types are similar
- Delete – it deletes the type with its workflow (not possible for system types and types in use)
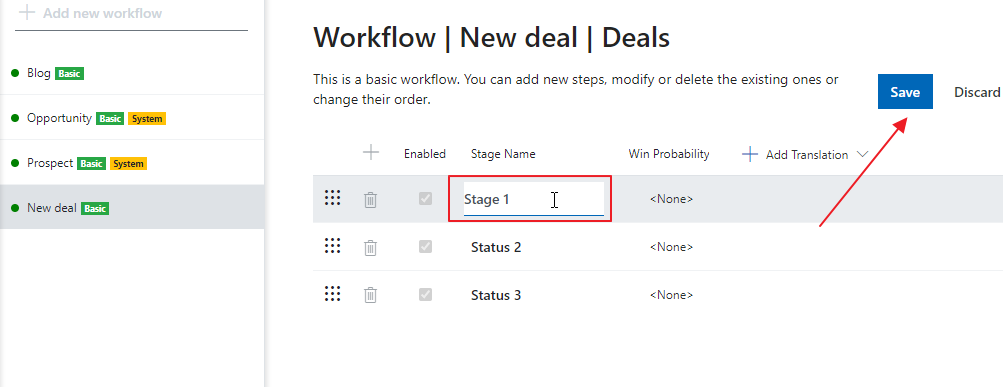
How to Rename a Status
- In the Workflow section, the Deals module (in our case), select the type and just click on the name of the status. Just rewrite the name and save it.
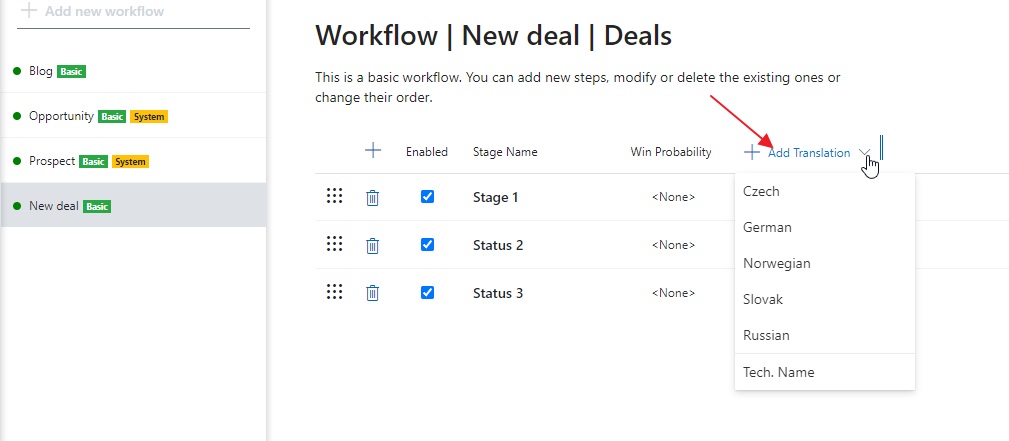
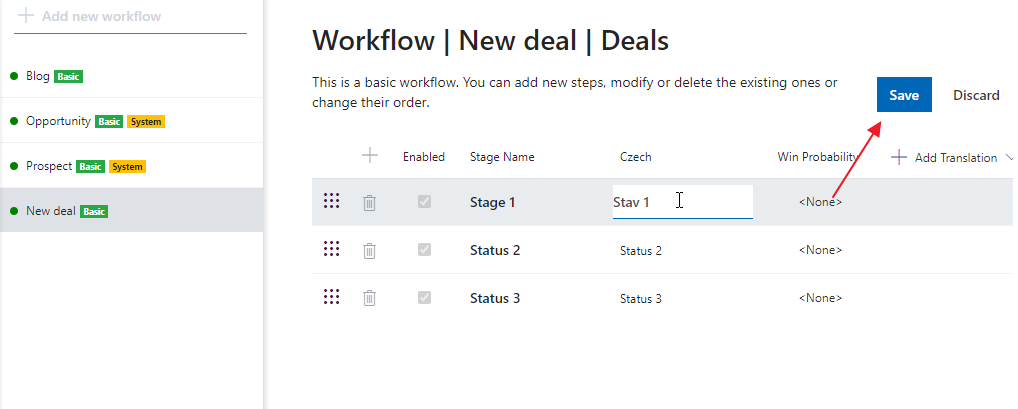
- You can also manage translations. Just click Add Translation and select the language.
- Click the name of the status you want to rename in the column of the chosen language. Rename it and save the change.
How to Add or Hide a Status
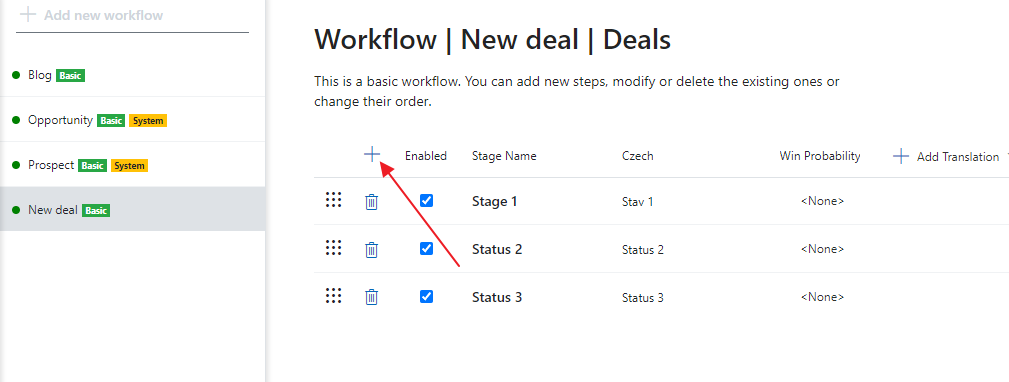
- You can add new status easily by clicking the + sign.
- On the bottom row, you can write the name of new status. Save it.
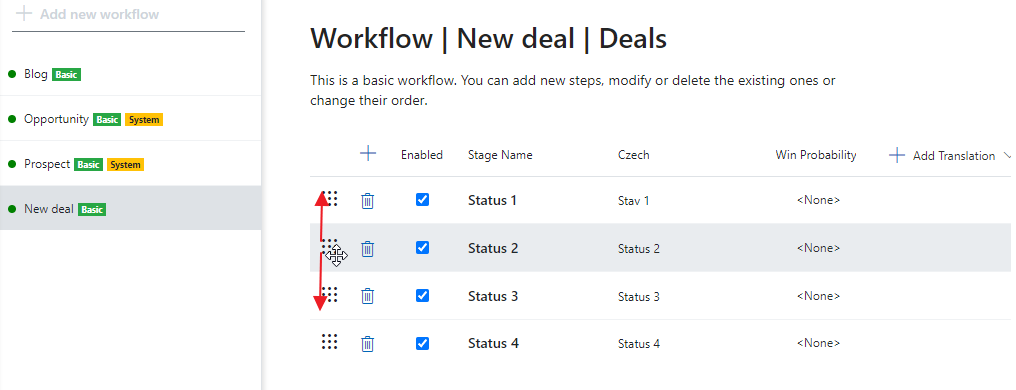
- If you drag the icon on the beginning of the row, you can drop the status on any position you need.
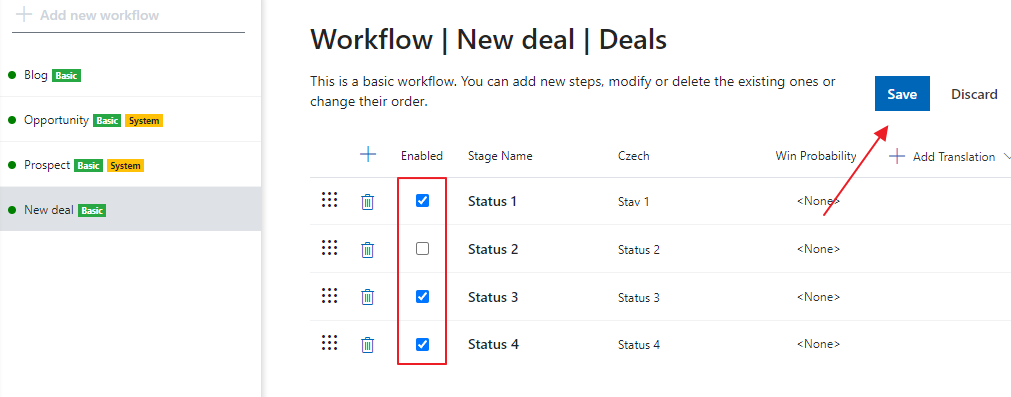
- If you want to hide the status but net delete it, just unmark its check-box in the Enabled column. The status will not be visible in eWay-CRM and users cannot go to it. Save the change.
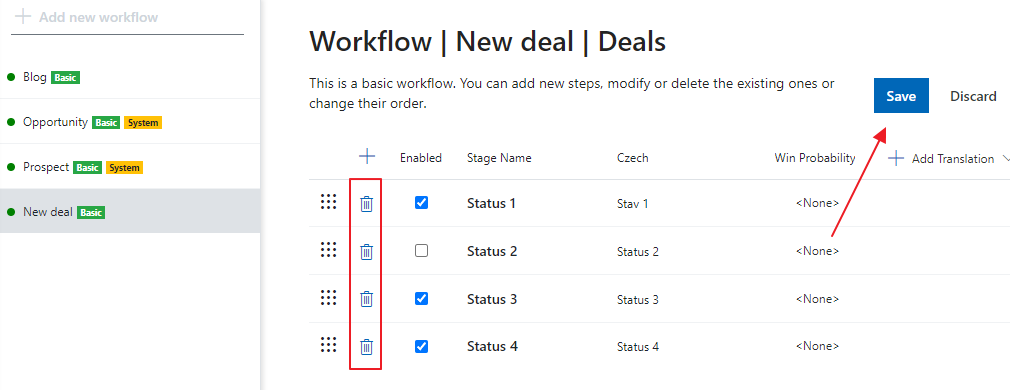
- If you want to delete the status, just click the bin in its row. You can delete only those statuses that are not used for any item. Click Save after deleting.
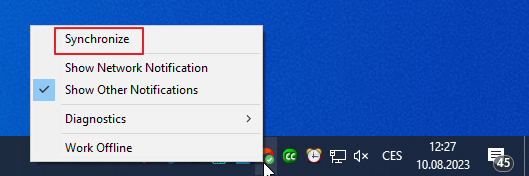
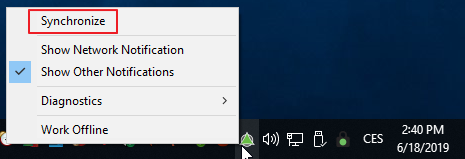
- In eWay-CRM Desktop, wait for 30 seconds for automatic synchronization or synchronize changes manually. To do that, right-click on the eWay-CRM agent in the system tray and select Synchronize.
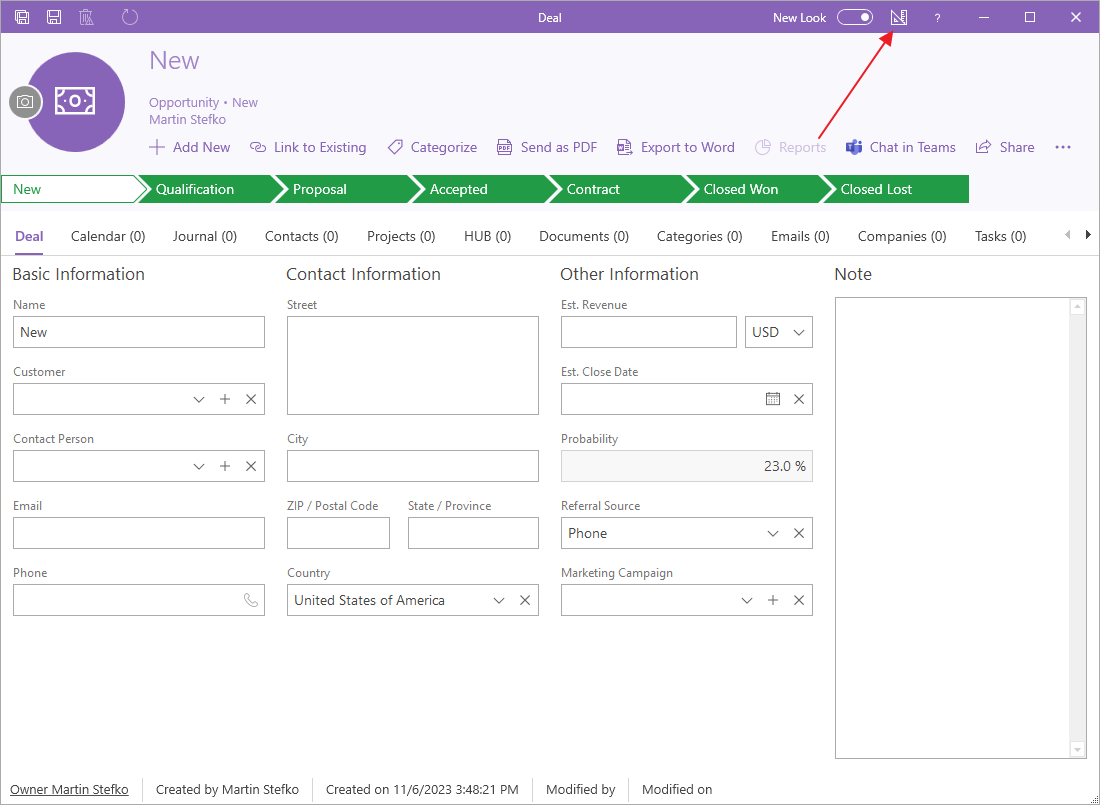
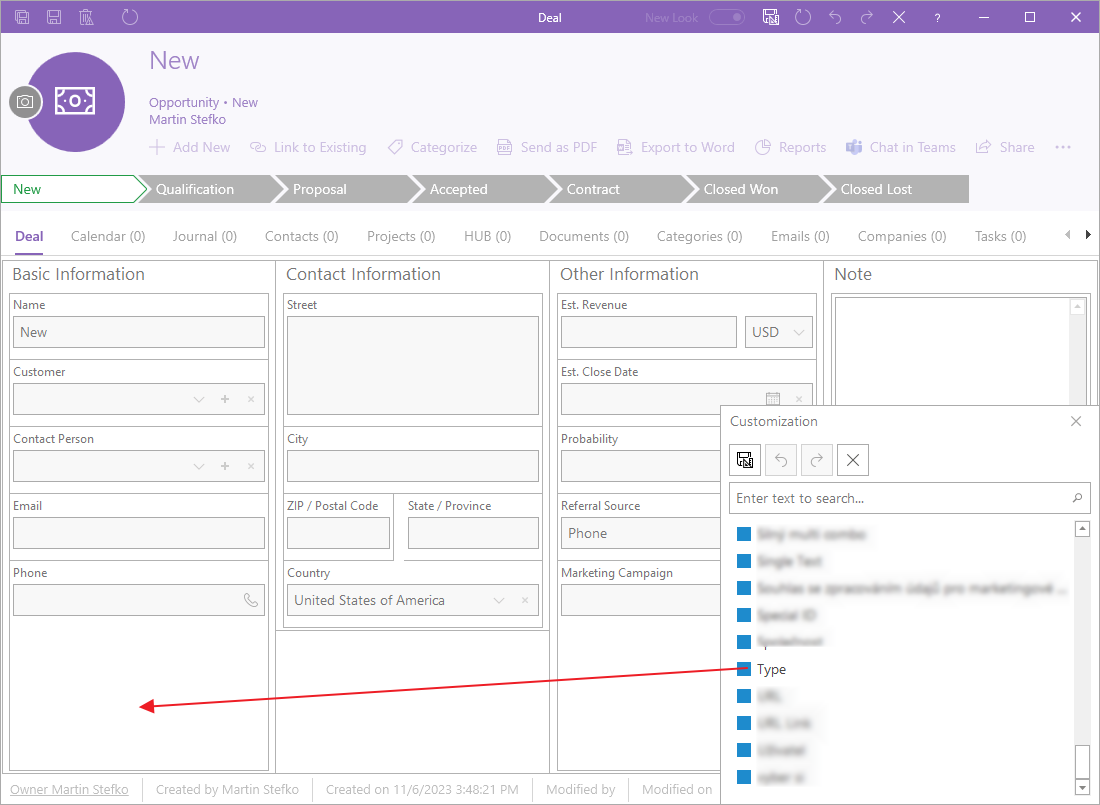
- Now, you can open a deal and change its type to see and work with your new workflow. If you cannot see the Type field in eWay-CRM Desktop, just click the Form Designer icon in the top toolbar of the dialog.
- Here, drag and drop the Type field into the dialog and save it for all types. For more information about own forms, please go to Create Custom Forms.
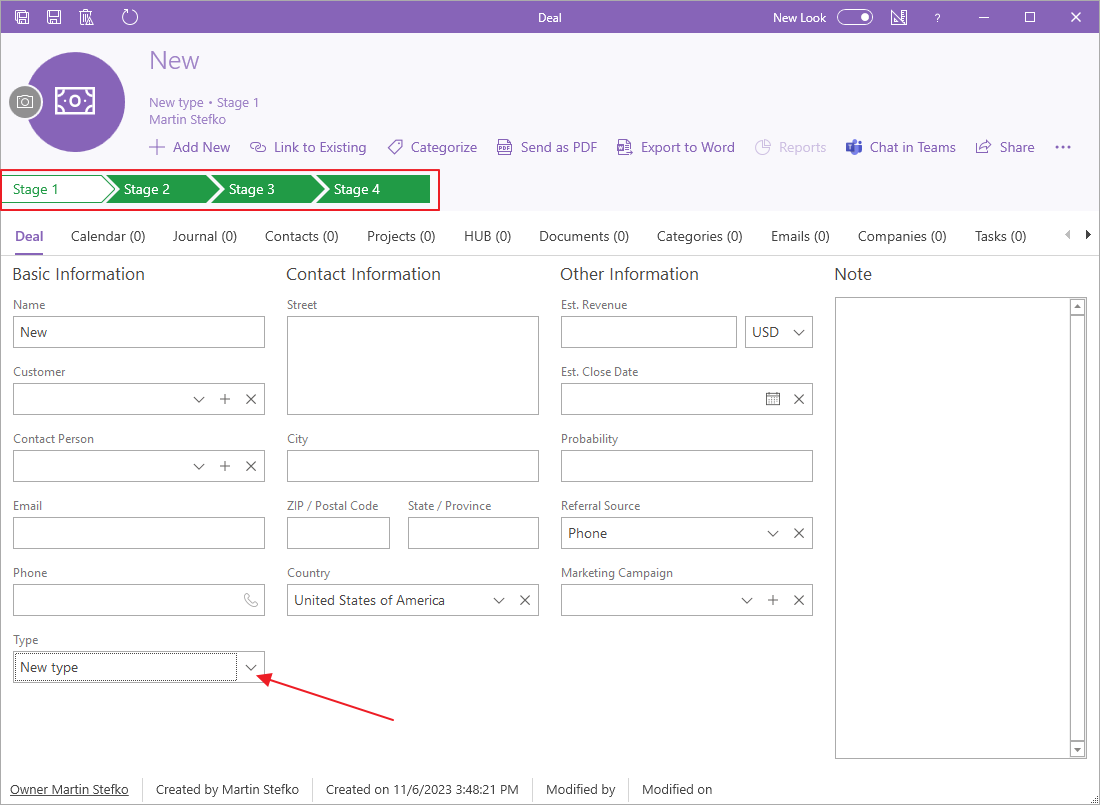
- Now, you can change the type to one with your new workflow – you can see it in the part of the dialog above the fields and their values.

Advanced Workflow
How to Rename or Hide Statuses
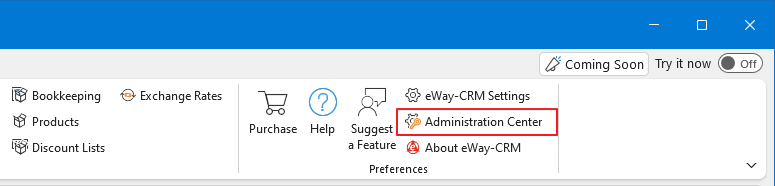
- Press SHIFT and click Administration Center on the eWay-CRM ribbon in Outlook Desktop.
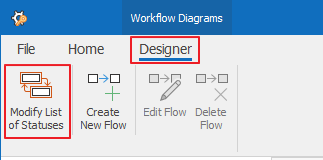
- Click Workflow Diagrams > Deal – Opportunity. Clicking the workflow in the list selects it and for advanced workflows a list of transitions between statuses in this workflow will be displayed. Basic workflow does not have transitions displayed, because you can freely change between statuses.
- Click Modify List of Statuses in the top left corner of the window.
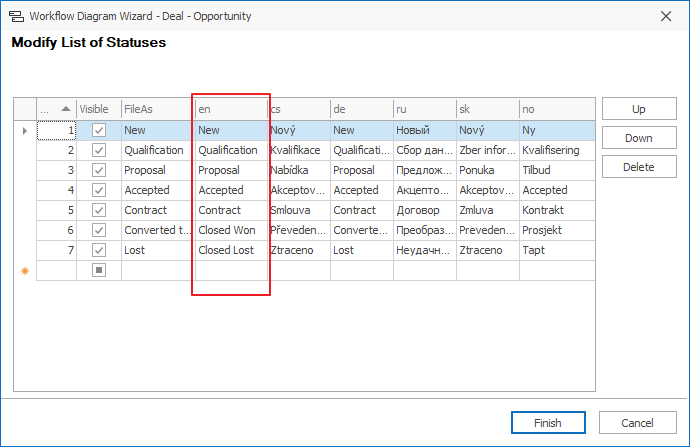
- In the new window change a name (names) of a status (statuses) in the column “en” (which stands for English) and click Finish.
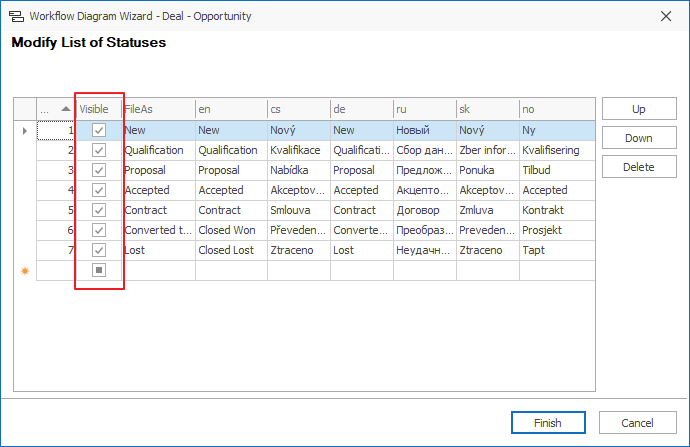
- Or, if you need fewer statuses and want to hide an unnecessary status (statuses), you can define which statuses are visible in the column Visible.

How to Add a Status
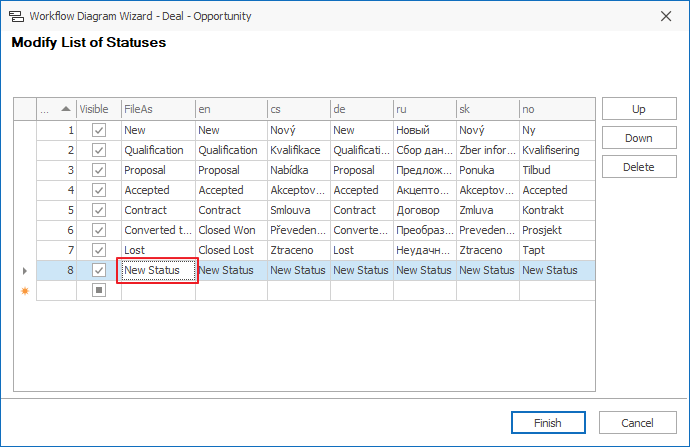
- Go to the Modify List of Statuses window as described above, and type the name of a new status in the FileAs Then press TAB or the down arrow button on your keyboard.
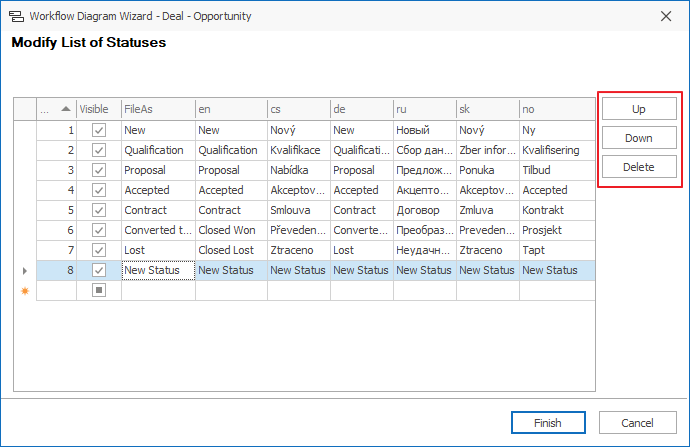
- You can move the status up and down using buttons on the left side of the item window. Click Finish.
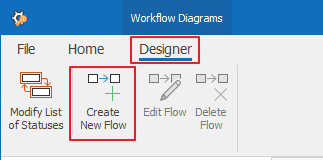
- Now, you need to link the new status with other statuses in the workflow. Click the Create New Flow button in the top left corner.
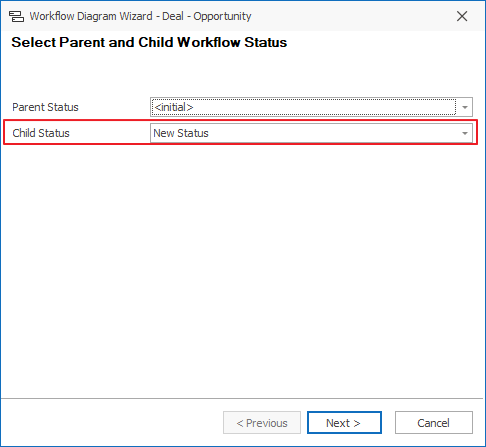
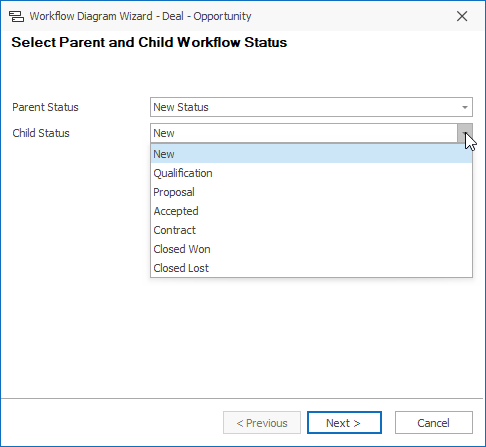
- A new window will appear with two fields: a parent status (a status you are moving from) and a child status (status you are moving to). You will find the new status in the second field as a child status.
- You need to link the new status with each parent status from the 1st field. To do that, click Next and Next on the next step.
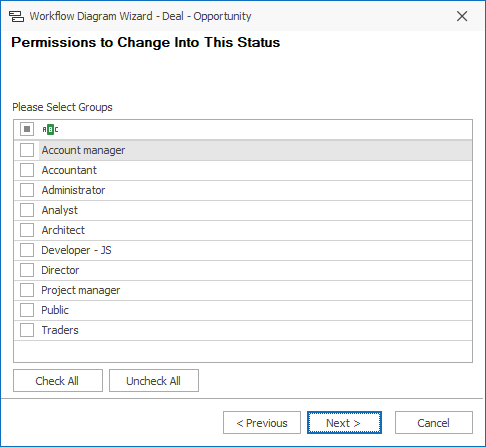
Select the group of users that will be able to change statuses or click Check All to enable it for all users. Then, click Next, Next on the next step, and Finish. - Now, click the Create New Flow button again, select the next parent status in the list and go through the wizard again. Do the same for each parent status.
The new status will also act as a parent status for other statuses. Link it with each child status you see in the drop-down menu. - In eWay-CRM Desktop, wait for 30 seconds for automatic synchronization or synchronize changes manually. To do that, right-click on the eWay-CRM agent in the system tray and select Synchronize.
- Now, you can open a deal and change its type to see and work with your new workflow. If you cannot see the Type field in eWay-CRM Desktop, just click the Form Designer icon in the top toolbar of the dialog.
- Here, drag and drop the Type field into the dialog and save it for all types. For more information about own forms, please go to Create Custom Forms.
- Now, you can change the type to one with your new workflow – you can see it in the part of the dialog above the fields and their values.
Was it useful?

Thank you for your feedback.

