Projects - Master eWay-CRM
Customers are ready to do business with you. It’s time to kick the project off and deliver.
Step 1: Create a Project
You will never get lost in projects as long as you keep them in eWay-CRM. Set the project up, choose your team and plan a budget.
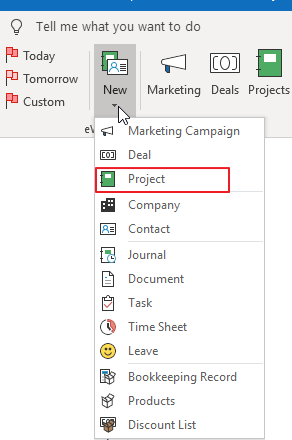
- Click New > Project in the eWay-CRM ribbon.
- Fill in all the necessary information. We strongly recommend entering Customer, Contact Person, Name, and Estimated End.
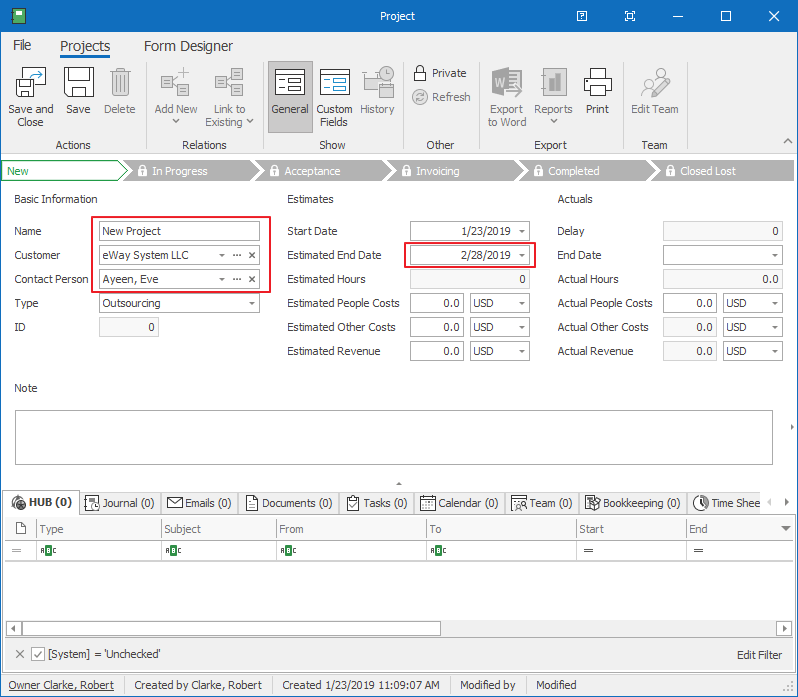
- Save the record.
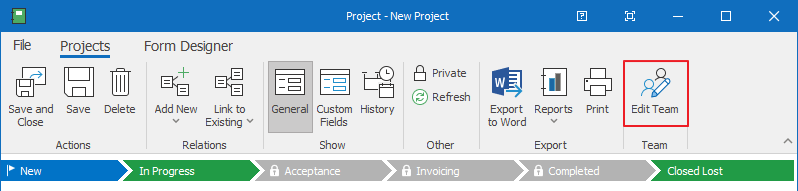
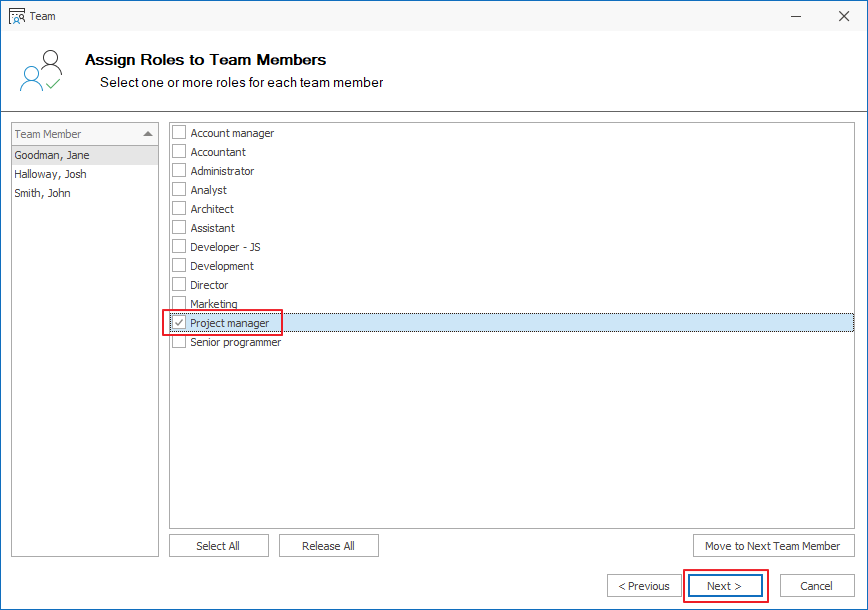
- If you want to add other team members to the project team, click Edit Team.
- Choose your colleagues and click Next.
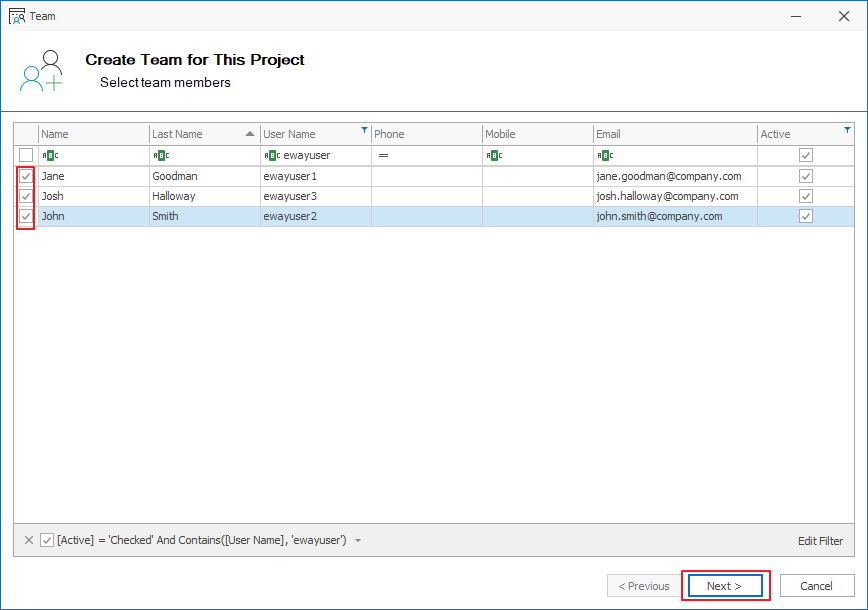
- In the following screen, you can assign their roles. You don’t need to mark everyone. Just make sure you chose a Project Manager – the one who is responsible for the job. Confirm by OK.
![]() Tips for you:
Tips for you:
If you work with module Deals as well, a new project is automatically created right as you convert a deal into a project.
If you have received an email from your customer, you can convert it to a project right away. Just follow the steps at How to Create Projects from Emails page.
Step 2: Plan Human Resources
To make sure that your team has enough capacity for the project, check your team members’ availability and plan accordingly.
- Go back to the list of projects. In the eWay-CRM ribbon, click Resource Plan.

- You will see a list of your projects along with the team members assigned to each of them. You will also find a list of calendar weeks in the following columns.

- Click into each cell and type down how many hours you’d like to allocate each team member to the specific project in the selected week. Don’t worry when values change to red. It means that the person is overloaded. In the next tutorial, you will learn, how to add the employees’ availability.

- You can copy-paste the values to speed up the process.
Step 3: Create and Assign Tasks
Use tasks to establish deadlines and keep your projects up to date. You can review all the tasks assigned to a particular project at any time in both eWay-CRM and Microsoft Outlook TODO list.
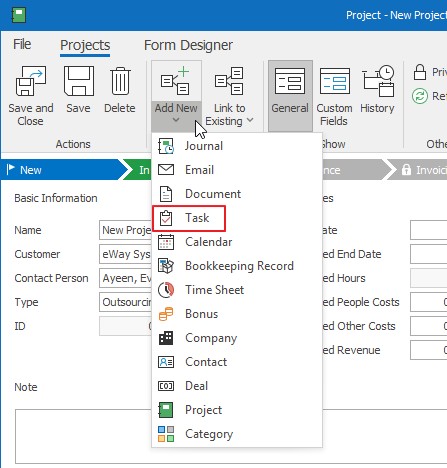
- Click Add New and choose Task.
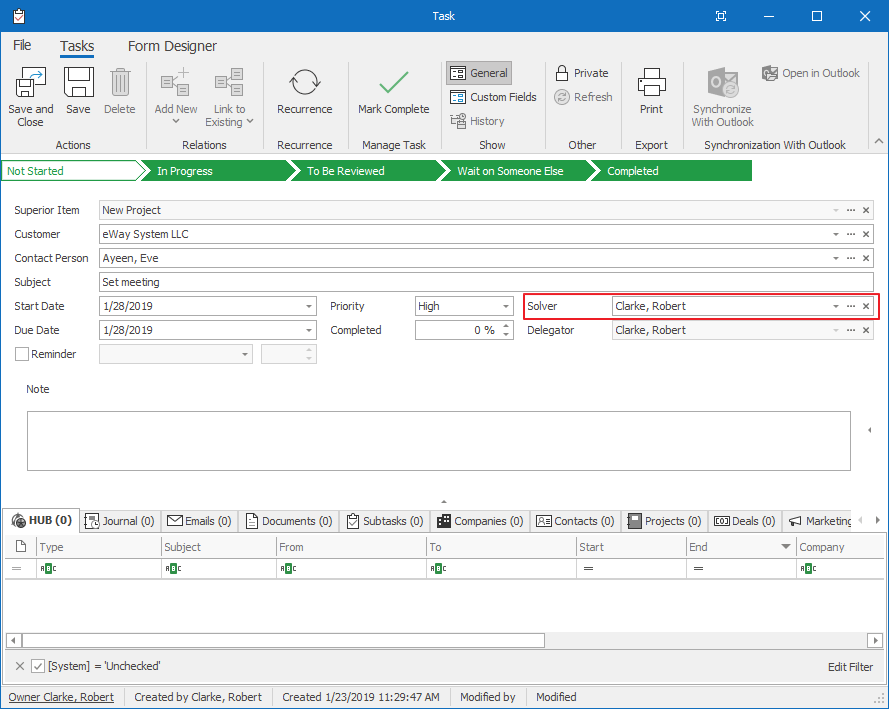
- If you want to assign a task to somebody else, click the Solver field and select new user. Save the task.
![]() Tip for you: Sooner or later you will need to add tasks to an existing project. You can create a task right in Microsoft Outlook and link it with the eWay-CRM project. Find out how to do it.
Tip for you: Sooner or later you will need to add tasks to an existing project. You can create a task right in Microsoft Outlook and link it with the eWay-CRM project. Find out how to do it.
Step 4: Track Your Communication History
In most projects, customers specify their needs and provide feedback. Write down important notes and attach emails to keep everything in one place.
Attaching Emails
- You’ve already learned how to send an email from the contact cart. Let’s have a look at how to attach an incoming email to a project manually.
- Open the email in Outlook.
- In the bottom section, you will find a field Superior Item. Select a project. That’s it.

- You can click on three dots to open the project. The email will be available under tabs HUB and Emails.
![]() Tip for you: To diligently save outgoing emails into eWay-CRM, follow this article.
Tip for you: To diligently save outgoing emails into eWay-CRM, follow this article.
Taking Notes
- Click New > Journal in the eWay-CRM ribbon.

- Fill in the Subject and Type. Write down details of the call/meeting into the Note. Choose a project in the Superior Item.
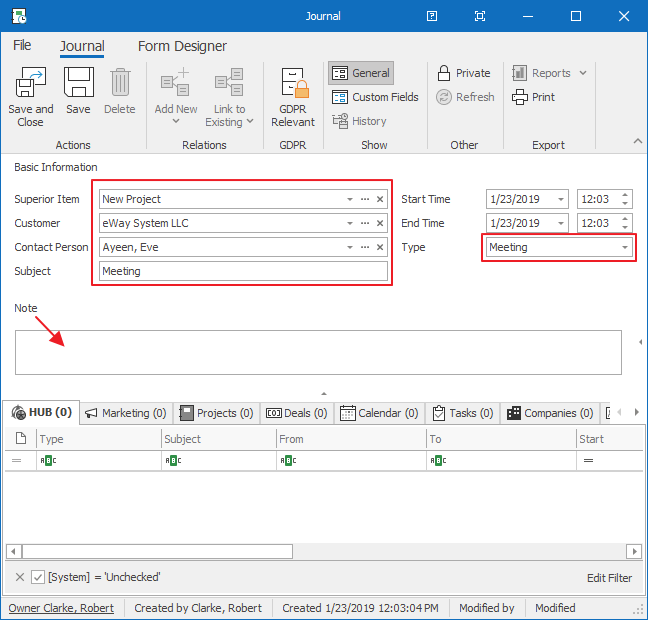
- Save and close the journal.
![]() Tip for eWay-CRM Premium: You can create a journal in eWay-CRM Mobile too. To find our more, please visit this link.
Tip for eWay-CRM Premium: You can create a journal in eWay-CRM Mobile too. To find our more, please visit this link.
Step 5: Use Time Sheets
Timesheets can help you understand how much time people spend on particular projects. Use them to plan better and keep budgets under control.
- To fill in your daily time sheet, click New > Time Sheet in the eWay-CRM ribbon.
- Choose a Project, fill in the Subject, Start, and End. Optionally, you can change the type and enter a brief description into the note.
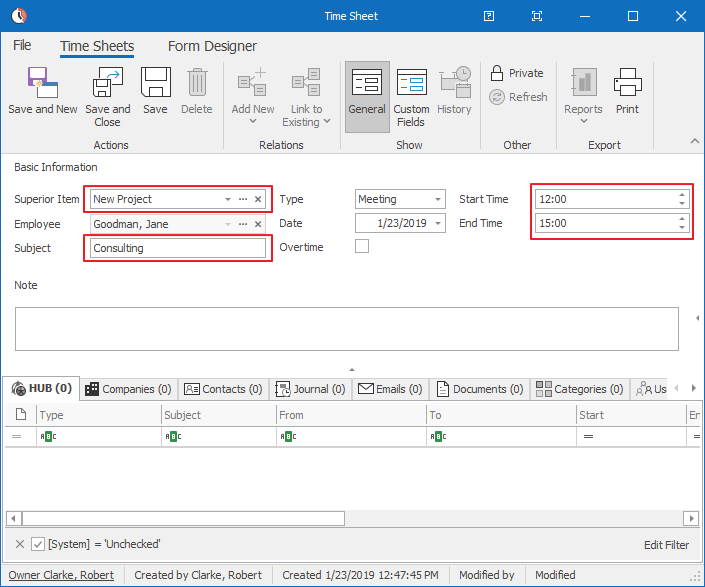
- If you click Save and New, eWay-CRM will pop up with a new time sheet so that you can report another activity.
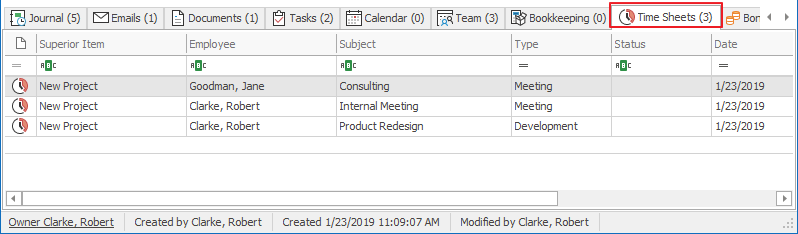
- In the end, you will find the summarized time sheets under the tab Time Sheets of the particular project.
![]() Tip for you: Together with the module Salaries, eWay-CRM can automatically calculate project people costs and keep the project profit up-to-date. Find out more here.
Tip for you: Together with the module Salaries, eWay-CRM can automatically calculate project people costs and keep the project profit up-to-date. Find out more here.
Step 6: Update the Project Status
As the delivery continues, you need to change the project status. Keeping order in your projects will help you get the total overview.
- Open a project.
- Click on the green status. It will turn white to signalize you where you want to move the project to.
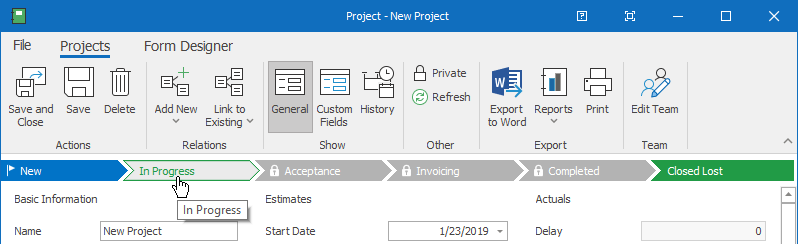
- Save and close.
- Use the project list to see all jobs and their stages.

Step 7: Issue an Invoice
Create invoices in eWay-CRM and link them to the corresponding projects.
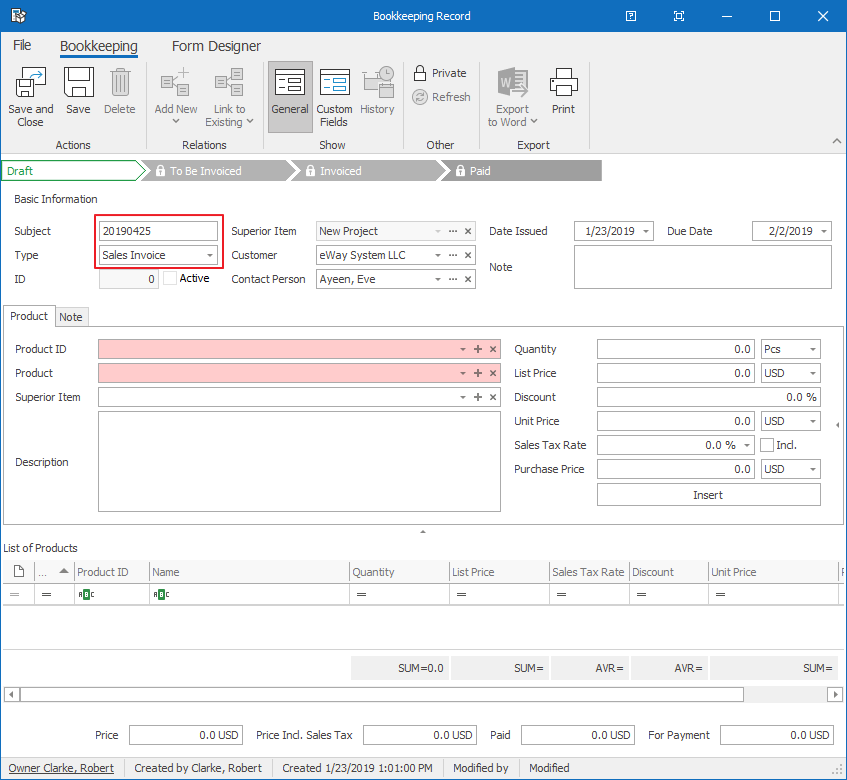
- Open a project.
- Click Add New and choose Bookkeeping Record.
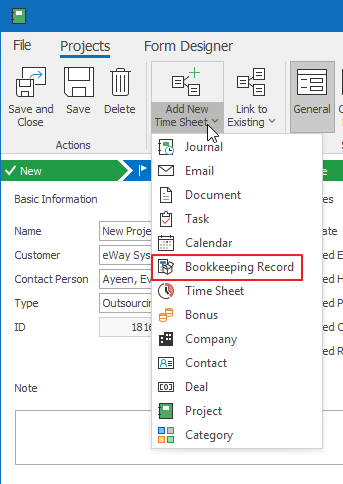
- Change the type to Sales Invoice and enter a short description into Subject.
- Add products/services into the bookkeeping record. Search them by the fields Product ID or Product. You can also change the Quantity, Unit price or apply a Discount. At the end, press Insert.
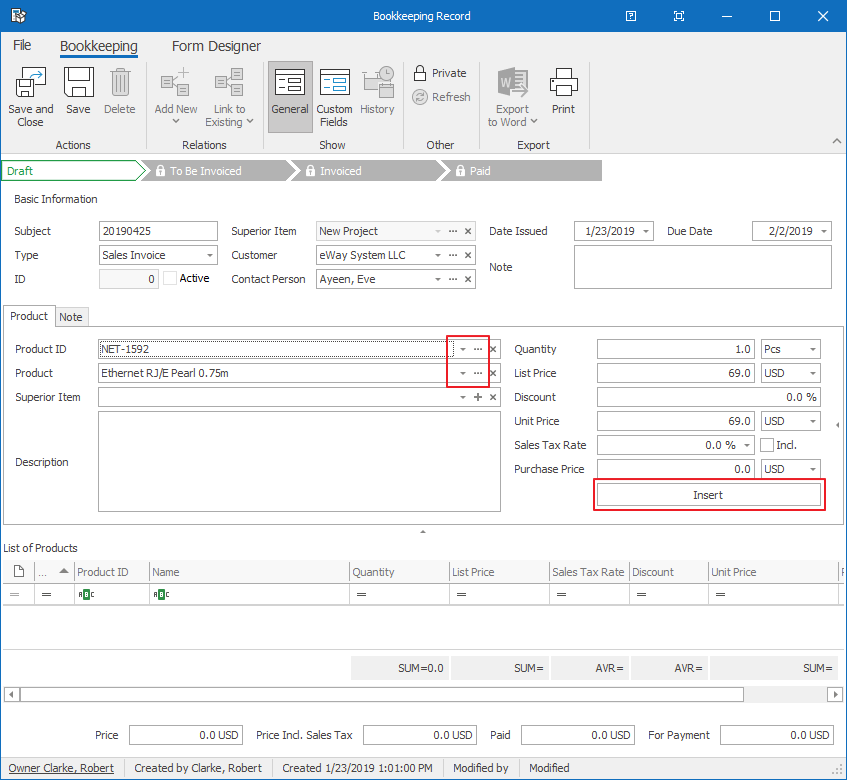
- As soon as the invoice is done, save it.
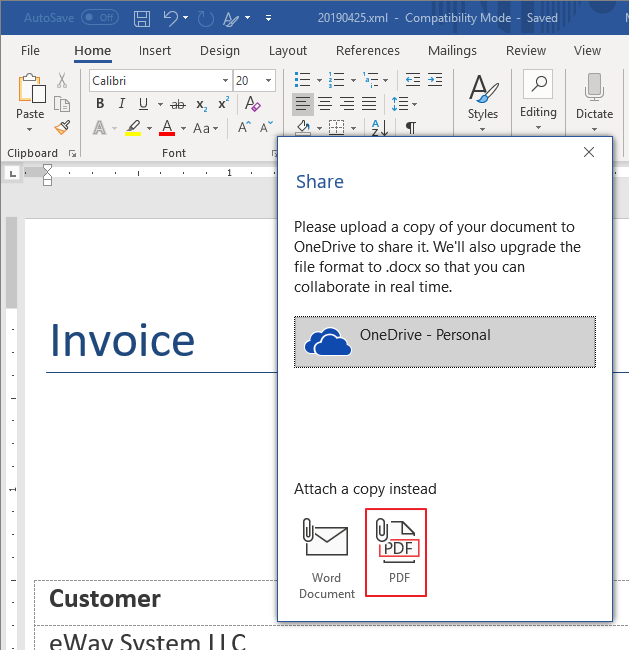
- Click Export to Word > Invoice (or Invoice VAT). A Microsoft Word template will open with predefined data. In the new version of Microsoft Word, you can click File > Share > Email > Send as PDF. A new email will appear with your invoice attached as PDF. Send the email.
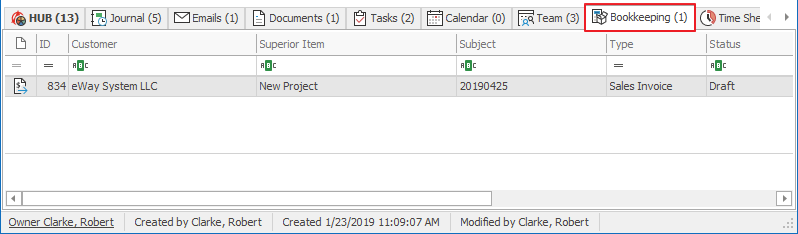
- If you go back to the project page, you will find your bookkeeping record in the HUB or under the tab Bookkeeping. Also, please note, that the project price changed according to the sales invoice.
![]() Tip for you: To add a purchase invoice, just choose the proper type in step (3). The invoice will appear under Other Costs on the project dialog.
Tip for you: To add a purchase invoice, just choose the proper type in step (3). The invoice will appear under Other Costs on the project dialog.
![]() Tip for eWay-CRM Premium: Have a look at your mobile app and find the project. You will see all the information in the HUB. This way, you can access your eWay-CRM data on the go.
Tip for eWay-CRM Premium: Have a look at your mobile app and find the project. You will see all the information in the HUB. This way, you can access your eWay-CRM data on the go.
Do you have questions? Our consultants have answers.
Do not hesitate to contact us.
You can also book our consultant. We will make a demo just for you.