From UA to GA4, Part 2: Step by Step Guide Made Easy

In this article series, I am exploring the transition from Universal Analytics (UA) to Google Analytics 4 (GA4).

Digital marketers must always be prepared to adapt and evolve to stay ahead of the curve. With the expected shutdown of Universal Analytics (UA), the time to transition to Google Analytics 4 (GA4) is now.
Remember, in the ever-changing world of digital marketing,
"Change is the only constant."
Heraclitus (Greek philosopher)
Welcome to Part 2 of our "UA to GA4" series!
Our first article delved into the fundamentals and key differences between Universal Analytics (UA) and Google Analytics 4 (GA4). We examined the reasons behind this shift and how it will impact the way we analyze data and optimize our digital strategies.
If you haven't read it yet, I recommend you start there to build a strong foundation.
Update: All articles are out!
From UA to GA4: A Step-by-Step Guide
In this part, we'll take a hands-on approach, walking you through the migration process step by step.
So, buckle up and get ready to elevate your data-driven marketing.
Important note: This guide is tailored specifically for those of you using the old UA and Google Tag Manager.
Content
- Step 1 - Configure Google Analytics 4
- Step 2 - Set up Your Tag Manager
- Step 3 - Verify That You Measure Data
- Step 4 - Additional Configuration
Step 1 - Configure Google Analytics 4
- Click on Admin (In your Google Analytics account).
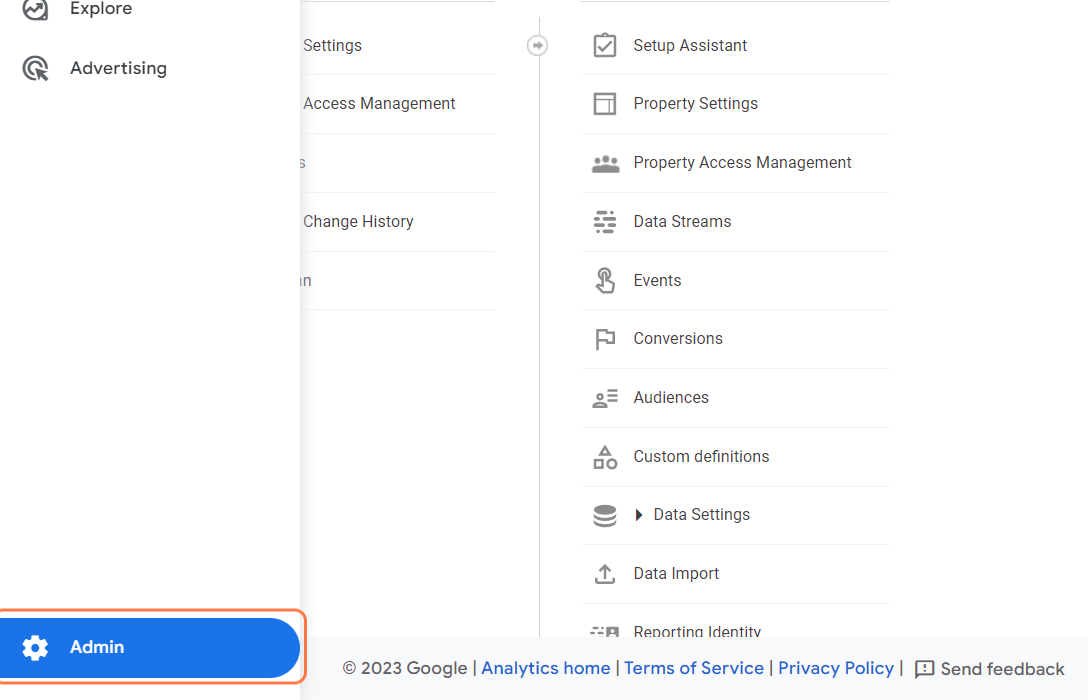
- Create a new property.
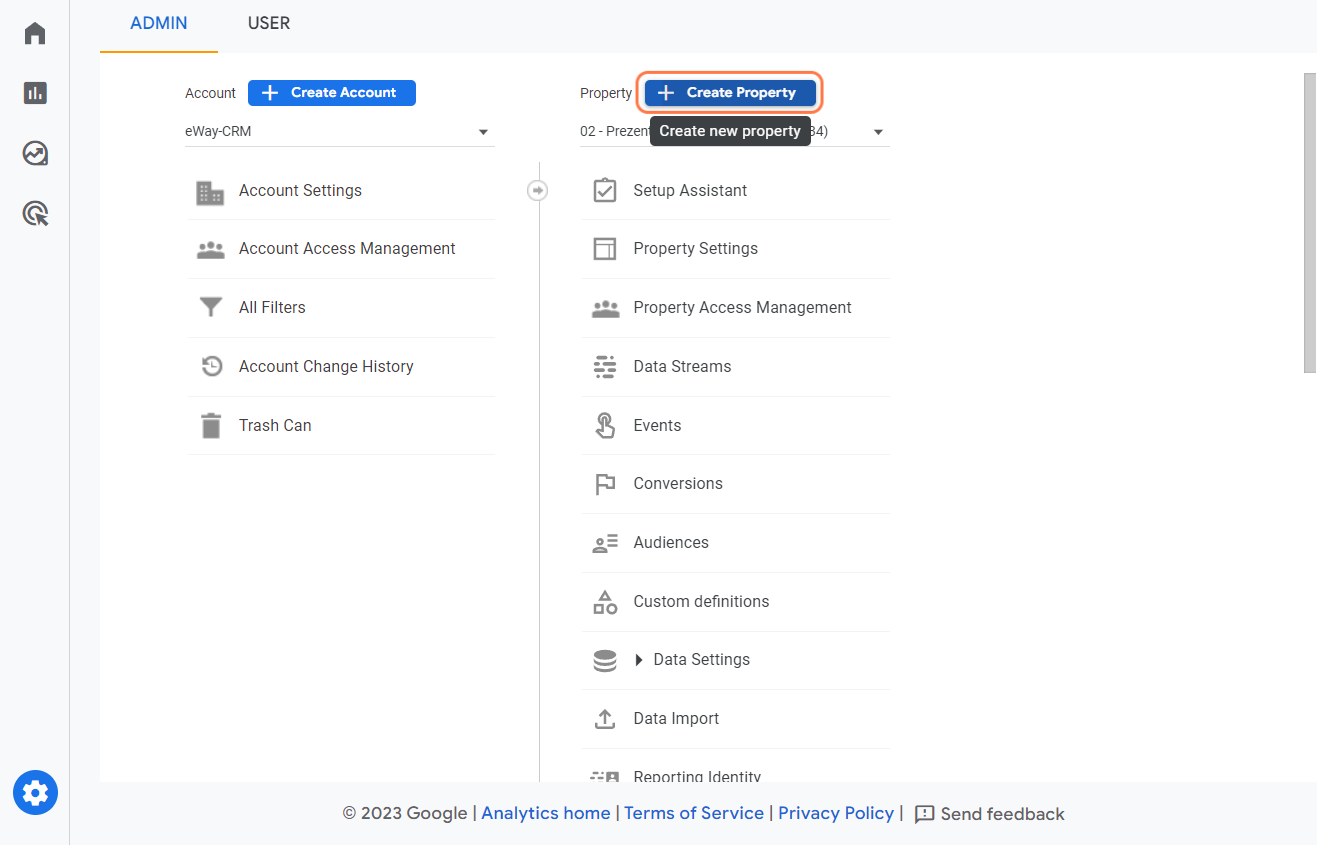
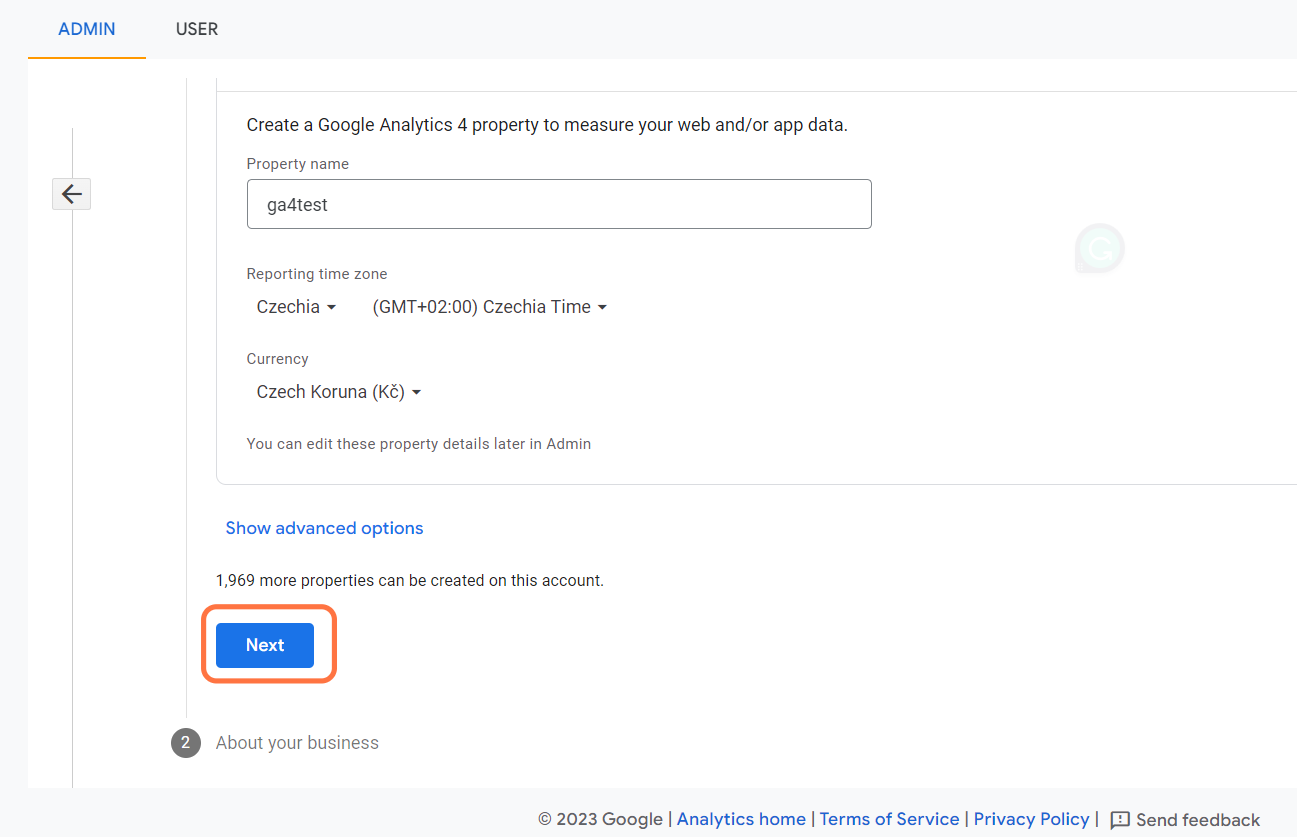
- Go through the property setup. It’s easy to navigate.
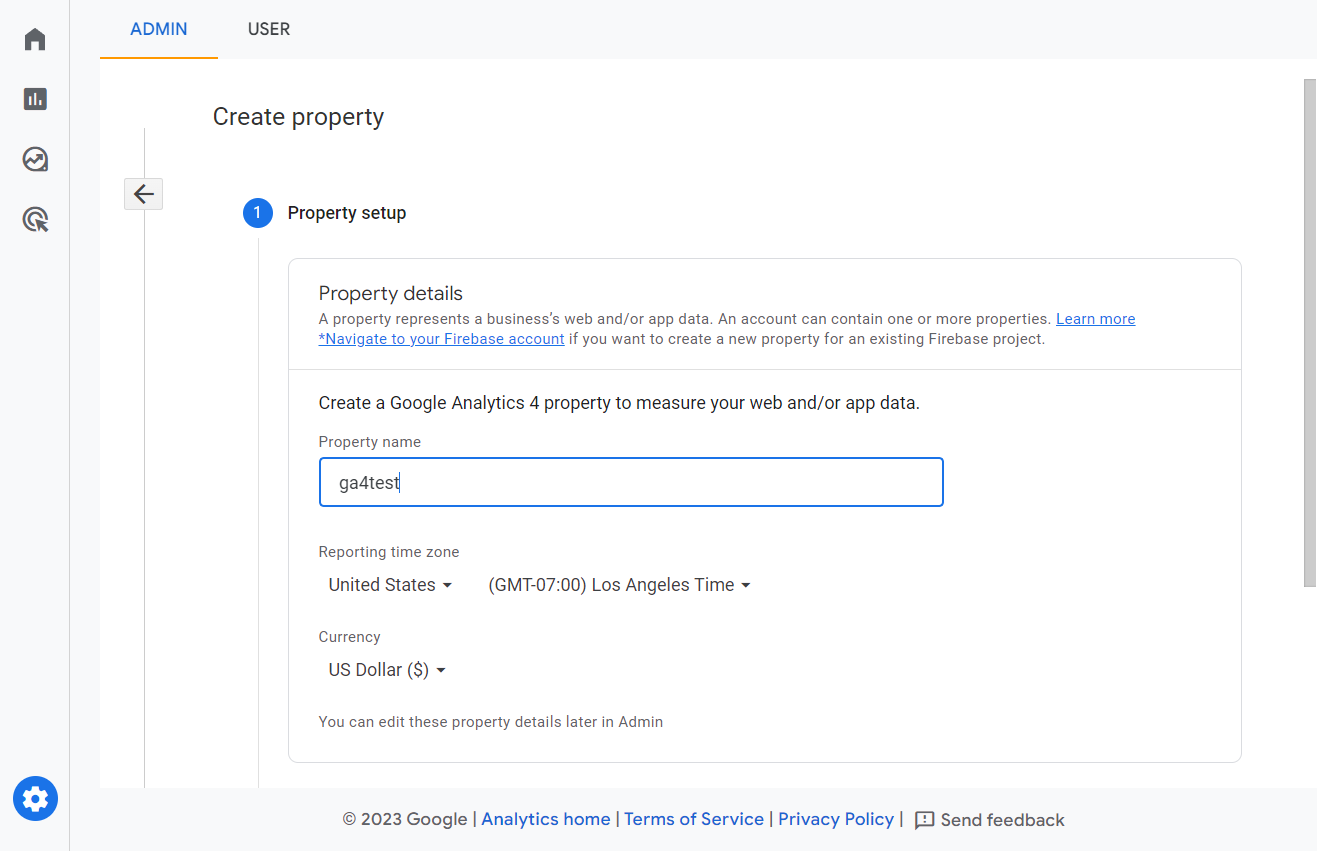
- After filling in your property details, click on Next. Alternatively, you can edit your property details later in the admin section.
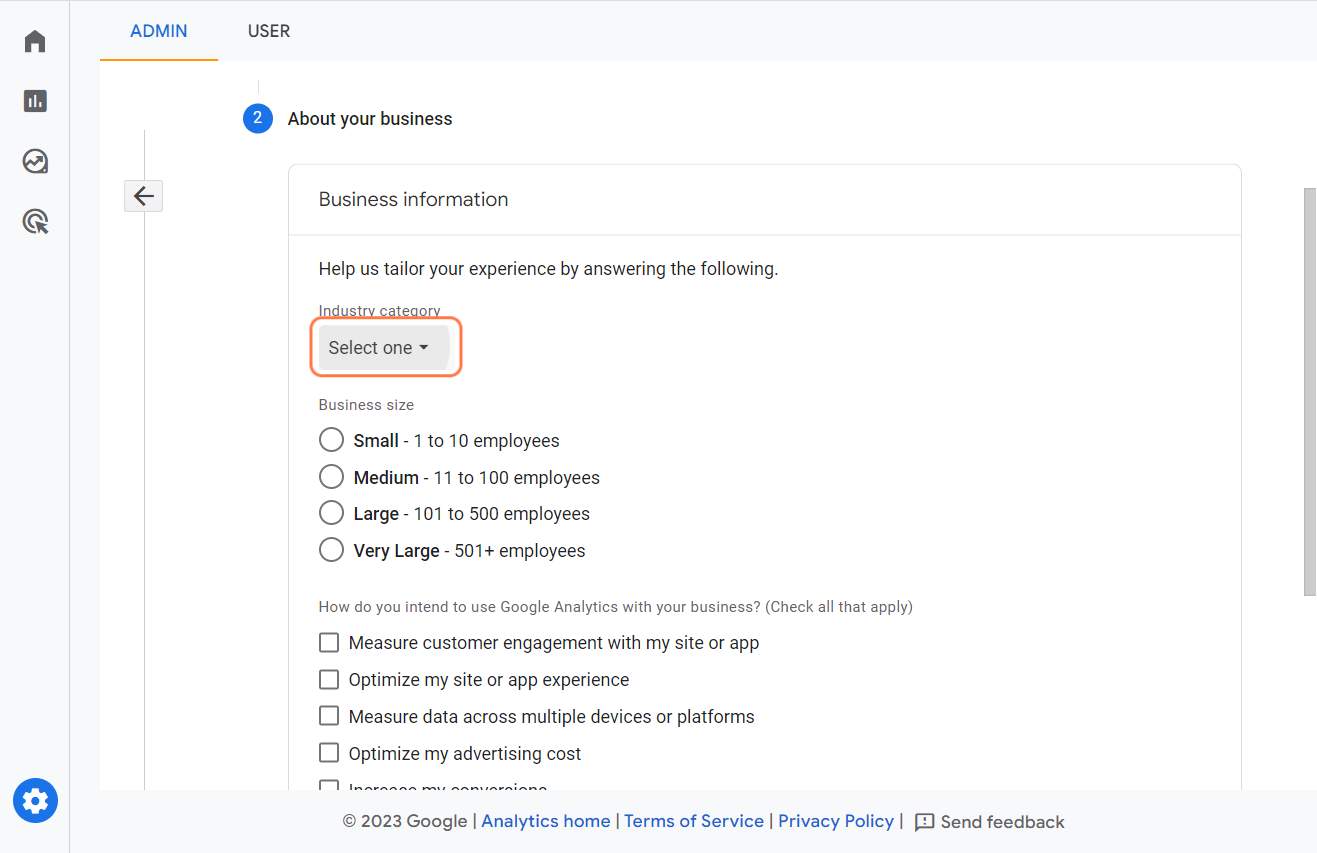
- "Business information" window will pop up. Try answering these questions. It’s easy to navigate.
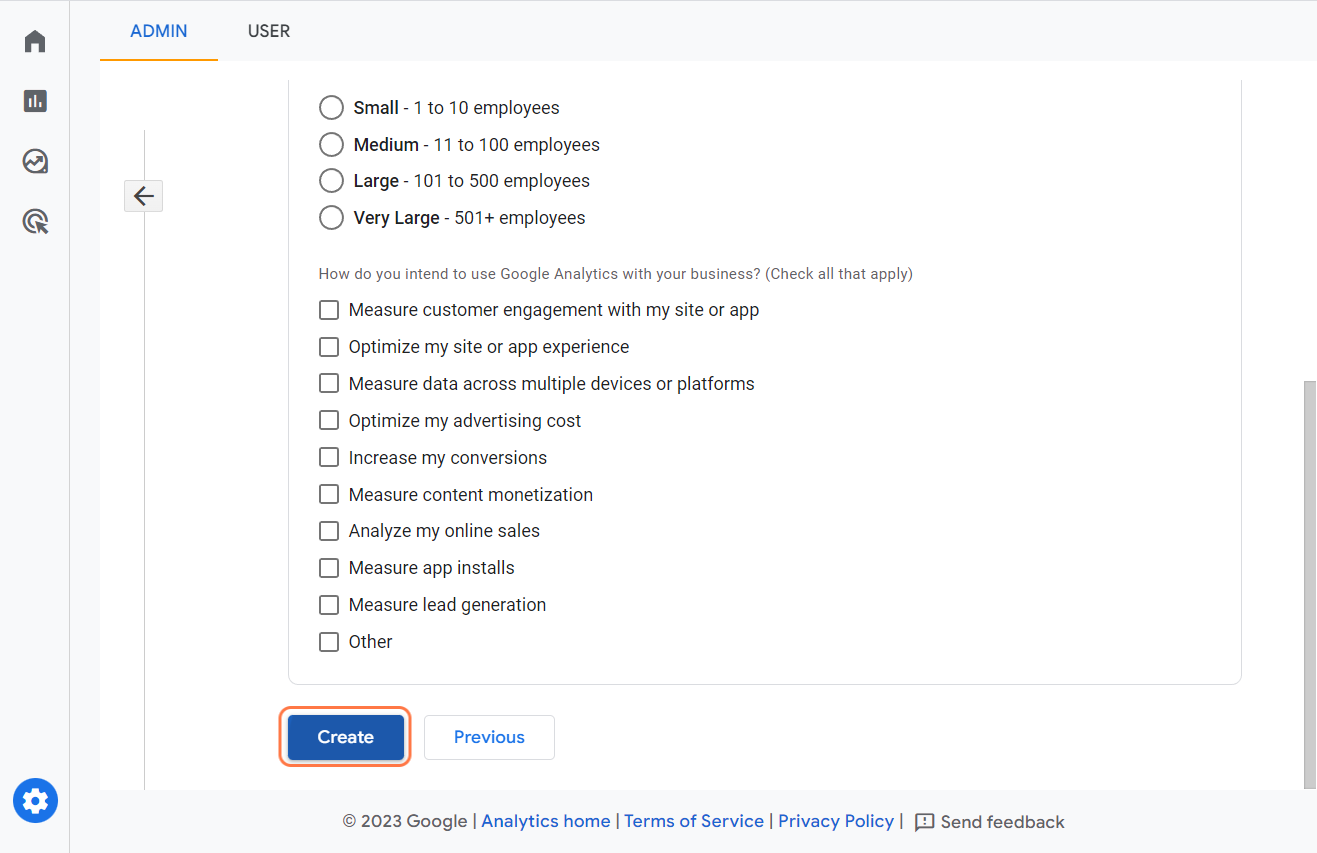
- Mark what is relevant to your business and hit "Create".
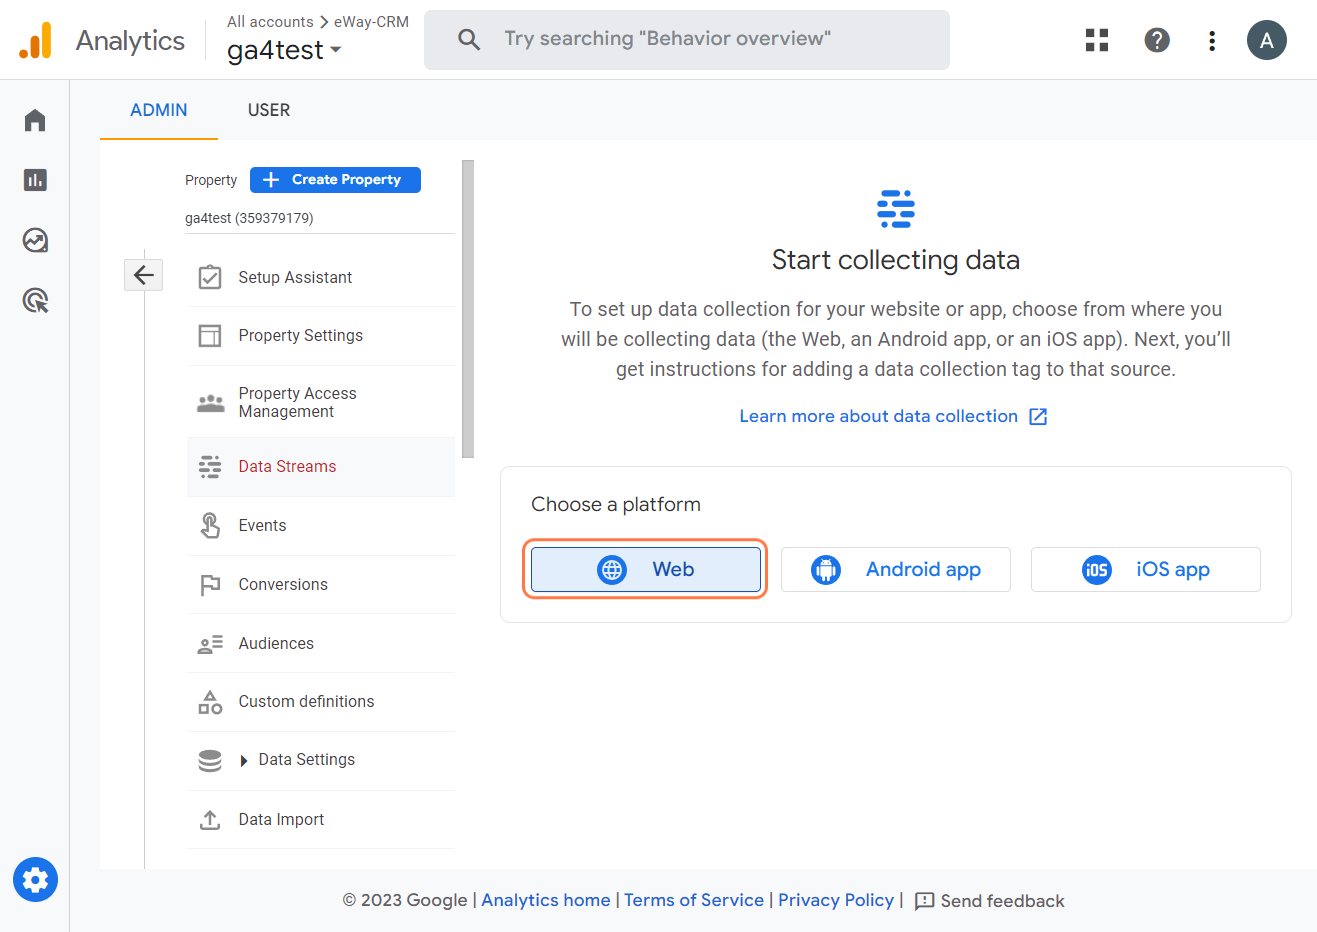
- Choose a platform. We want to collect data from the Web.
- "Set up your web stream" window will pop up. Fill in your website’s URL.
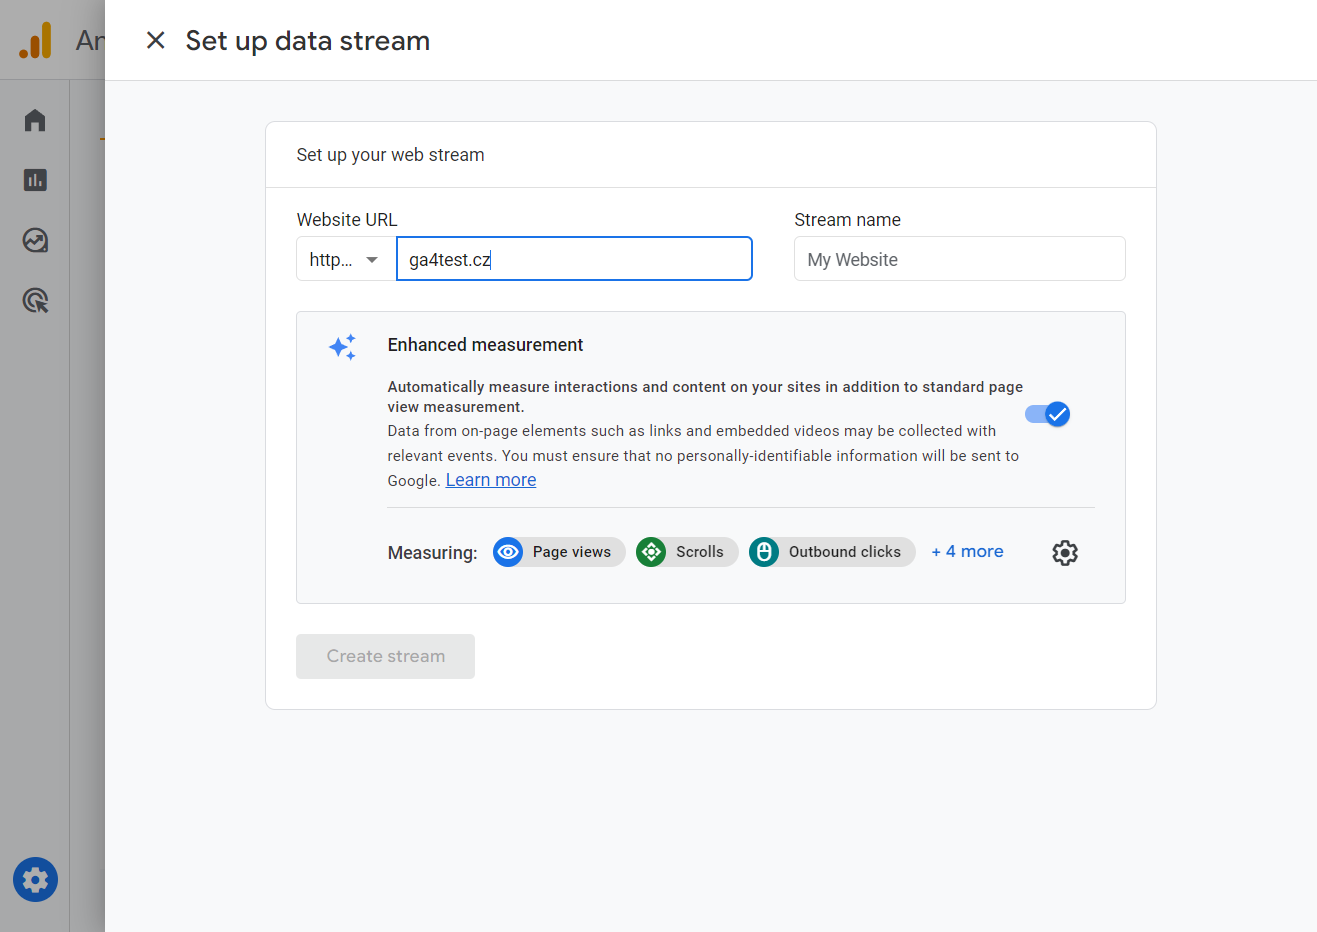
- Choose a name for your data stream.
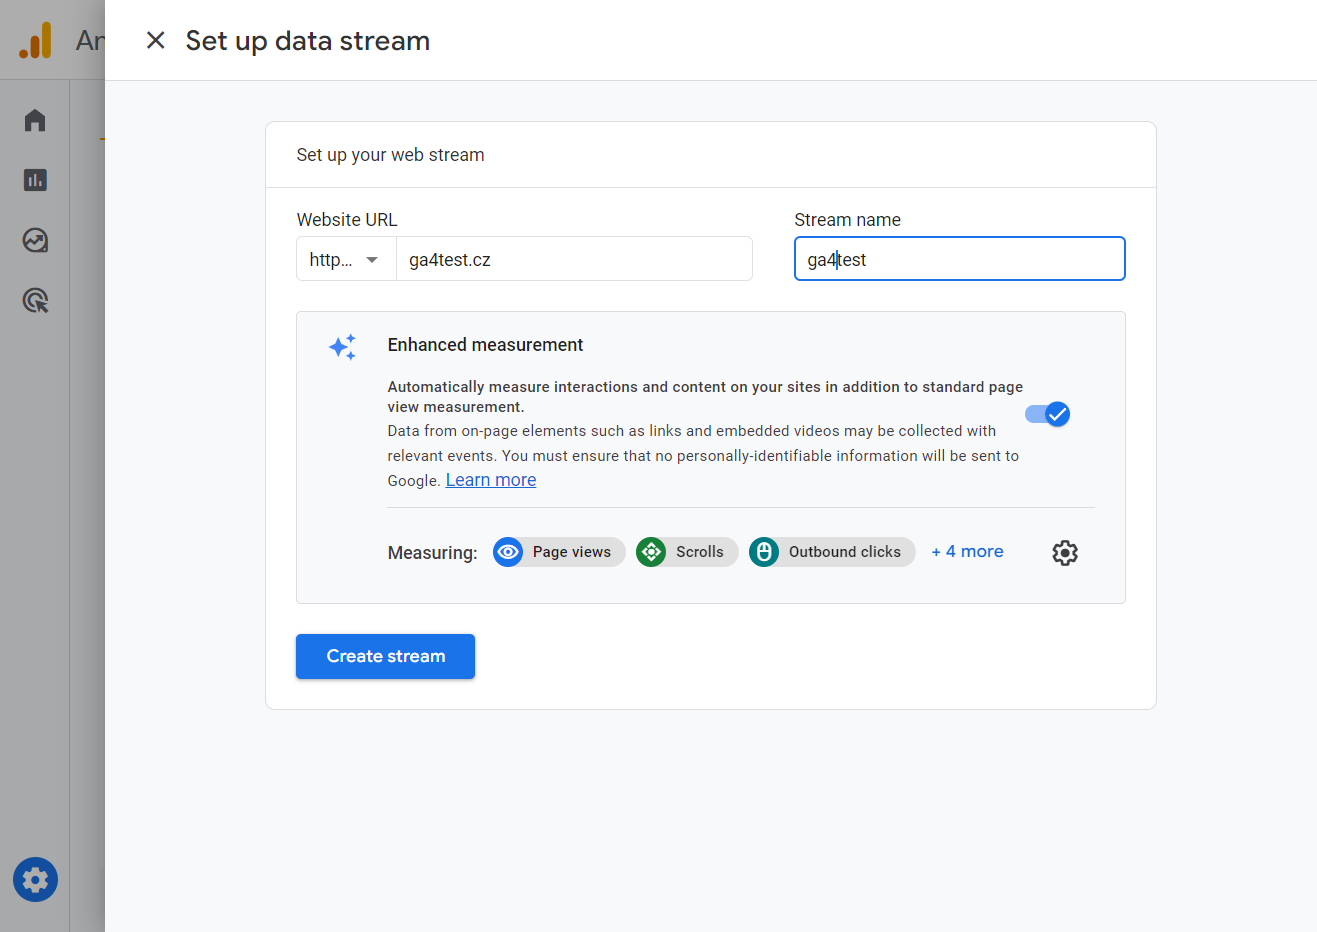
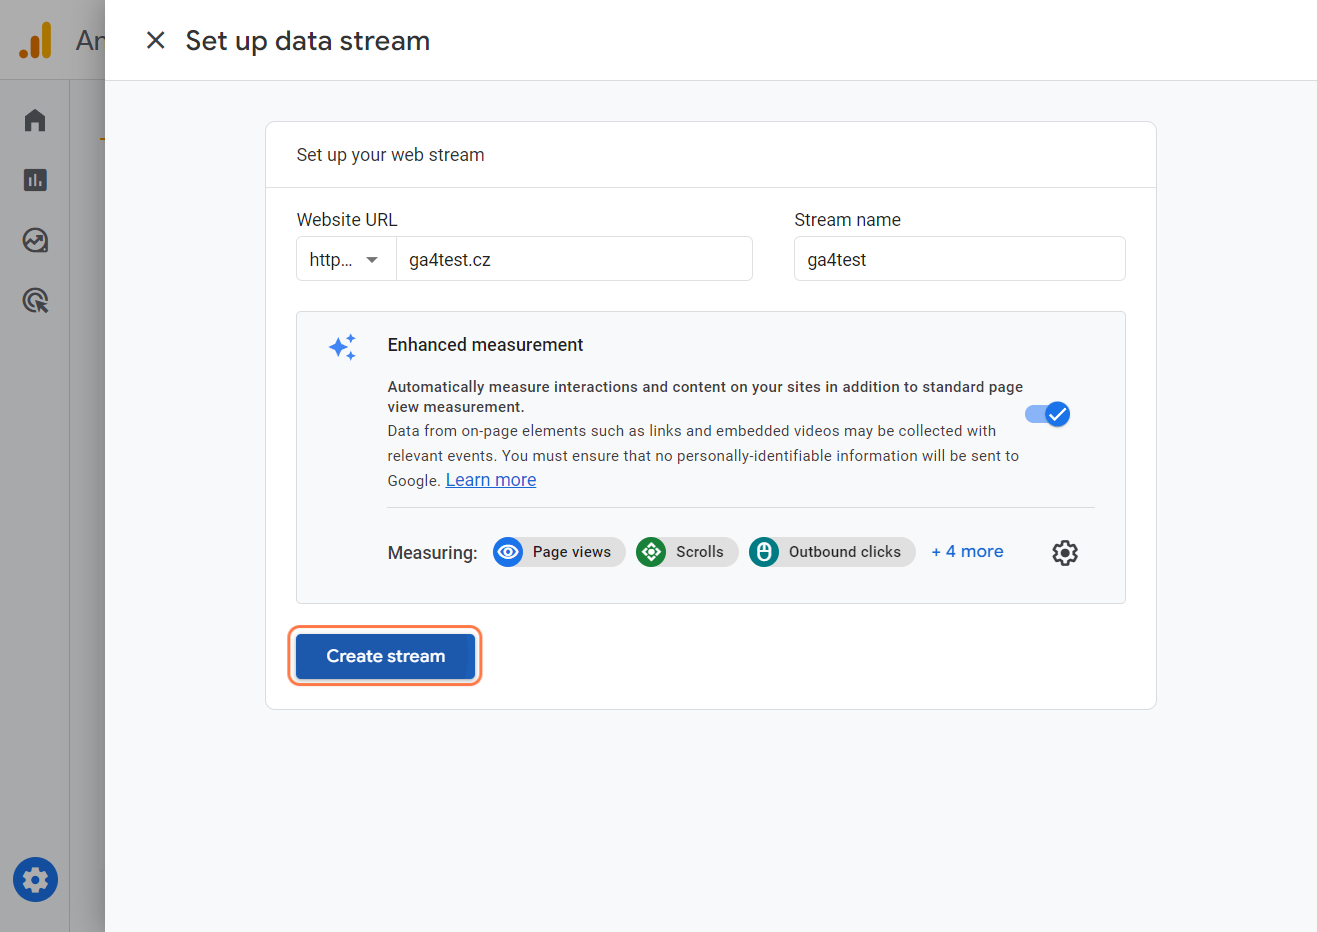
- Click on "Create stream".
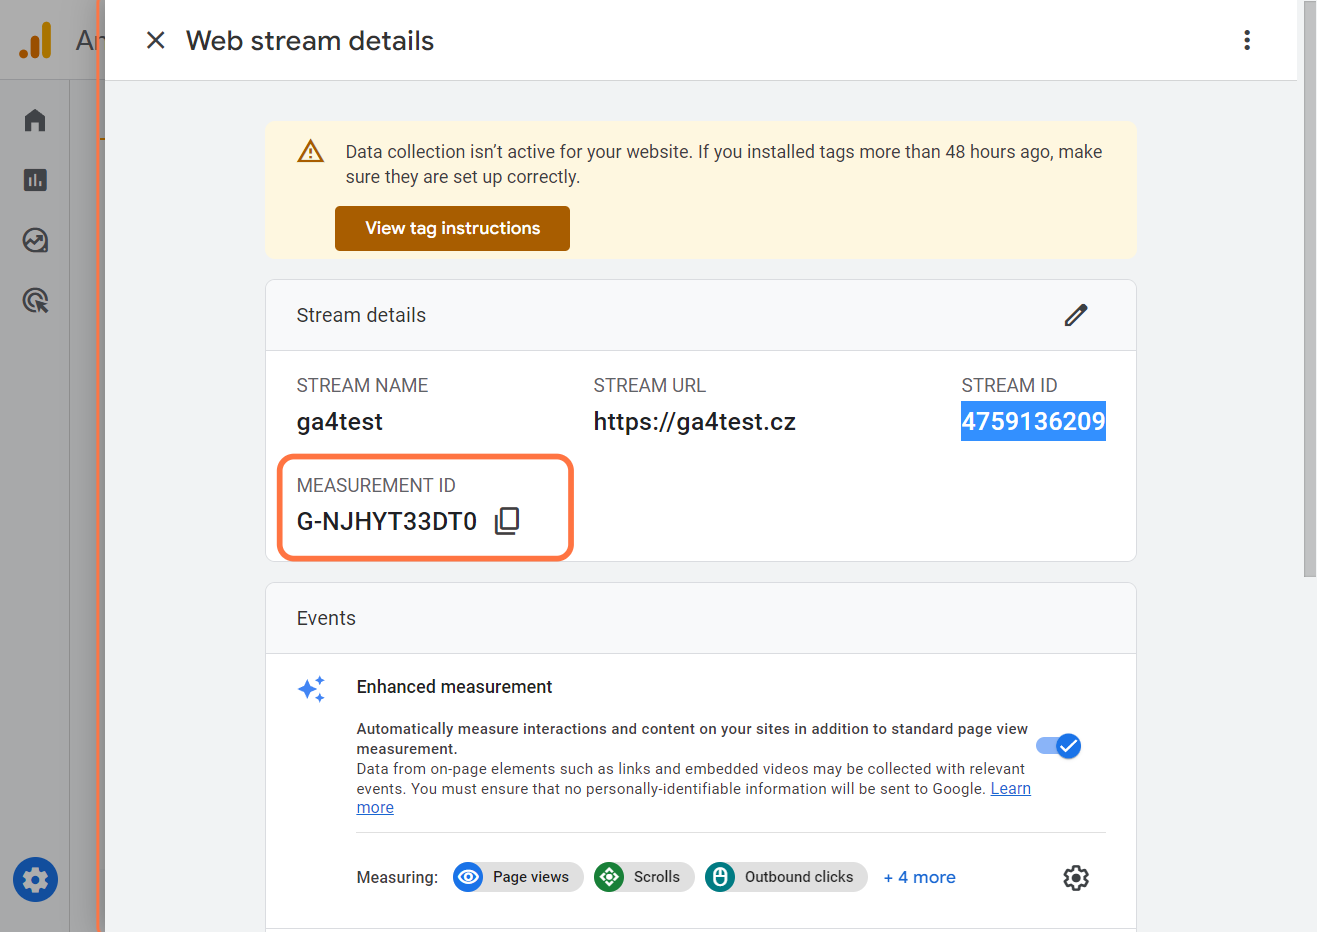
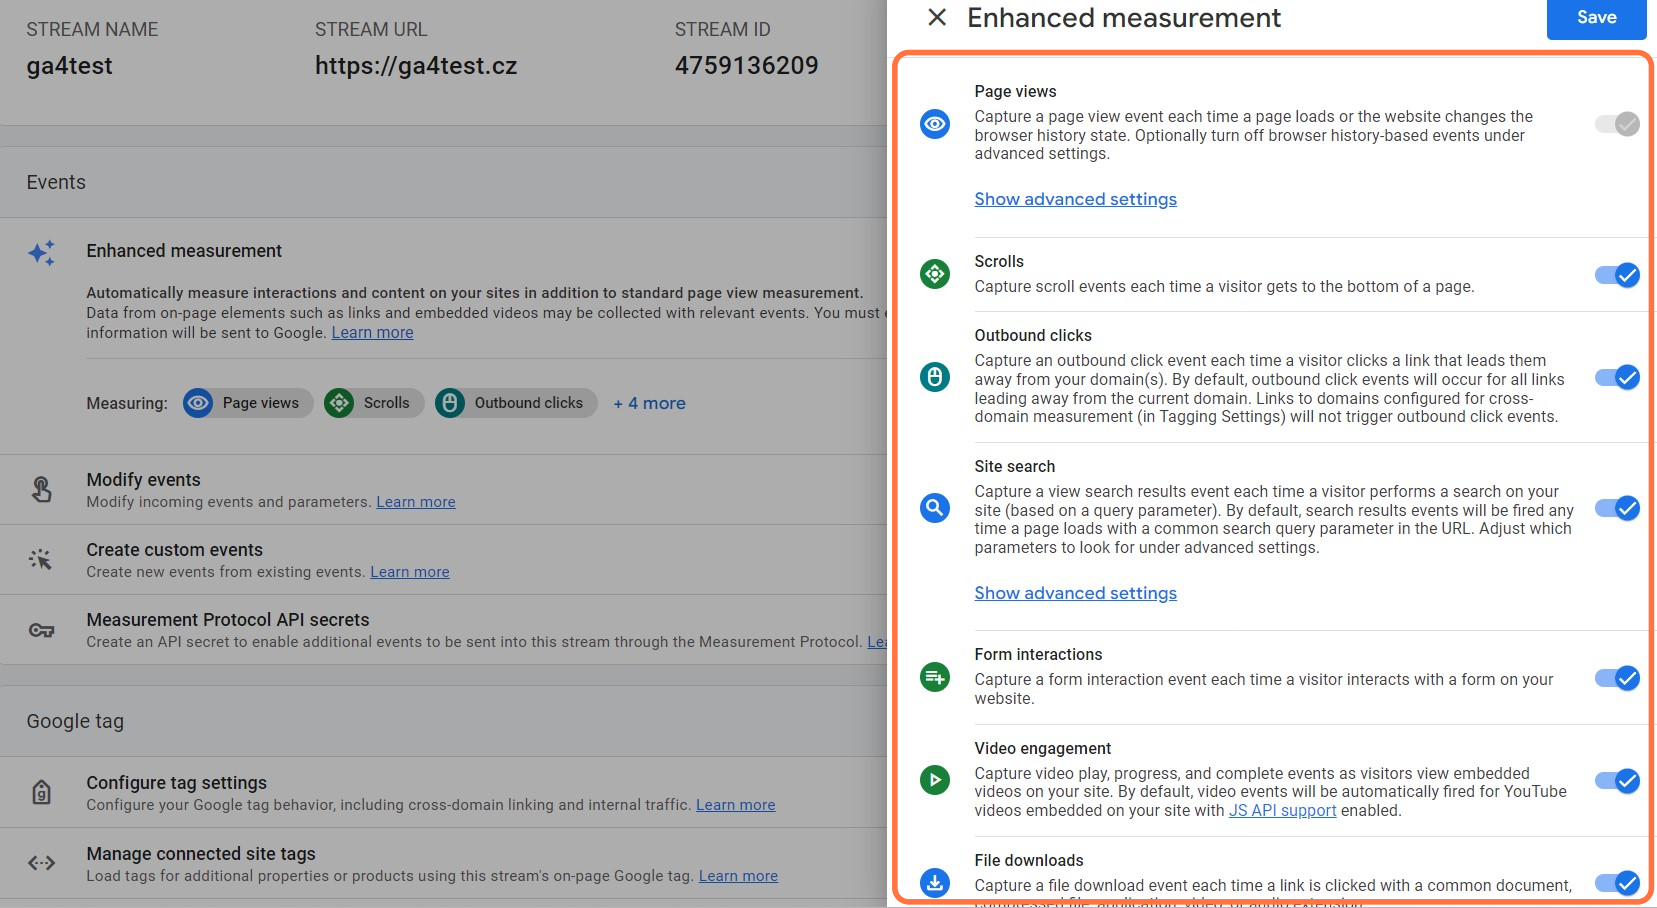
- Voila! Copy the MEASURMENT ID. We will need it! Also "Enhanced measurement" is set by default. Leave it as it is.
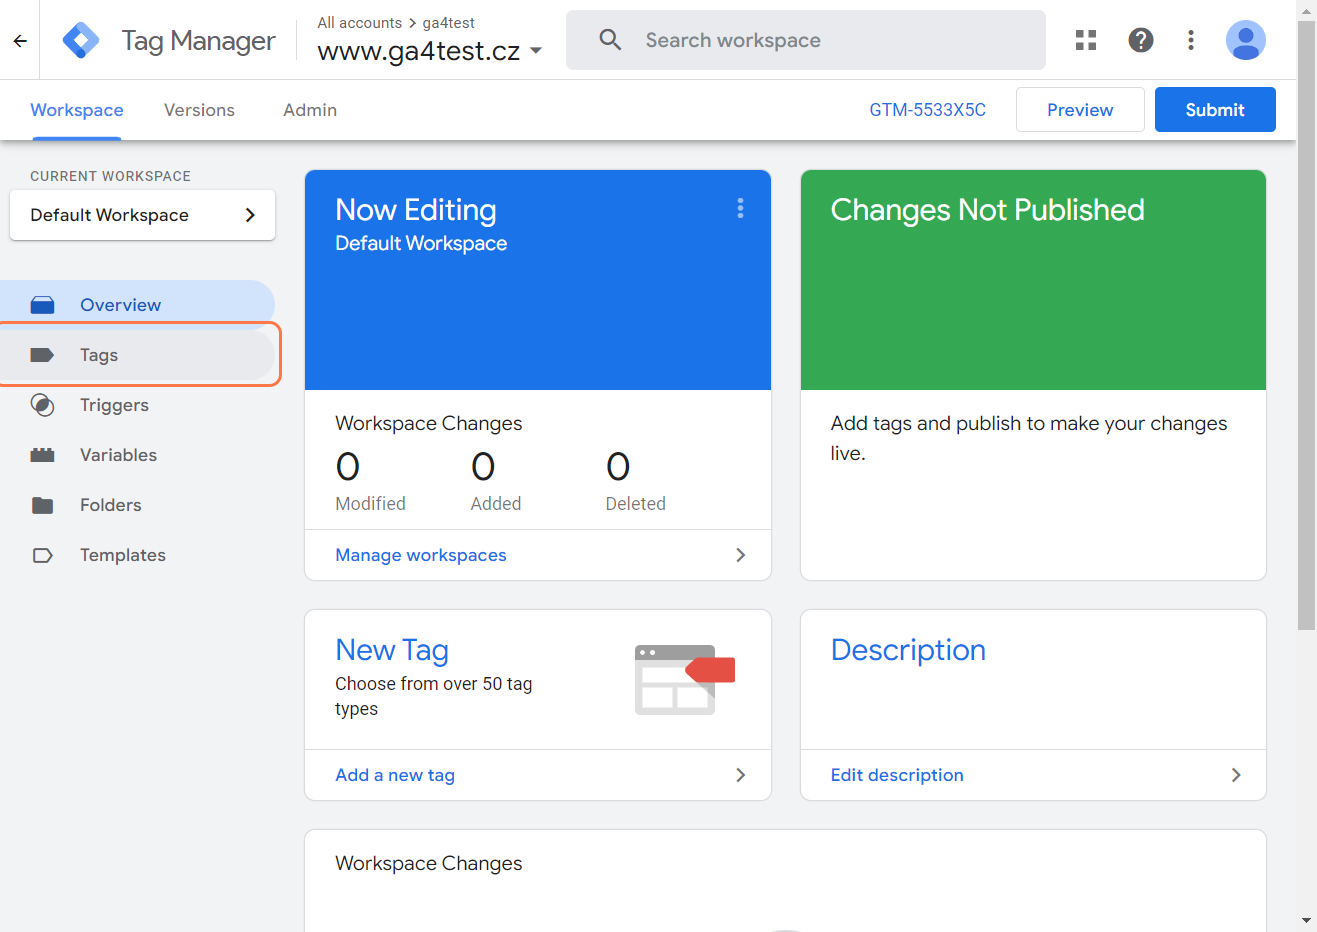
Step 2 - Set up Your Tag Manager
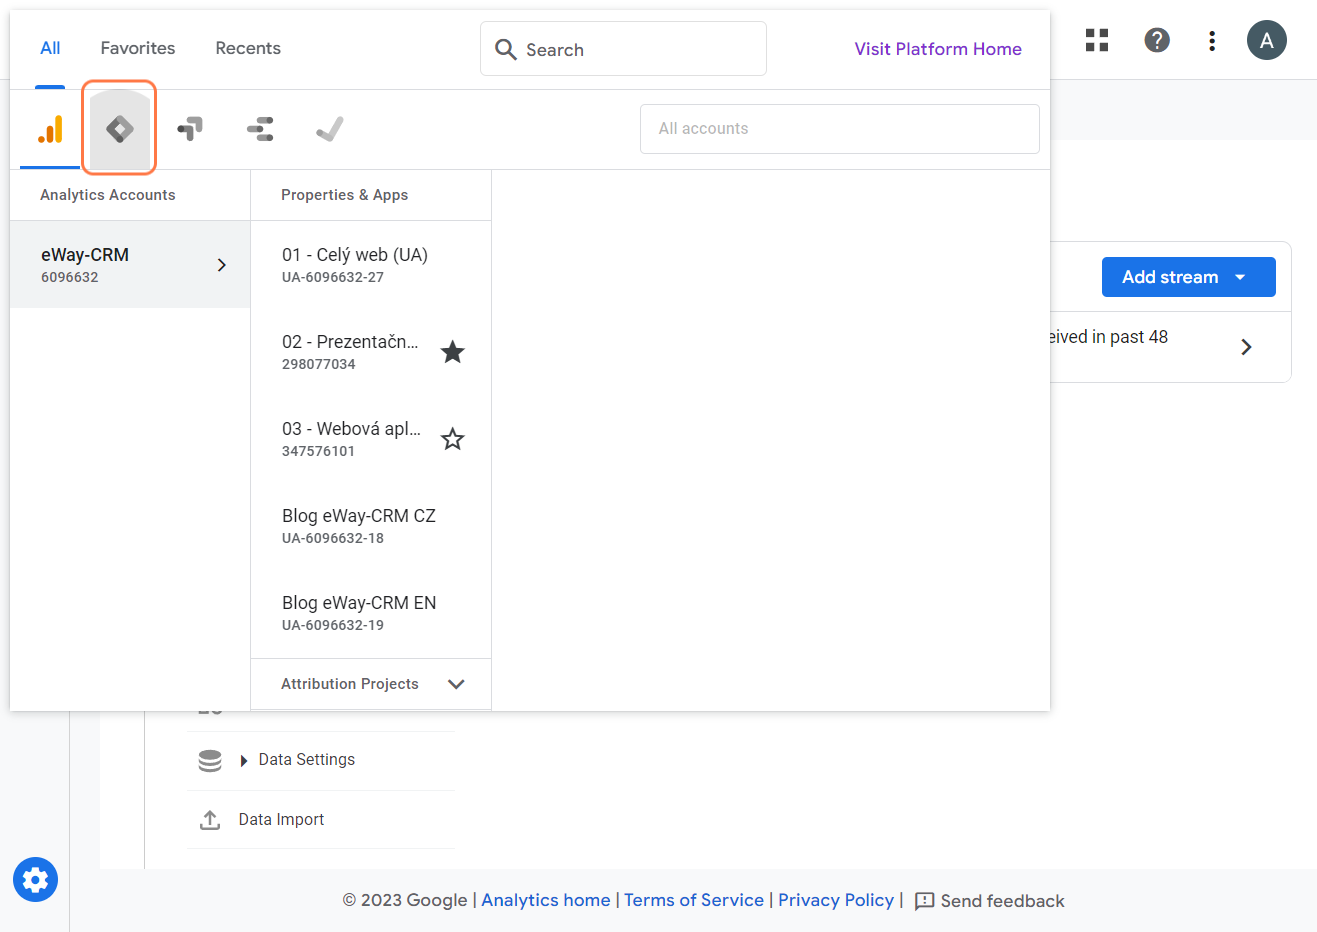
- We need to head over to Google Tag Manager now. Click on All accounts.
- Click on the Google Tag Manager icon.
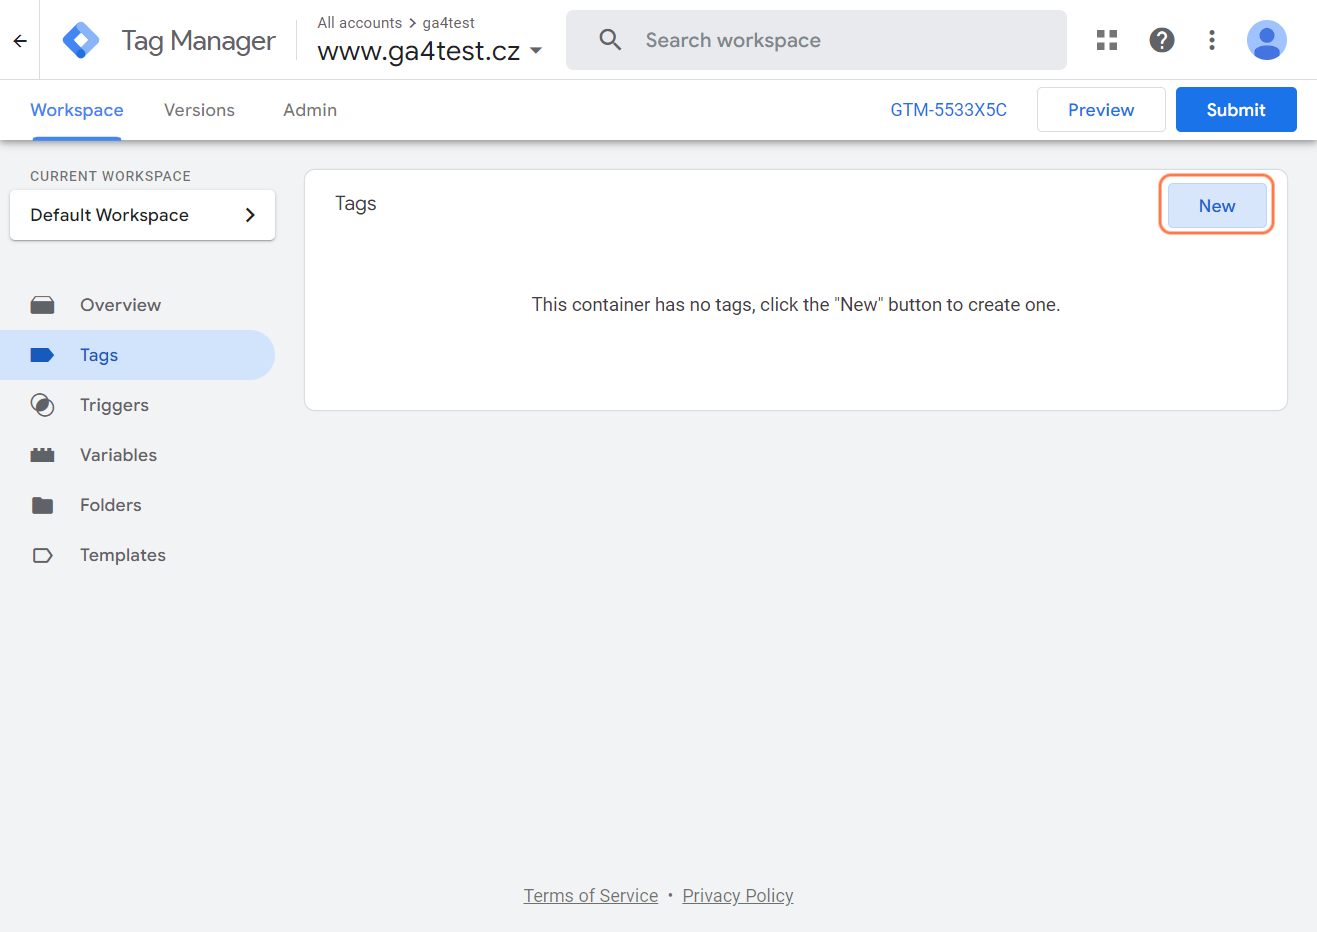
- Head over to "Tags".
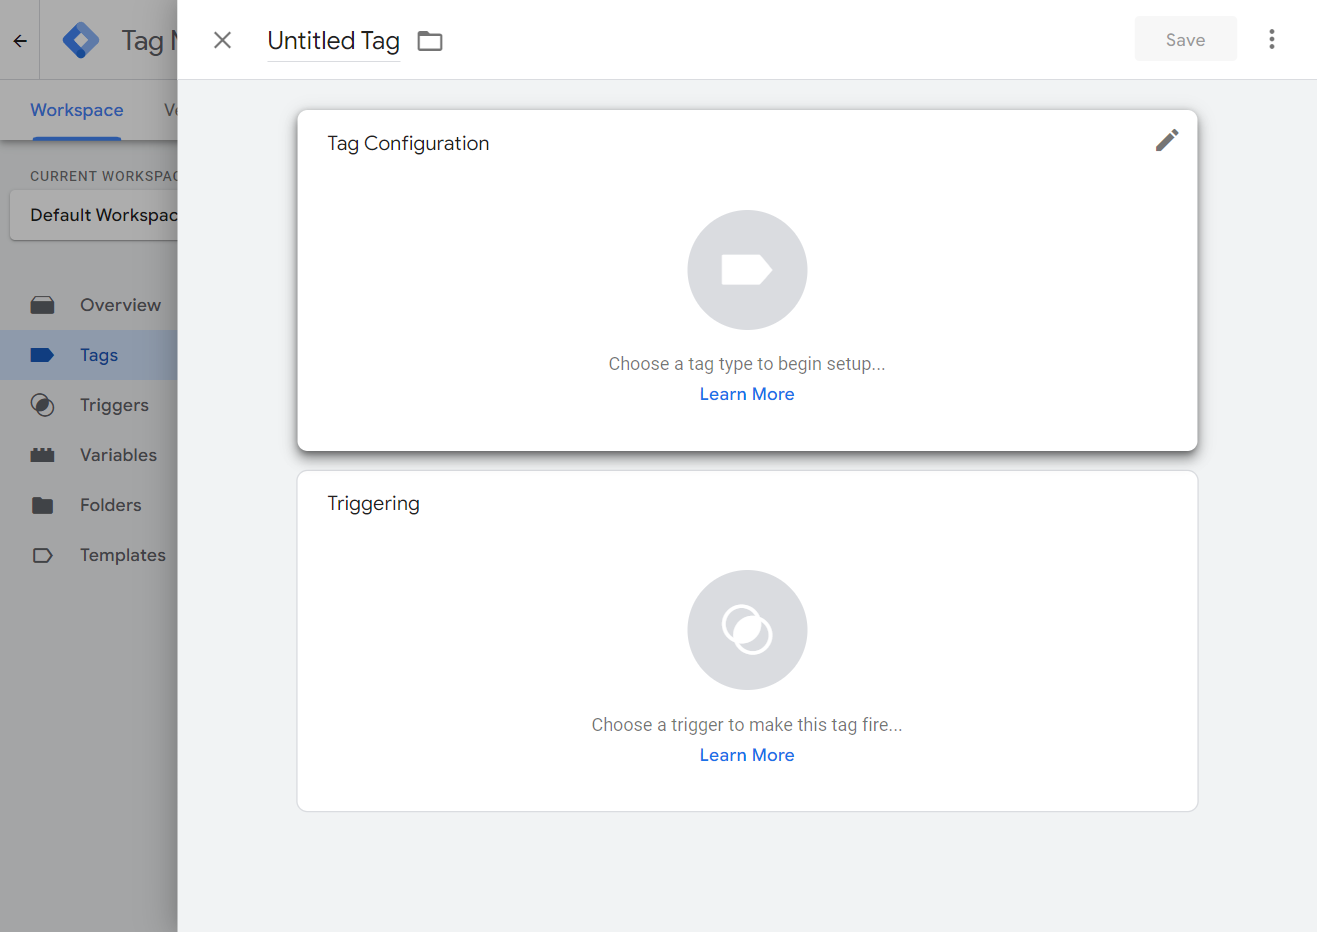
- Click on New.
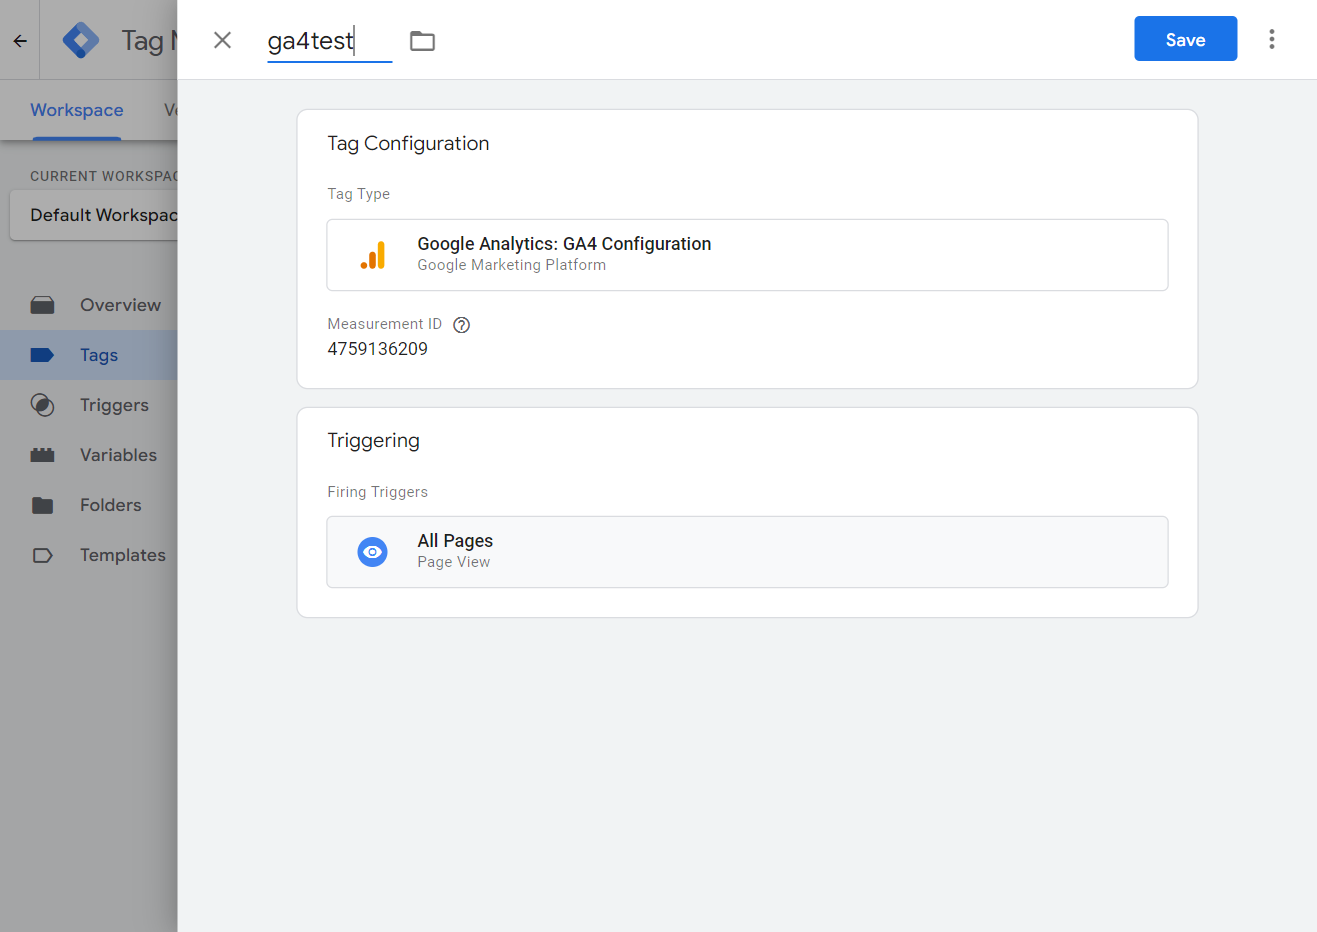
- Click on Tag Configuration.
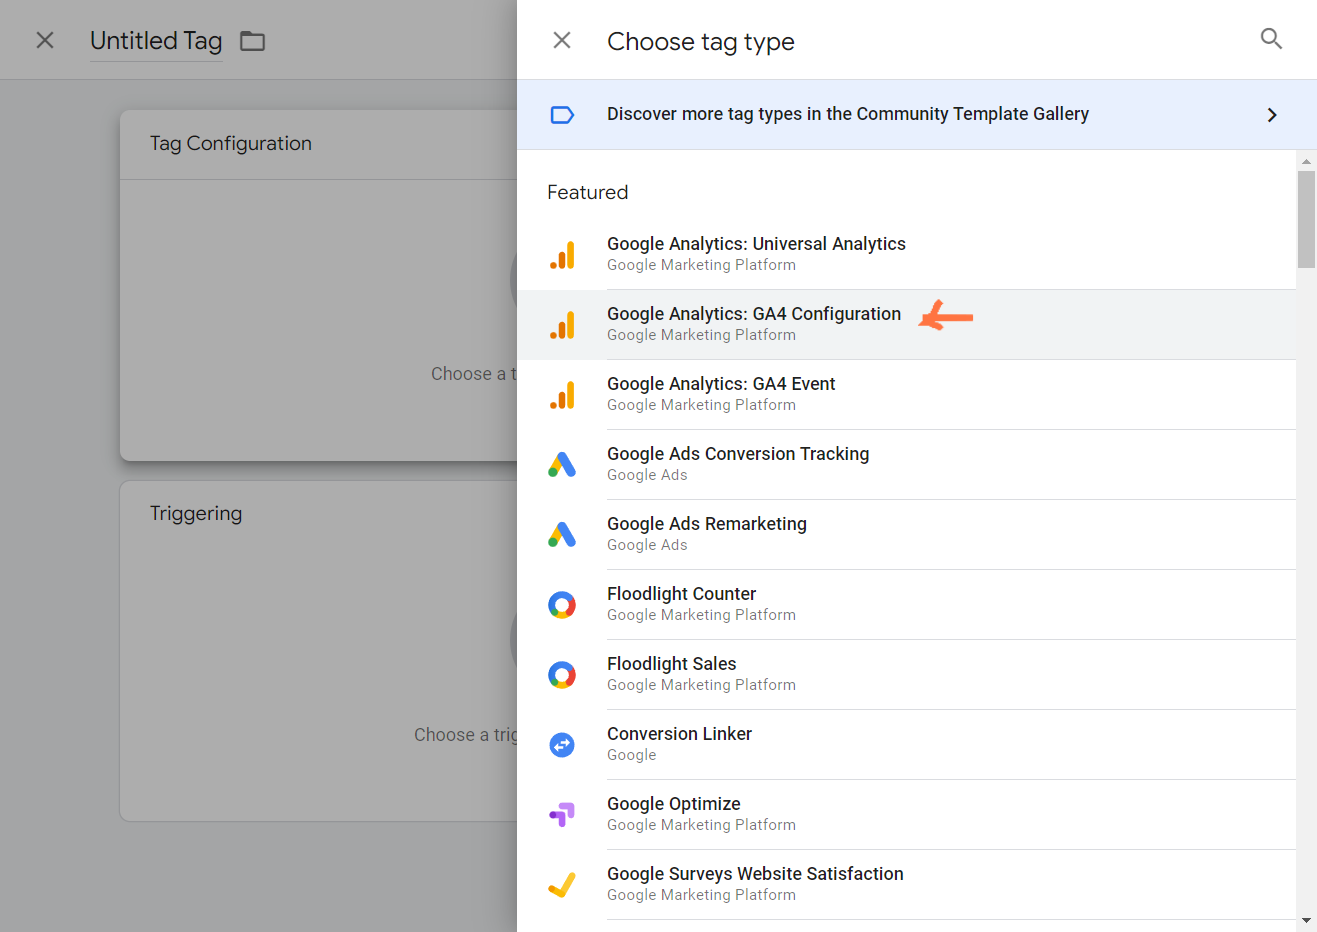
- Click on Google Analytics: GA4 Configuration.
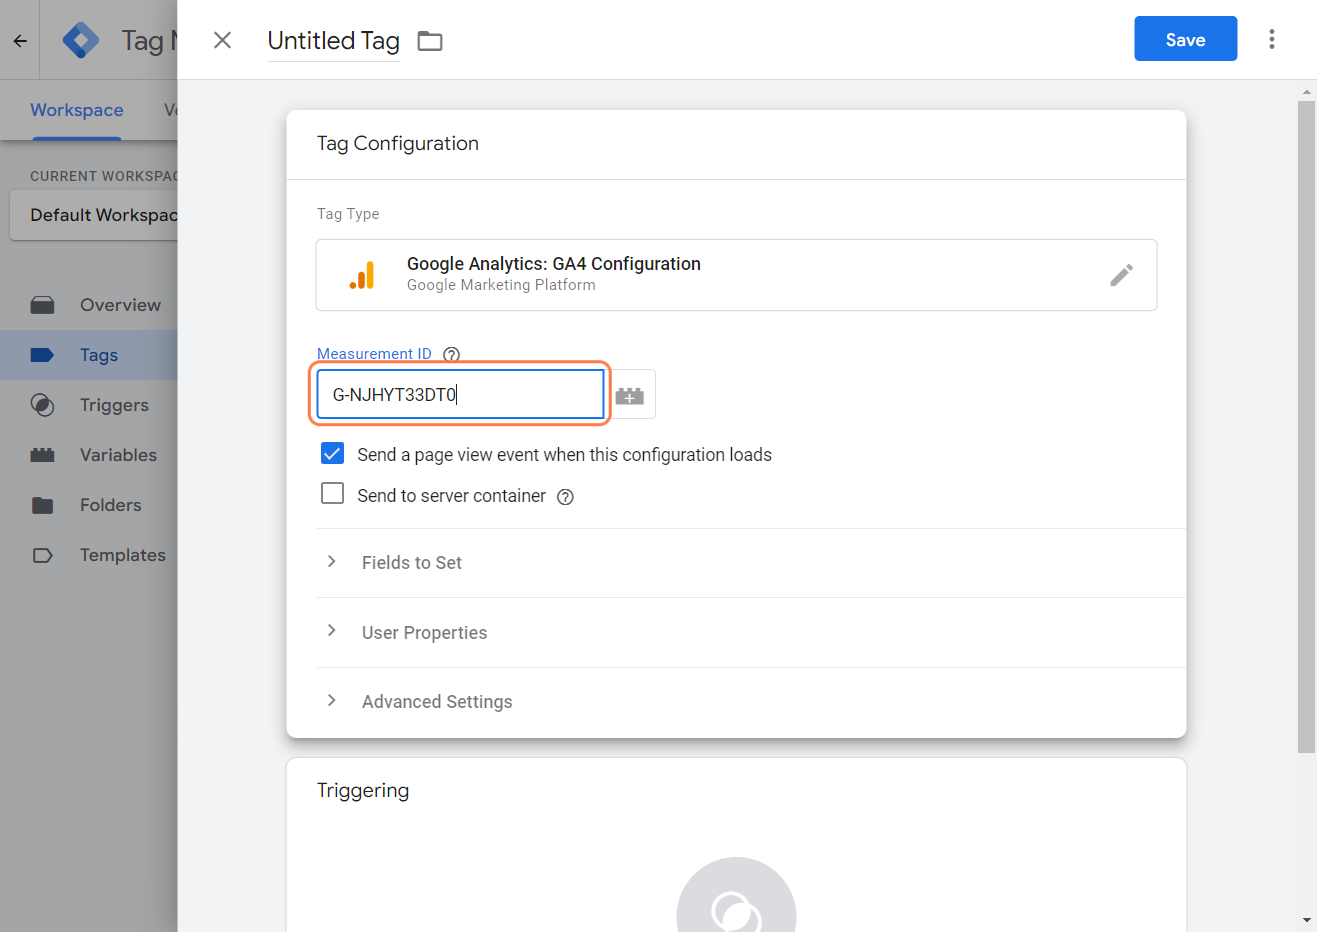
- Paste the Measurement ID you have copied to your clipboard before.
- Click on Save.
- Don't forget to name your tag.
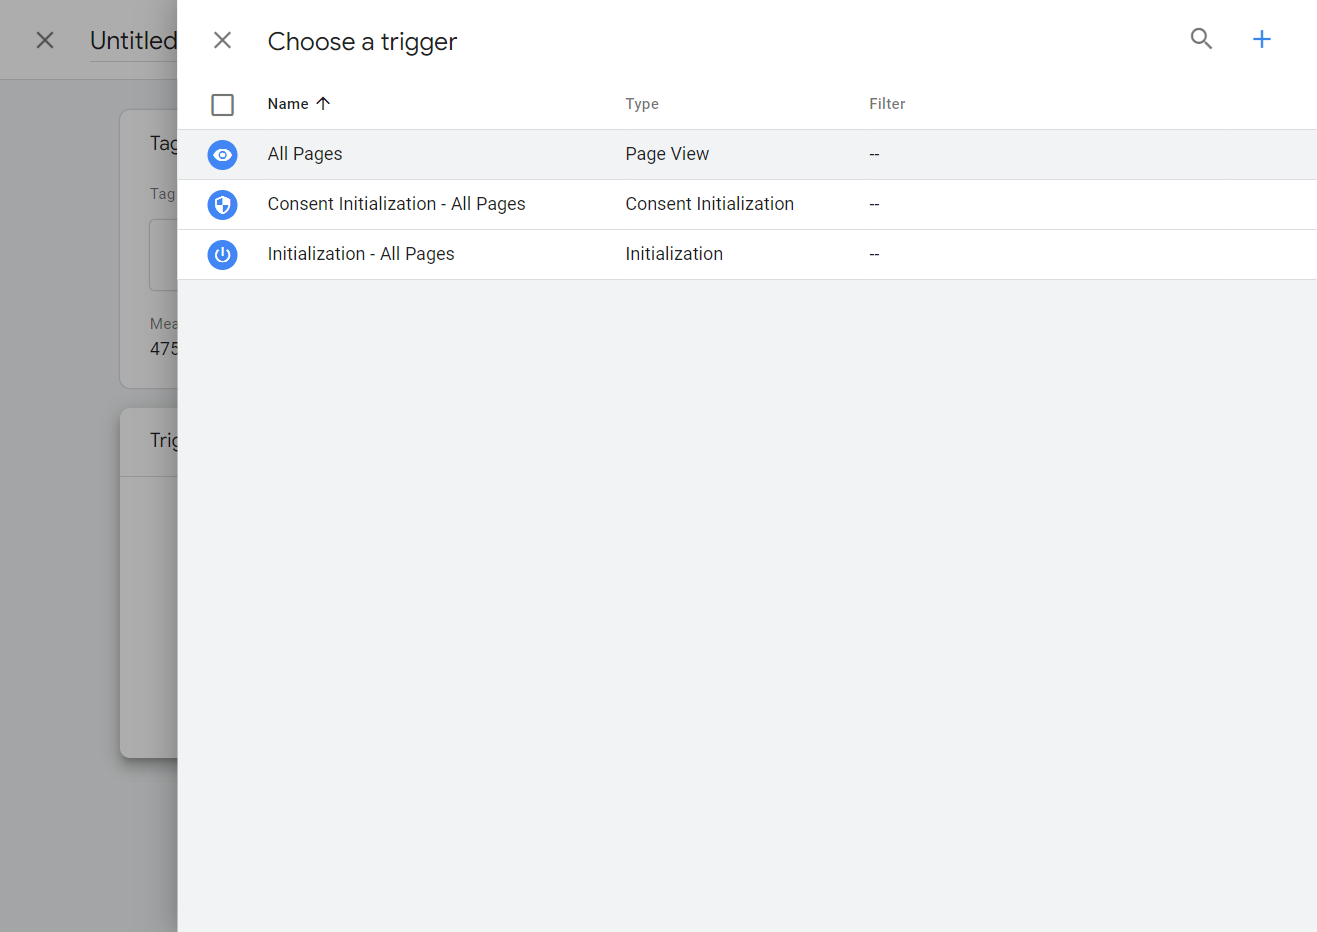
- We need to choose a trigger to make our tag fire. Click on Triggering.

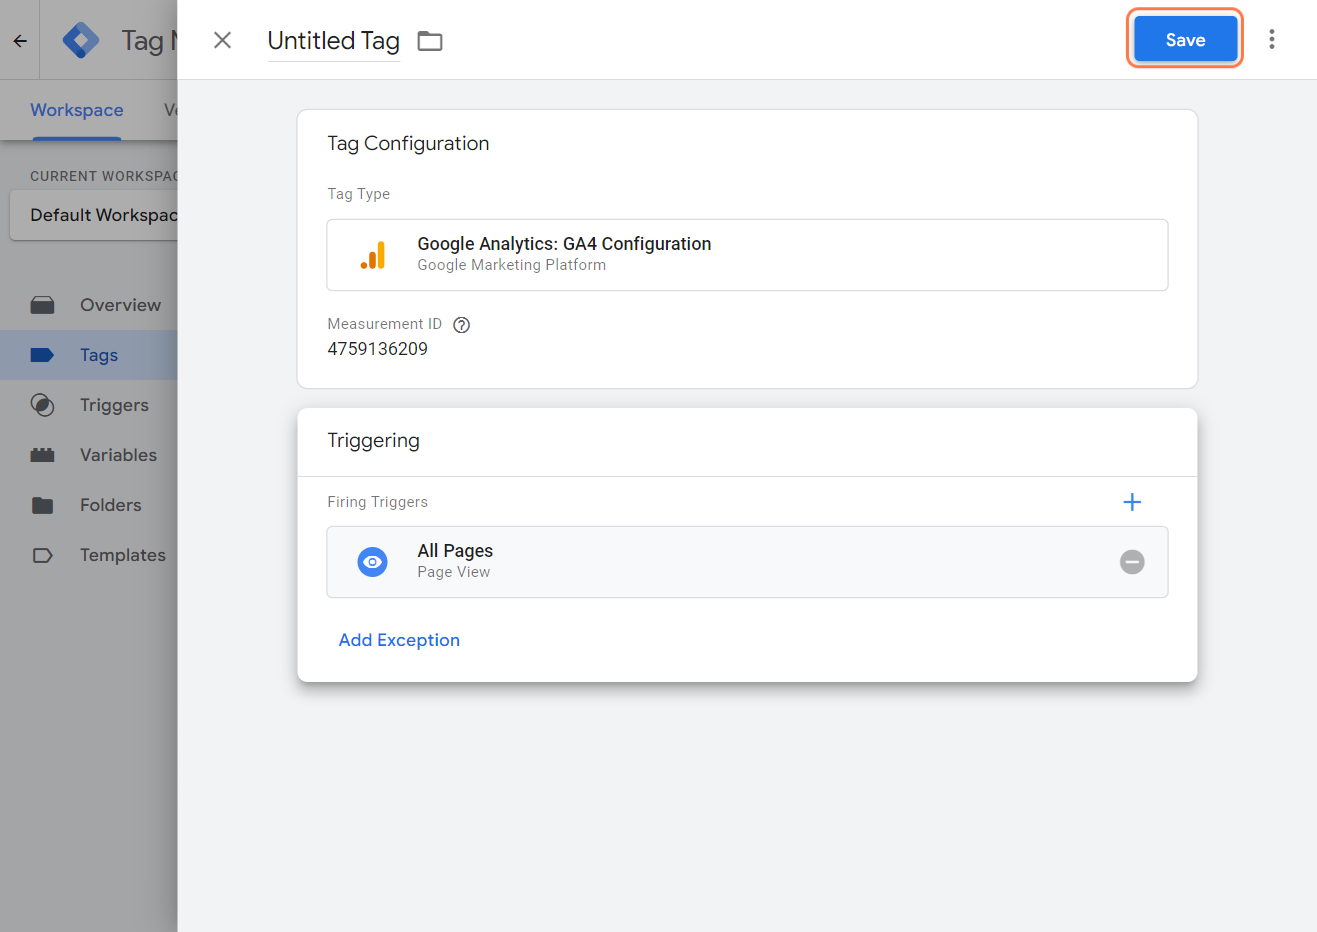
- Click on "All Pages".
- Click on Save.
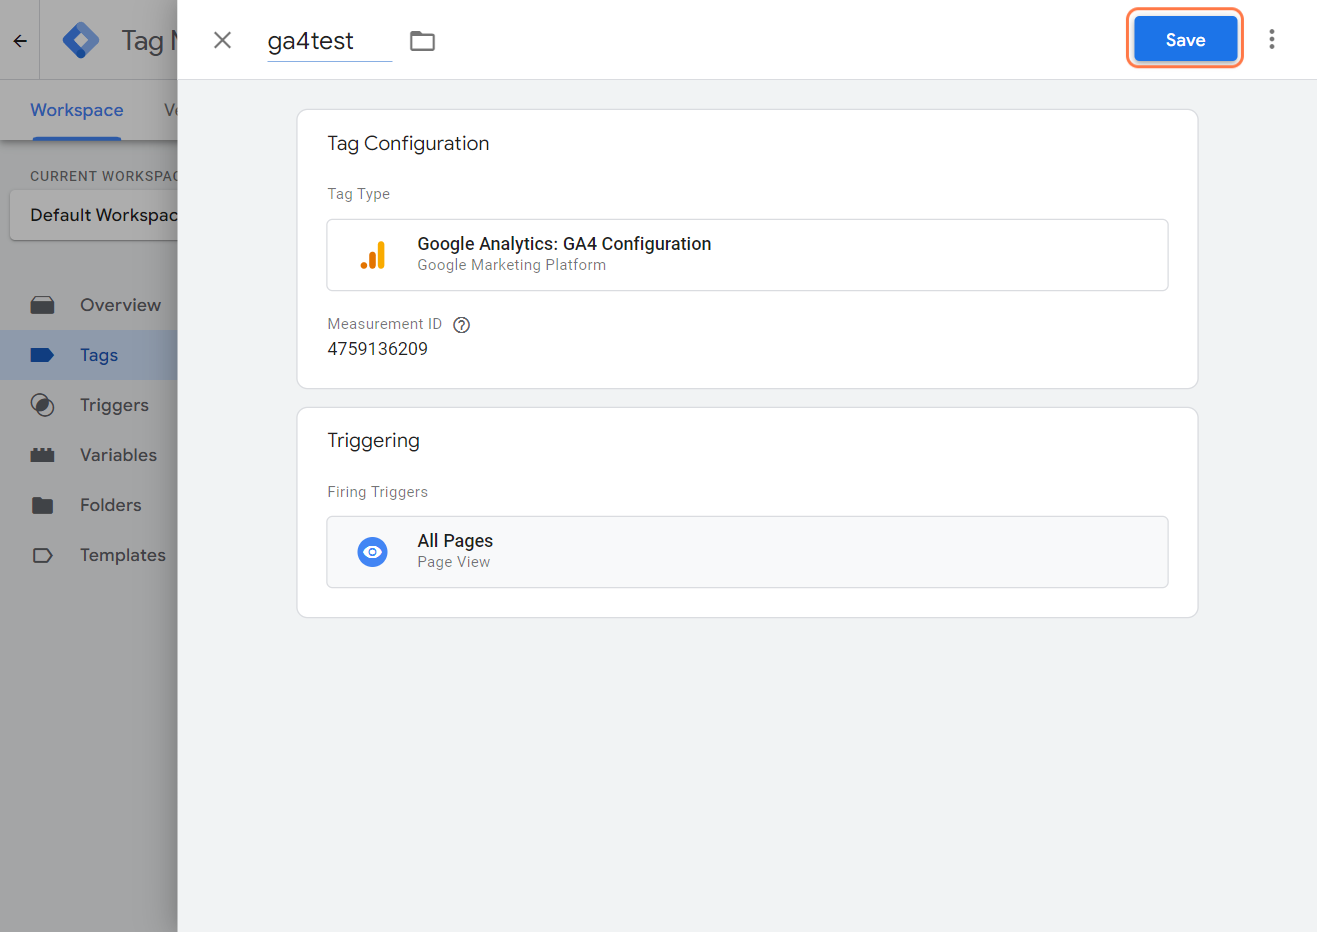
- Our tag is set! Click on Submit.
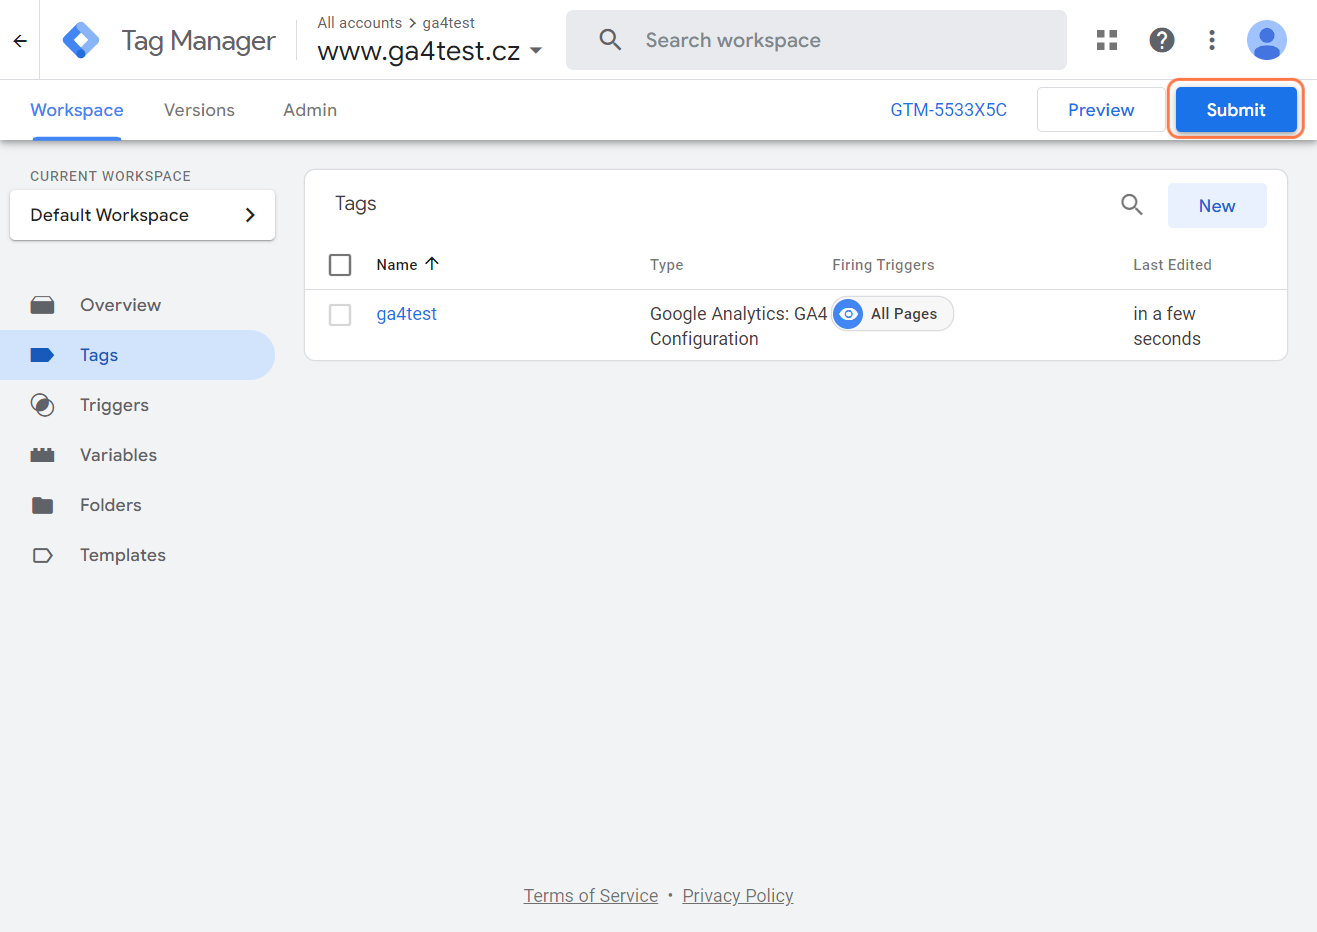
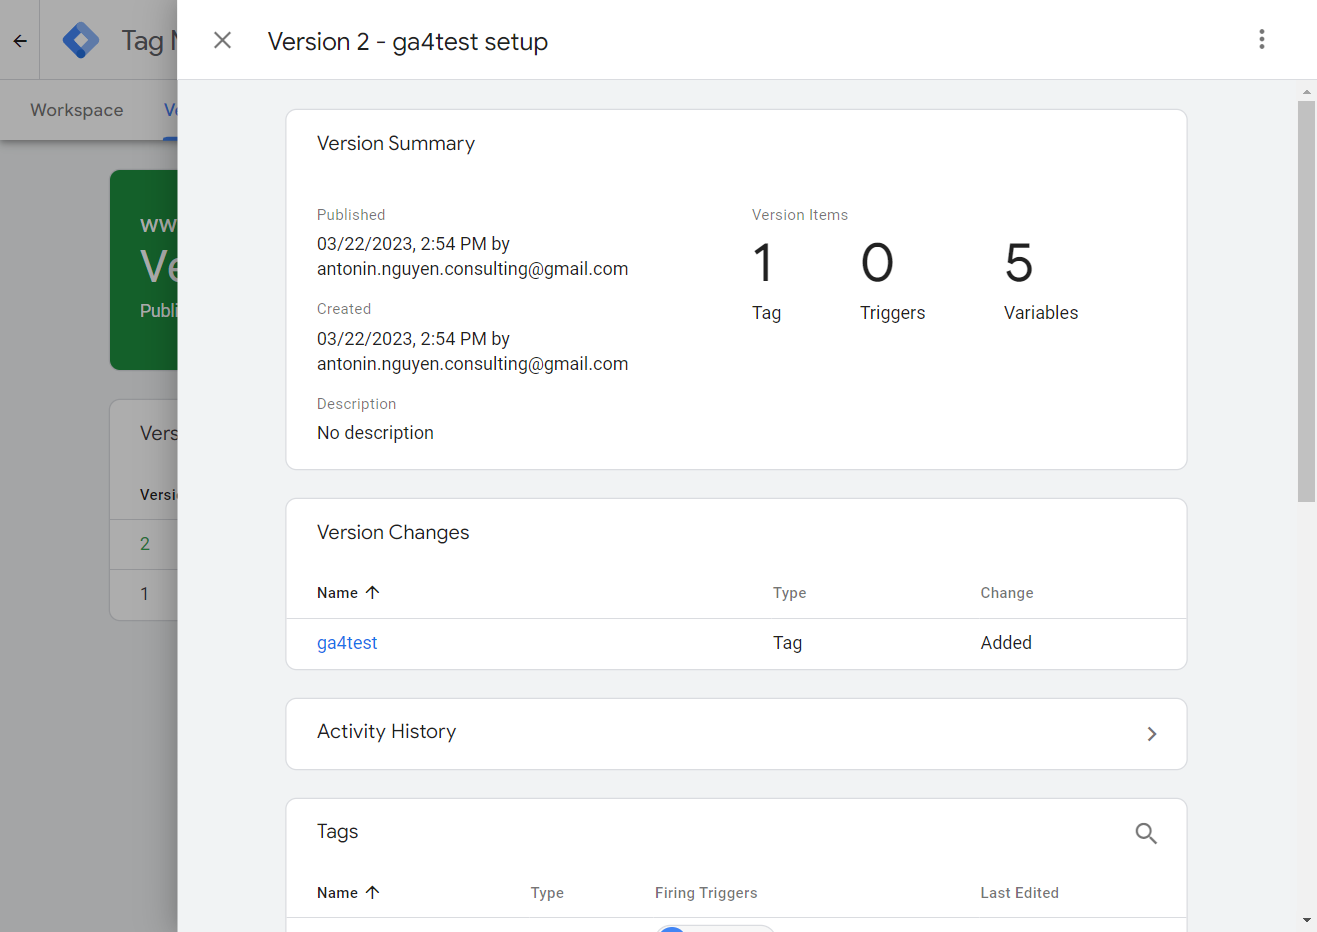
- "Submission Configuration" window will pop up. Name it and hit Publish.
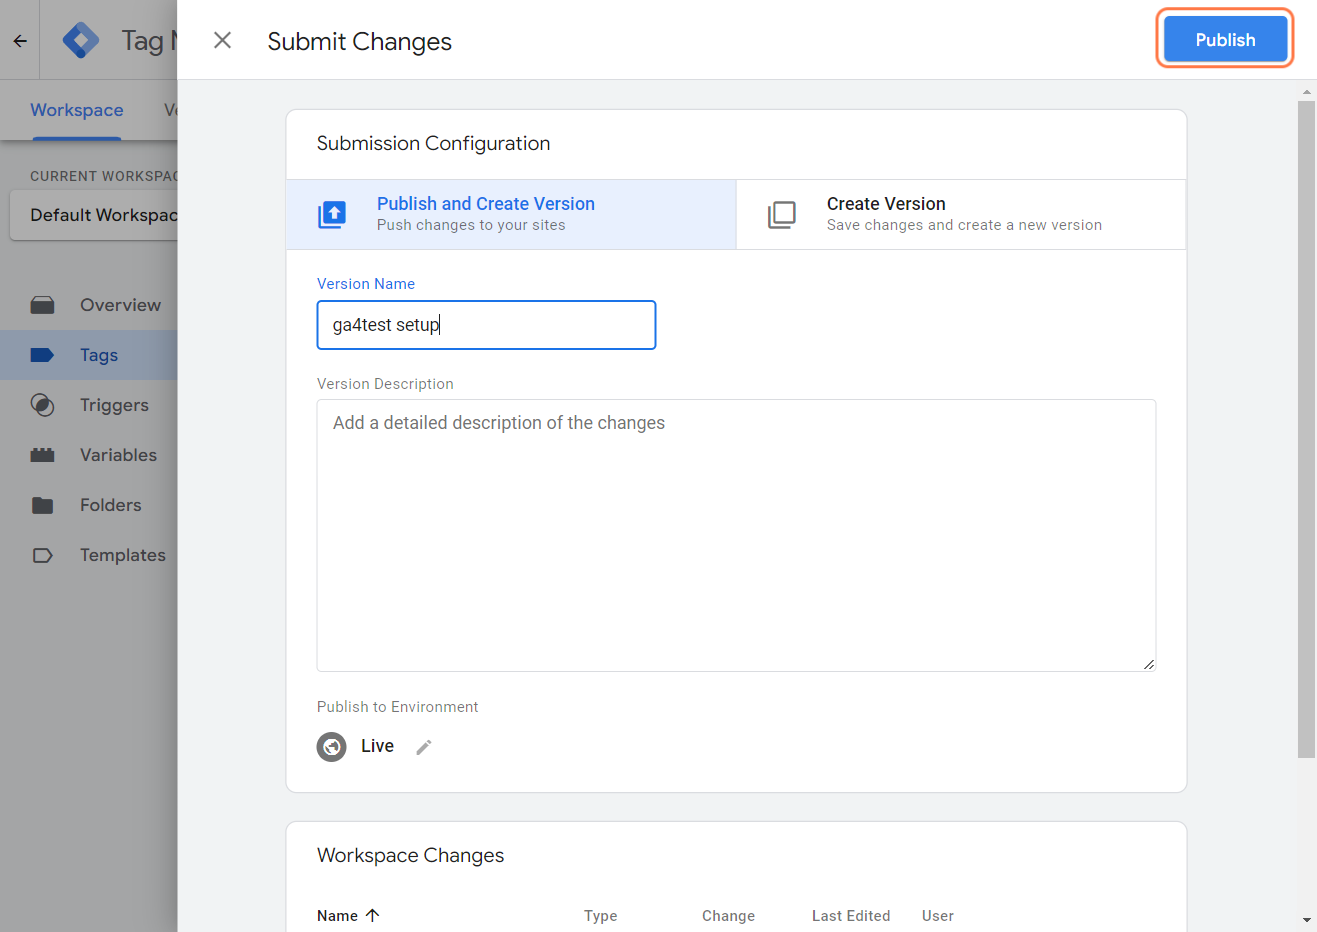
- You’ve made it! Your website will now start collecting important data.
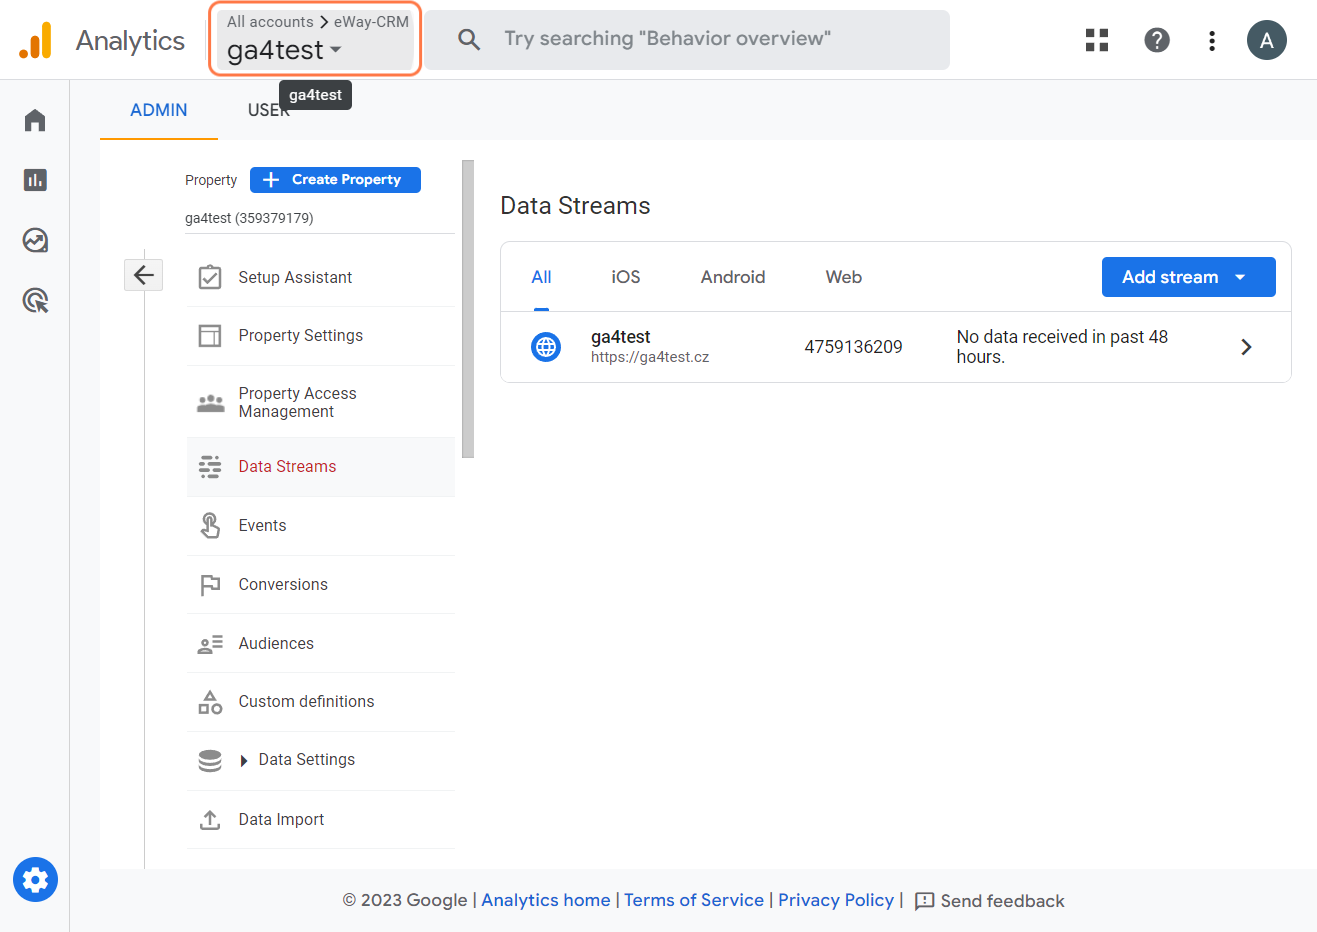
Step 3 - Verify That You Measure Data
- Go back to GA4 interface and head over to Data Streams.
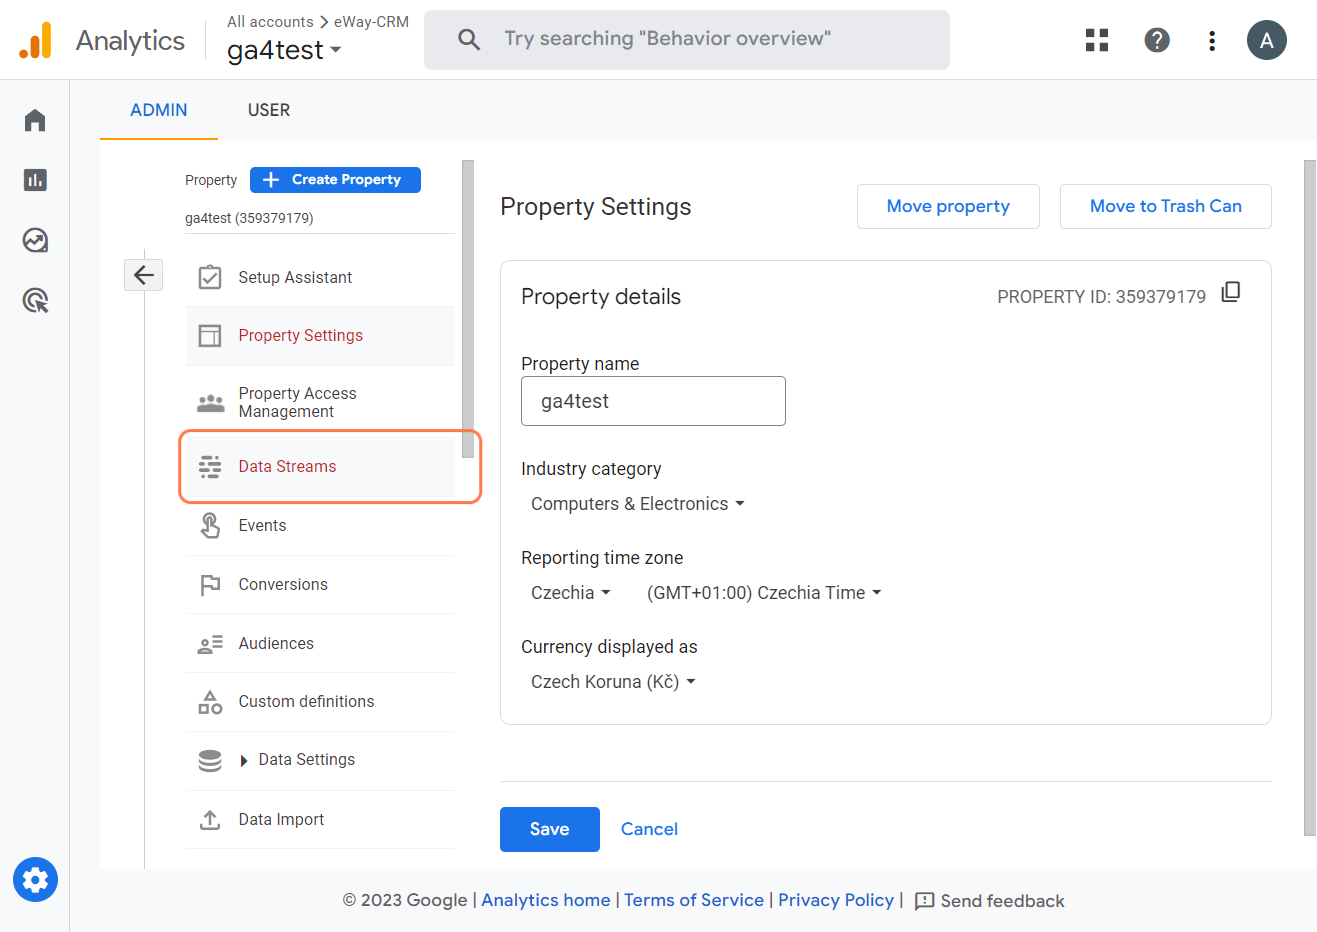
- Select your newly created data stream.

- Let’s check what data we collect by default.
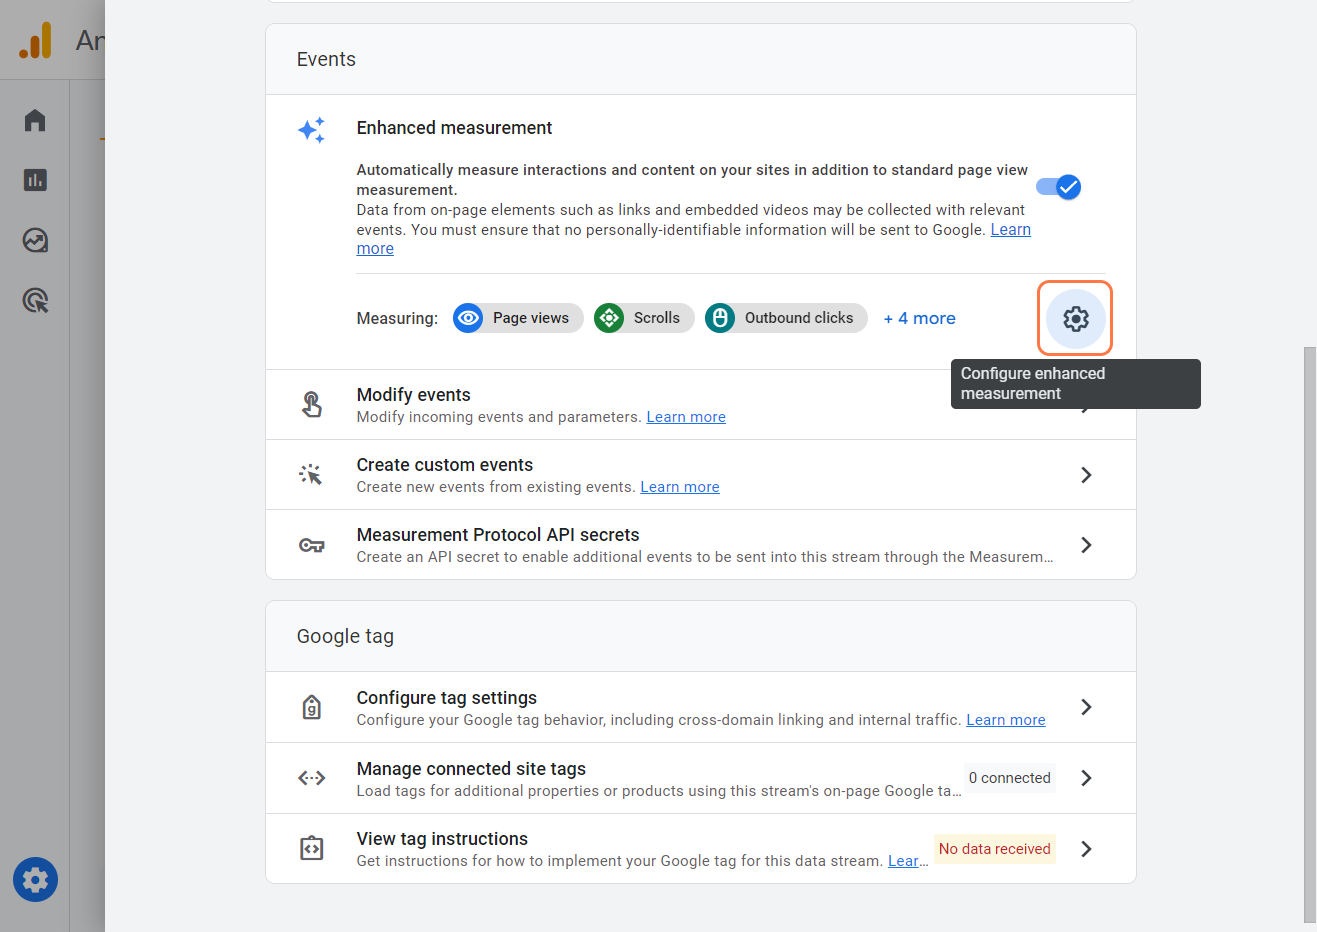
- Wow! GA4 automatically measures all these data, unlike the old UA.
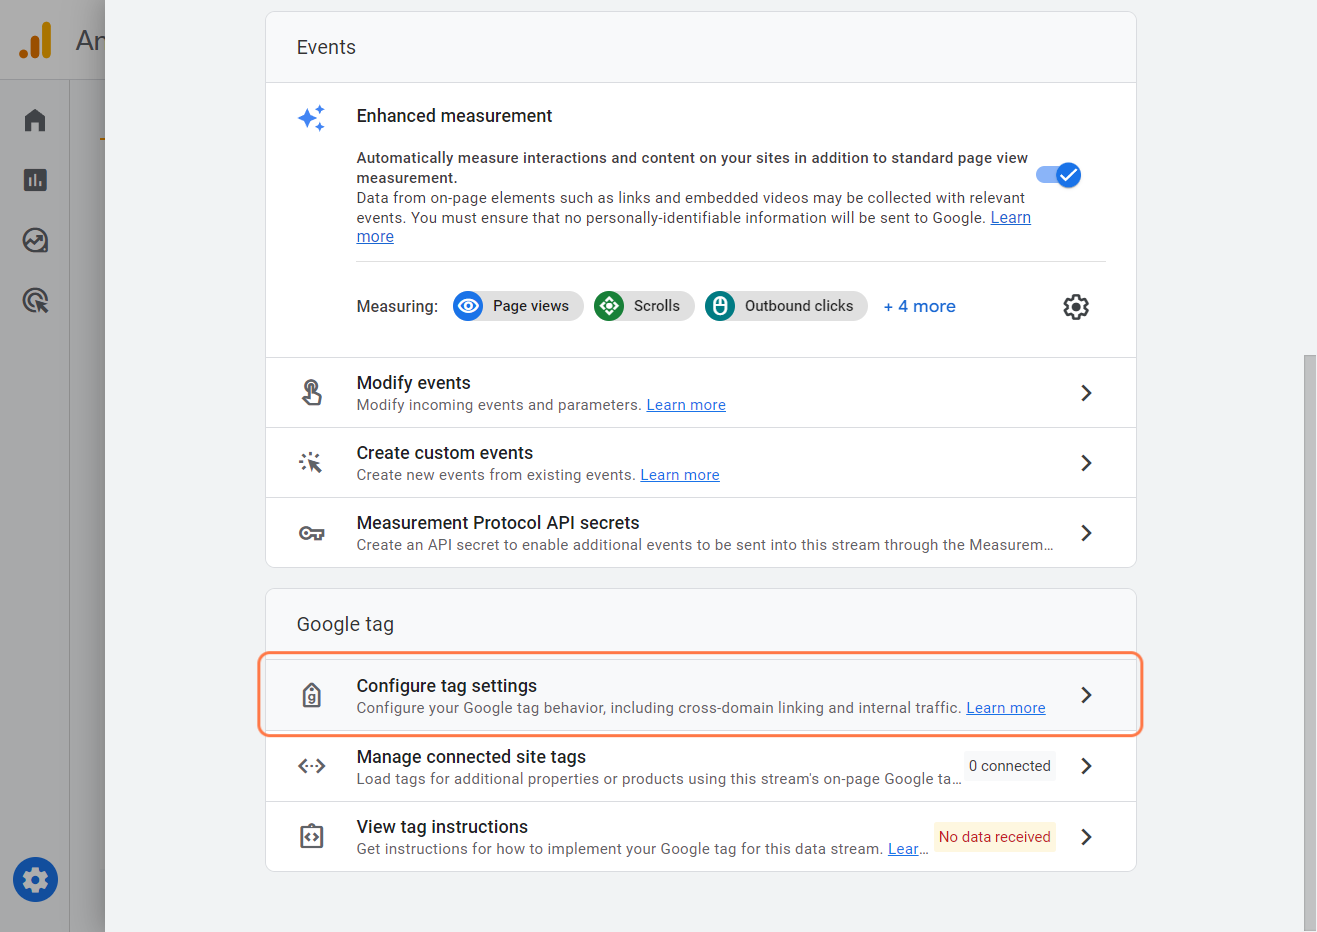
Step 4 - Additional Configuration
- We need to configure a few more things. Click on "Configure tag settings".
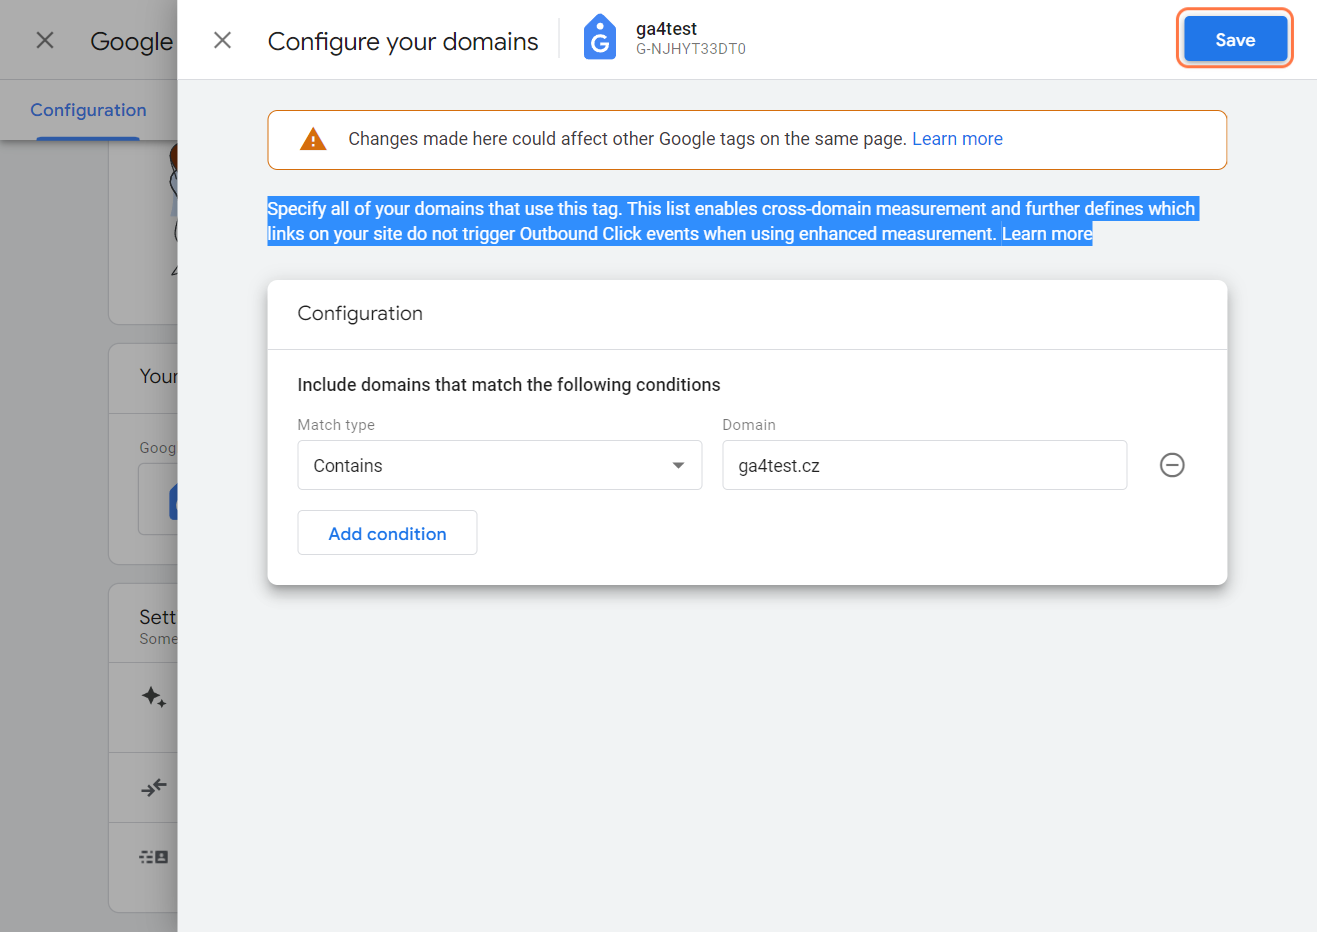
- Click on "Domain Configuration" and Add condition.
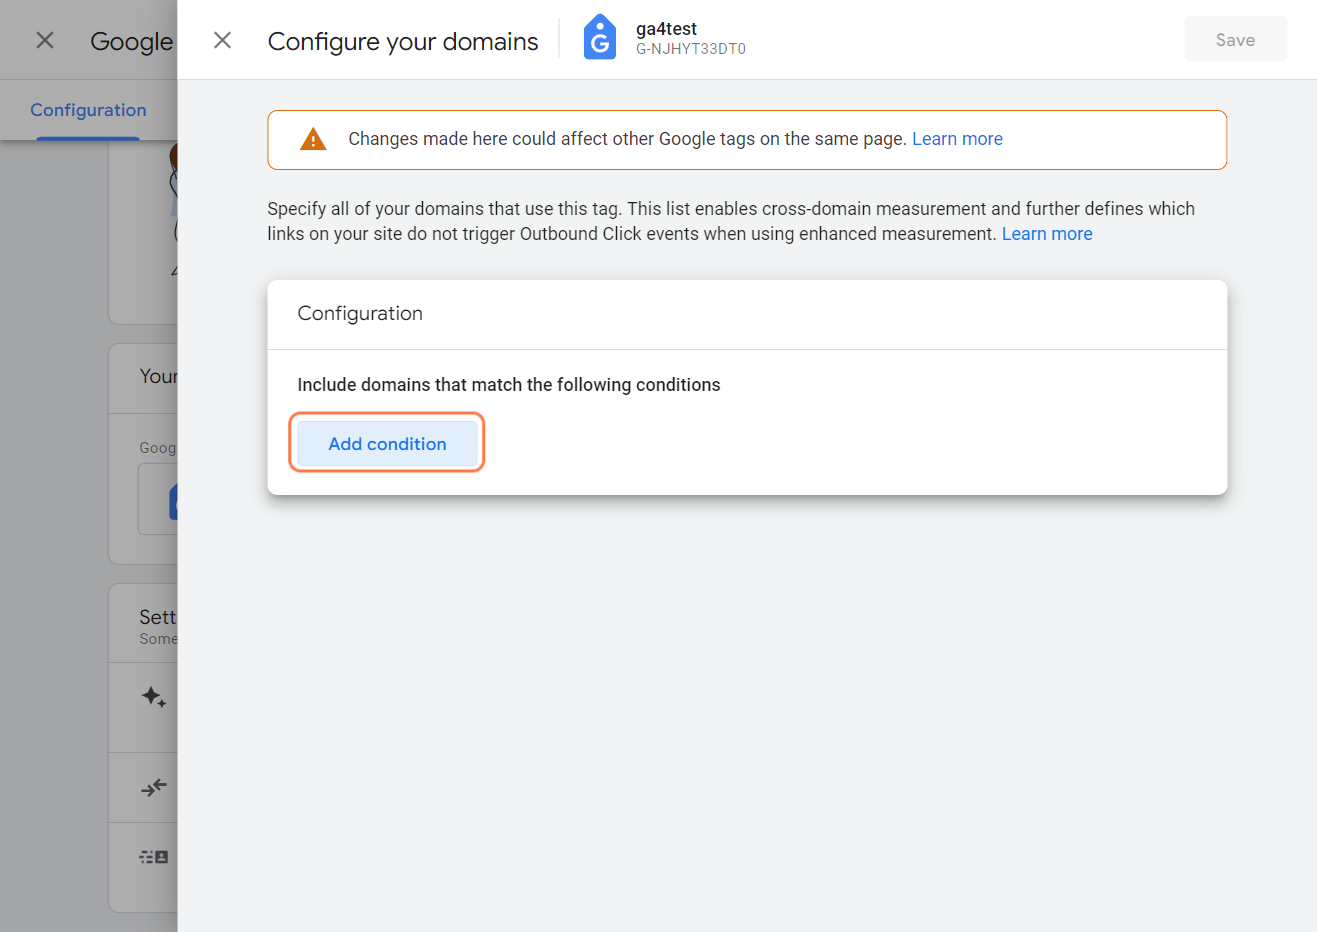
- Specify all of your domains that will use this tag.
Note: This "website list" enables cross-domain measurement and further defines which links on your site do not trigger Outbound Click events when using enhanced measurement.
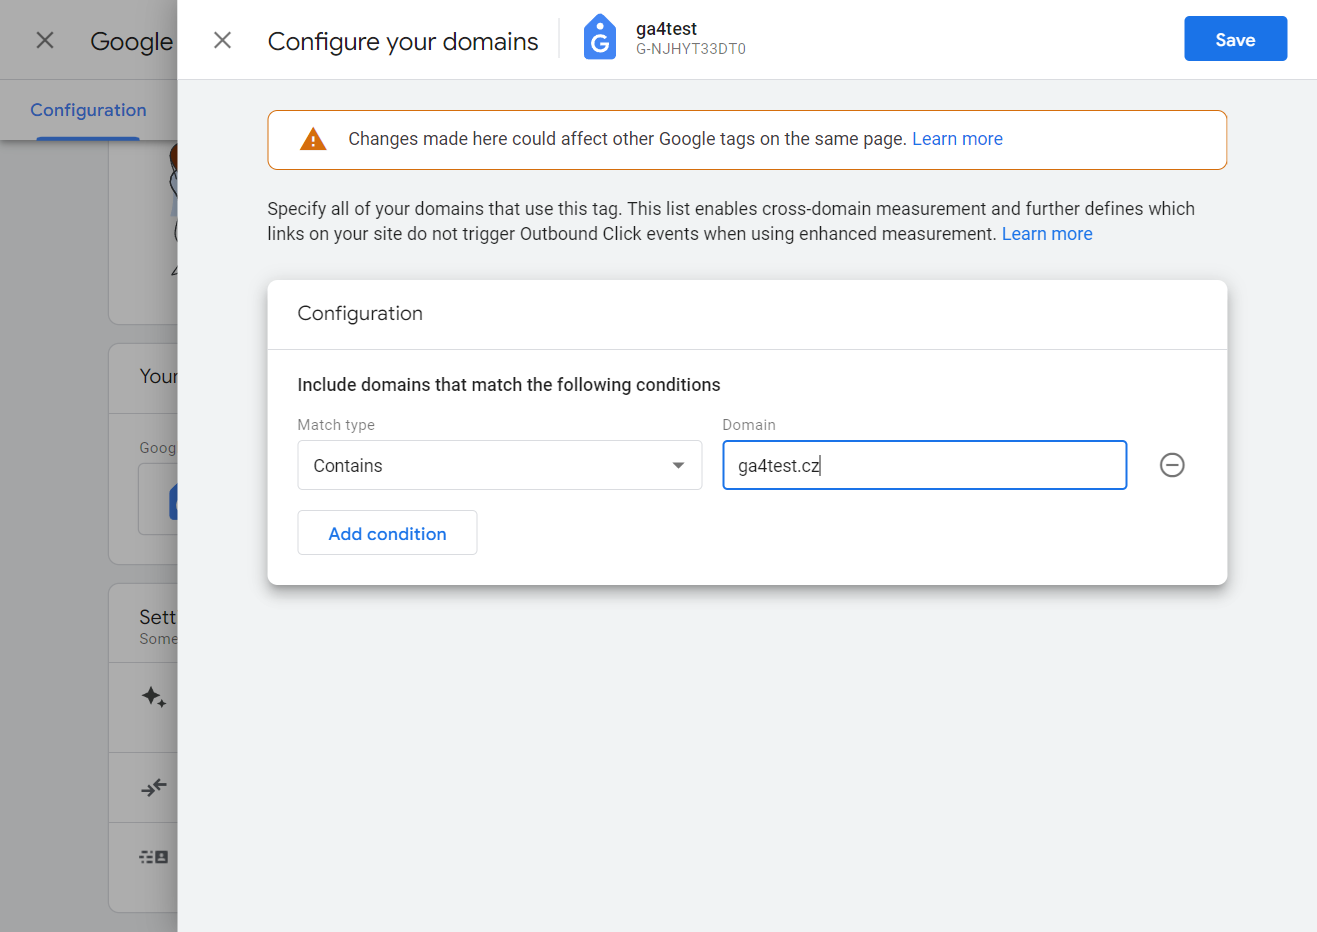
- Click on Save.
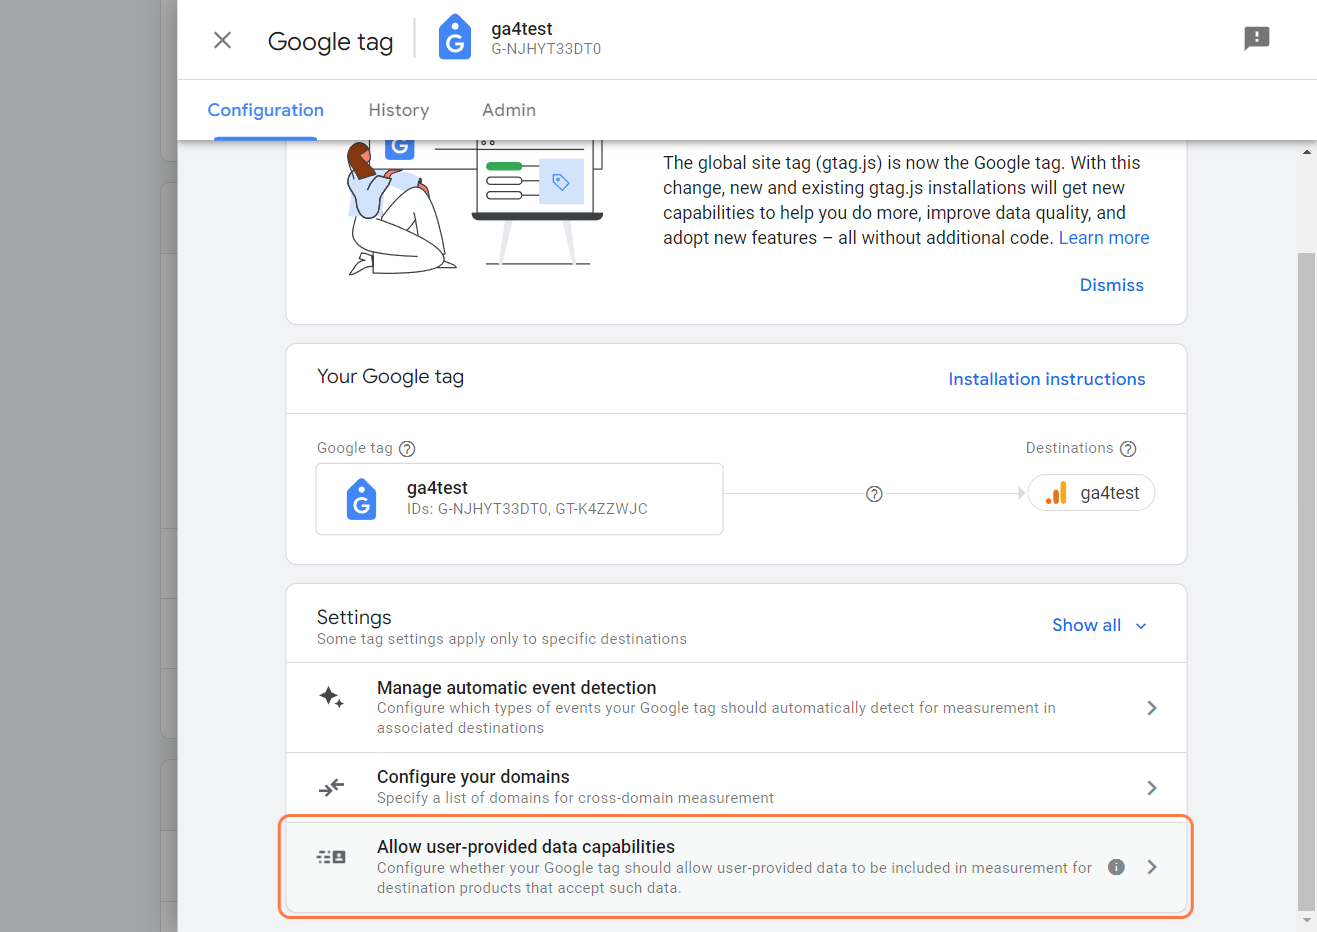
- Now head over to user-provided data capabilities.
- If you turn off this feature, none of the things you use with Google will be able to get your private information automatically. We recommend turning it off for now.
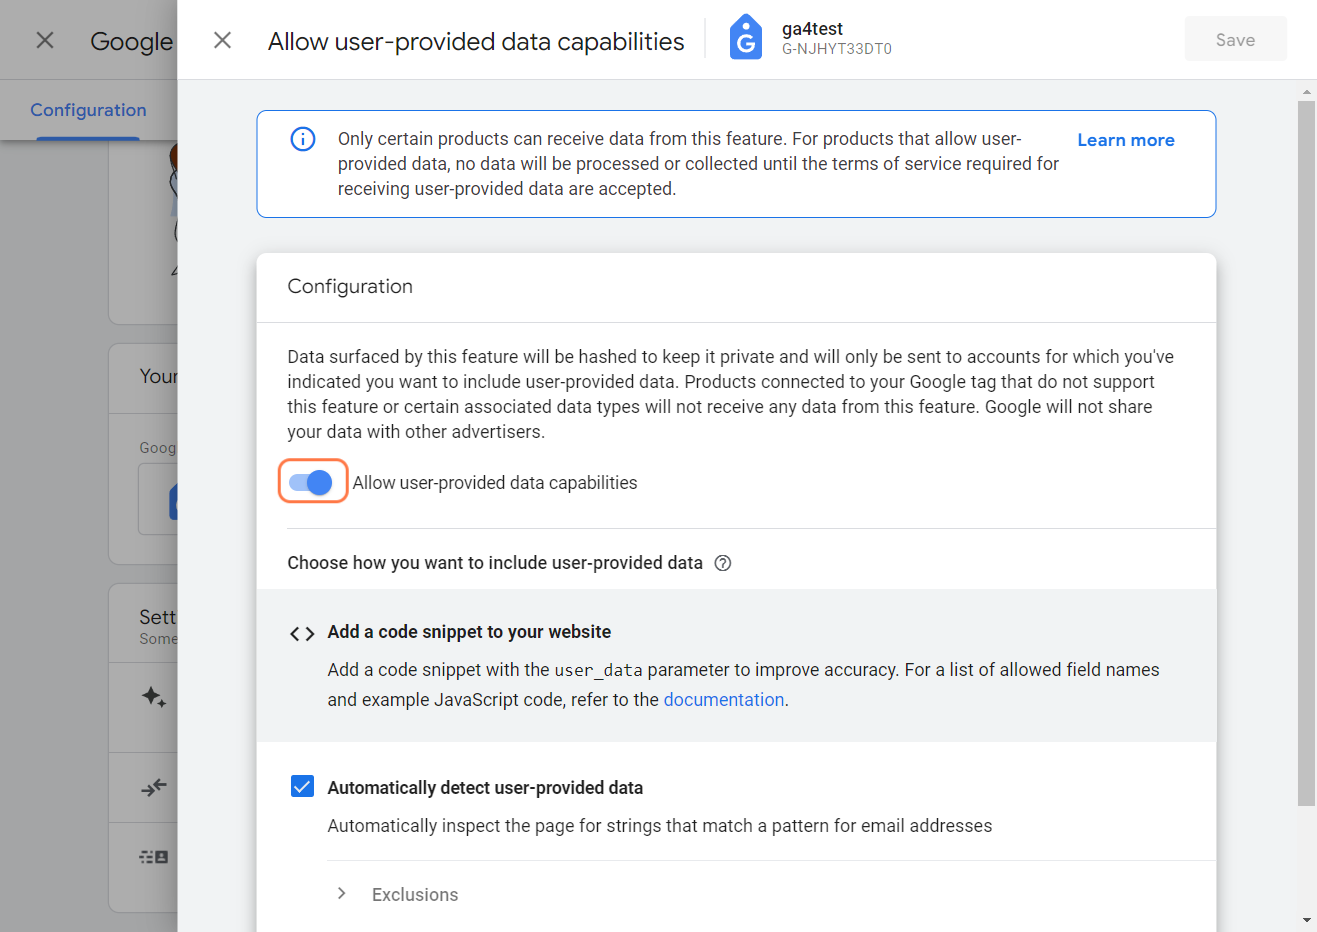
- Click on Save.

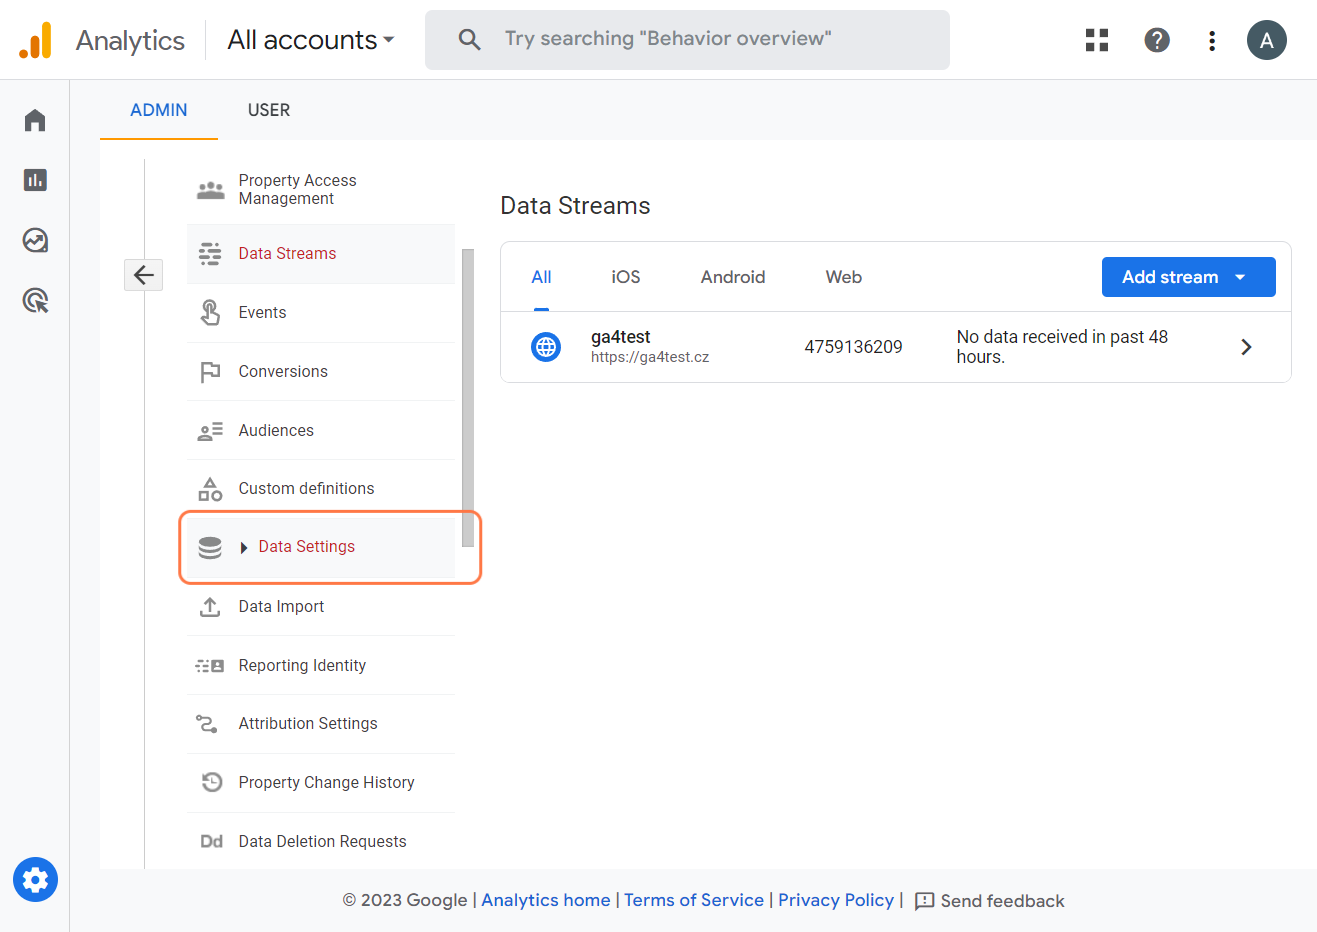
- Head over to Data Settings.
- Click on Data Retention.
- Change event data retention from 2 to 14 months.
- Click on Save.
Well done! You have moved from UA to GA4!
From now on, your website will start collecting important data.
| Page views | Capture a page view event each time a page loads or the website changes the browser history state. You can turn off browser history-based events under advanced settings. |
| Scrolls | Capture scroll events each time a visitor reaches a page's bottom. |
| Outbound clicks | Capture an outbound click event each time a visitor clicks a link that leads them away from your domain(s). By default, outbound click events will occur for all links leading away from the current domain. |
| Site search | Capture a view search results event each time a visitor performs a search on your site (based on a query parameter). By default, search results events will be fired any time a page loads with a common search query parameter in the URL. Adjust which parameters to look for under advanced settings. |
| Form interactions | Capture a form interaction event each time a visitor interacts with a form on your website. |
| Video engagement | Capture video play, progress, and complete events as visitors view embedded videos on your site. By default, video events will be automatically fired for YouTube videos embedded on your site with JS API support enabled. |
| File downloads | Capture a file download event each time a link is clicked with a common document, compressed file, application, video, or audio extension. |
What’s next? GA4 reports!
In Part 3 of our series, we'll make it easy for you to navigate the GA4 environment.
We'll explore essential reports and filters, helping you understand the basics.
Our goal is to ensure you have a solid grasp of GA4's core features, so you can confidently dive into advanced capabilities later on.
We'd also like to extend a heartfelt thank you to our contributor Zdeněk Hejl, who has been instrumental in helping us create this series.
Now, you can proceed to the Part 3, and happy analyzing!